

You're probably at the point where the railing layout looks simple on paper, then the mounting options show up and everything gets muddy. One post says deck mount. Another says fascia mount. A third looks cleaner, but the hardware is hidden and now you're wondering whether that means better engineering or just better photography.
That confusion is normal. Mounting types aren't just style choices. They decide how the railing pushes load into the structure, how much walking space you keep, what kind of blocking or anchors you need, and whether the finished job looks crisp or patched together.
Table of Contents
- Choosing the Right Mounting Style for Your Project
- What a Railing Mounting Type Really Means
- The Five Mounting Types Compared Side by Side
- How Substrate Changes Everything
- Matching Mounting Types to Decks, Stairs, and Balconies
- Code Loads and Structural Consequences
- Common Misconceptions Worth Clearing Up
- A Simple Decision Framework and Next Steps
Choosing the Right Mounting Style for Your Project
The typical approach begins by looking at the post shape, cable pattern, or top rail finish. Installers usually start somewhere else. They ask what the post is fastening into.
That's the right first question because the mount has to match the structure under it. A railing post on a wood-framed deck behaves one way. The same-looking post on a concrete slab behaves another way. A post at a stair stringer has a different job than one at a flat balcony edge.
Start with the five families
On most deck, balcony, and stair projects, you'll run into five common mounting families:
- Top-mount: The post sits on top of the walking surface or directly over framing.
- Side-mount: The post fastens to the vertical face of the structure.
- Fascia-mount: The post attaches outside the deck frame or edge member.
- Surface-mount: A base plate bolts onto concrete or steel.
- Concealed mount: The anchors are hidden inside a sleeve or internal connection.
Those names help, but the names alone don't make the decision.
What actually decides the best option
Three things usually settle the question faster than anything else:
- Load path: Where does the force travel when someone leans hard on the rail?
- Substrate: Are you fastening into wood framing, concrete, or steel?
- Location: Is this a level deck, a stair run, or a balcony edge?
Practical rule: If you choose a mount by appearance first, you often end up redesigning the structure later.
The better approach is simple. Identify the substrate, pick the mounting style that sends load into that substrate cleanly, then check how that choice affects deck area, code loads, hardware visibility, and finish details.
Think like an installer, not a catalog
A product photo can make every mount look interchangeable. On site, they're not. One option may cost you deck space. Another may preserve sightlines but require serious blocking. A third may look minimal but demand tighter tolerances during installation.
That's why experienced installers treat mounting choice as the first real structural decision in the project. Once that's right, cable spacing, rail profile, and finish become much easier to specify with confidence.
What a Railing Mounting Type Really Means
A homeowner stands on a new deck, grabs the top rail, and gives it a firm shake. The question is not whether the post looks sturdy. The question is where that force goes next.
A railing mounting type is the structural method that carries that force from the post into the building. The visible post is only the upright piece you can see. The mount is the connection that decides whether the load ends up in solid framing, a concrete slab, a steel member, or the wrong material entirely.
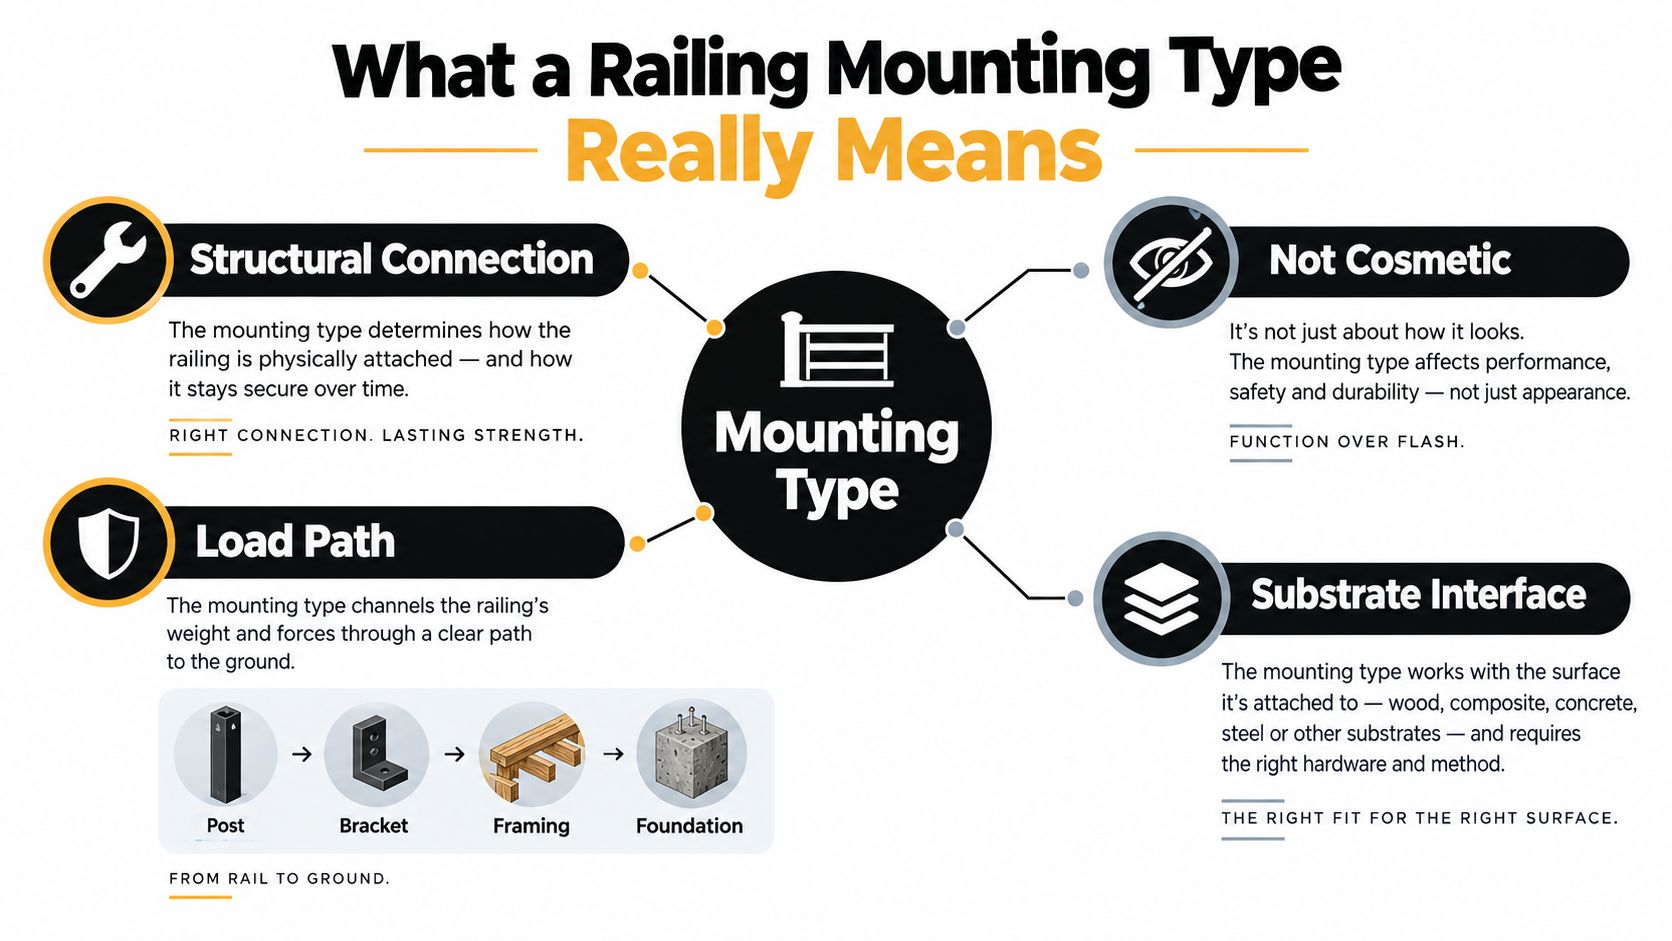
Load path is what the mount is really choosing
Every mounting type is a load-path decision.
When someone pushes on the top rail, the post acts like a lever. The mount has to catch that force and hand it off to structure that can resist it without twisting, splitting, or loosening over time. That is why installers talk about blocking, rim joists, anchor embedment, and edge beams so early in the project. They are tracing the path of the force before a single hole gets drilled.
This is the part that often causes confusion. Deck boards are a finish surface. Composite fascia is usually a finish surface. Tile on a balcony is a finish surface. None of those materials should be treated as the thing resisting the rail load. The resisting structure is behind or below them.
The same post can perform very differently depending on the mount
Two projects can use the same post and infill, yet one feels solid and the other feels springy. The difference is often the connection, not the post.
A top-mounted post sends force down into framing below the walking surface. A side or fascia mount sends that force into the deck edge or another vertical structural member. A surface mount on concrete depends on the base plate and anchor layout to spread force into the slab. A concealed mount may hide the hardware from view, but it still needs the same disciplined load path into real structure.
That has practical consequences you can act on:
- Deck area: Posts mounted on top usually consume some walking surface. Side and fascia mounts often preserve more usable width.
- Structure required: Edge-mounted options can look cleaner, but they usually ask more from the rim, stringer, slab edge, or steel support.
- Finish details: Concealed connections reduce visible hardware, but they also tighten installation tolerances and can make future access harder.
- Inspection and retrofit work: Exposed plates and anchors are easier to verify. Hidden connections usually demand more planning before finishes go on.
Why "mounting type" is not just a style label
Names like top-mount, fascia-mount, and surface-mount sound like catalog categories. On site, they are shorthand for how the railing loads the structure and what the structure must do in return.
That is why mounting choice comes before small appearance decisions. A black post, stainless cable, or wood cap rail can be changed fairly easily on paper. Reworking blocking, reinforcing a rim board, or correcting an underbuilt slab edge is a different kind of change. It affects labor, schedule, inspection, and sometimes the usable footprint of the deck or stair.
A simple way to read any mounting option is this: ask what it bolts to, where the force turns, and what part of the structure pays the price. Once you can answer those three questions, the trade-offs become much easier to judge.
The Five Mounting Types Compared Side by Side
You can usually spot the right mounting type by watching where the force has to go. A post works like a pry bar at its base. Someone leans on the top rail, the post wants to bend, and the connection has to push that force into framing, concrete, or steel without loosening, splitting, or cracking the edge.
That is why these five options are not just different looks. Each one shifts the load path, the amount of usable deck area, and the amount of structure you need behind the finish.
Top-mount
A top-mount post sits on the walking surface or directly over the framed surface below it. The force goes down through the base, then into joists, blocking, or a slab below.
This is often the most forgiving layout for retrofit work because the post lands where installers can see and reach the connection more easily. It also makes inspection simpler. If something needs adjustment later, access is usually better than with hidden hardware.
The trade-off shows up in daily use. The base takes up part of the walking surface, and on a smaller deck that can matter more than people expect. Structurally, top-mount is often the straightforward answer. Spatially, it asks you to give something back.
Side-mount
A side-mount fastens to the vertical face of the structure instead of the top. That keeps the deck surface cleaner and often improves the view because the posts sit outside the main walking plane.
The load path changes in an important way. Instead of pressing mostly downward into framing below, the connection pulls and twists on the rim, stringer, or edge support. That edge has to resist the post acting like a wrench on a bolt.
For contractors or homeowners comparing edge-mounted layouts, this guide to side-mounted cable railing systems helps show why backing and edge framing matter as much as the bracket shape. Side-mount can be a smart choice when deck width is tight. It just asks for more confidence in the edge structure.
Fascia-mount
A fascia-mount pushes that idea farther. The post sits fully outside the deck or slab edge, which preserves the interior footprint and keeps the top surface open.
Homeowners usually notice the space savings first. Installers notice the structural demand first.
Because the post is offset to the outside, the edge assembly takes a bigger share of the turning force. On a wood deck, that can mean stronger rim details, better blocking, or a more deliberate fastening pattern. On a balcony or slab edge, it can mean the difference between a clean design on paper and a connection that needs rework in the field. Fascia-mount gives you usable area and a crisp profile, but it has less tolerance for weak edge conditions.
Surface-mount
A surface-mount usually means a visible base plate anchored onto concrete or steel. You will see this a lot on balconies, landings, and retrofit jobs where cutting into the structure is not the goal.
The load still tries to bend the post at the base. In this case, the anchors and the material around them do the resisting. That makes the connection easier to inspect, and it often keeps installation sequencing simpler because the hardware stays accessible.
The trade-off is visual and structural at the same time. You see the plate and fasteners, and the forces concentrate into a defined anchor group instead of spreading through a buried connection. If the slab edge is thin, cracked, or crowded, surface-mount becomes less forgiving.
Concealed mount
A concealed mount hides the anchorage inside the post, inside a sleeve, or inside the receiving structure. It usually produces the cleanest finished look because the connection nearly disappears.
That cleaner look comes from tighter tolerances. If the substrate is out of square, the drilling is slightly off, or the embed location shifts, there is less visible hardware to absorb the error. Corrections can also be harder after finishes are in place.
Concealed mount is often the aesthetic winner. It is rarely the easiest install.
Five Cable Railing Mounting Types at a Glance
| Mounting Type | Post Position | Load Path | Key Trade-Off |
|---|---|---|---|
| Top-mount | On top of deck or framed surface | Down through base into framing below | Easier retrofit and inspection, but uses deck area |
| Side-mount | On vertical face of structure | Into rim, stringer, or edge framing | Keeps floor area cleaner, but edge framing works harder |
| Fascia-mount | Outside deck or slab edge | Into fascia or edge support assembly | Maximizes usable area, but puts more demand on the edge |
| Surface-mount | On top of concrete or steel with base plate | Through anchors into slab or steel | Accessible connection, but hardware stays visible and anchor conditions matter |
| Concealed | Hardware hidden inside post or sleeve | Through internal connector into structure | Clean appearance, but tighter tolerances and harder access |
How Substrate Changes Everything
A railing post is only as trustworthy as what it is fastened to. The mounting label on the product box matters less than the path the force takes after someone leans on the rail. That force has to travel into framing, concrete, or steel that can carry it without twisting, splitting, or loosening over time.
That is why the same mounting type can feel rock solid on one project and questionable on another.
Wood framing
Wood decks and stairs fool people because the finished surface looks substantial. Deck boards, trim, and composite sleeves are the skin. The work happens in joists, rim members, stringers, and blocking tied back into the frame.
If you are checking support conditions below the rail line, this guide to footings and support planning for posts helps connect the railing detail to the framing and foundation underneath.
A good way to picture it is a door hinge. The hinge only works if it bites into the framing behind the jamb, not just the trim you can see. Railing posts work the same way.
Common failures in wood are predictable. Fasteners land too close to the end of a rim board and split it. Blocking is missing, so the post base rocks the framing back and forth. An installer catches only finish material, and the connection looks neat on day one but moves once the rail starts taking load.
Concrete and steel behave differently
Concrete changes the decision because the load no longer spreads through wood members. It goes through anchors or through an embedded post detail into the slab itself. In plain terms, you are either fastening a base plate to the surface or creating a deeper connection inside the concrete. Surface anchorage is often simpler on retrofit jobs. Embedded or core-drilled details usually reduce visible hardware and create a more direct load transfer, but they ask for better planning and cleaner execution.
Steel is different again. Steel can handle railing loads very well, but only when the attachment point was considered early enough. A plate may need to be welded in the right location, holes may need to line up with the post base, and thin edge pieces may need reinforcement. Otherwise, the mount choice is fine on paper and awkward in the field.
Substrate Compatibility by Mounting Type
| Mounting Type | Wood Framing | Concrete Slab | Steel Edge |
|---|---|---|---|
| Top-mount | Works well when anchored into joists or blocking | Possible only with a defined anchor layout and slab capacity | Possible with plate or drilled connection detail |
| Side-mount | Good when rim or stringer is reinforced | Limited unless edge geometry supports it | Often effective with engineered attachment points |
| Fascia-mount | Strong option when edge framing is solid | Depends on slab edge and backing detail | Effective if edge member is designed for it |
| Surface-mount | Less common than direct framing mount | Very common with base plate and anchors | Very common with bolted base plate |
| Concealed | Works if framing allows precise internal connection | Works where embedment or sleeve detail is planned | Works well with coordinated fabrication |
The practical takeaway is simple. Start with the substrate and ask where the load will go. Then choose the mounting type that fits that load path, the amount of usable deck area you want to preserve, and the kind of edge detail your structure can support.
Matching Mounting Types to Decks, Stairs, and Balconies
Location changes everything because each part of a project asks the railing to do a different job. Flat decks want usable space. Stairs want clean transitions and predictable angles. Balconies often bring waterproofing, finished soffits, or thin slab edges into the conversation.
This quick visual helps sort the common fit.
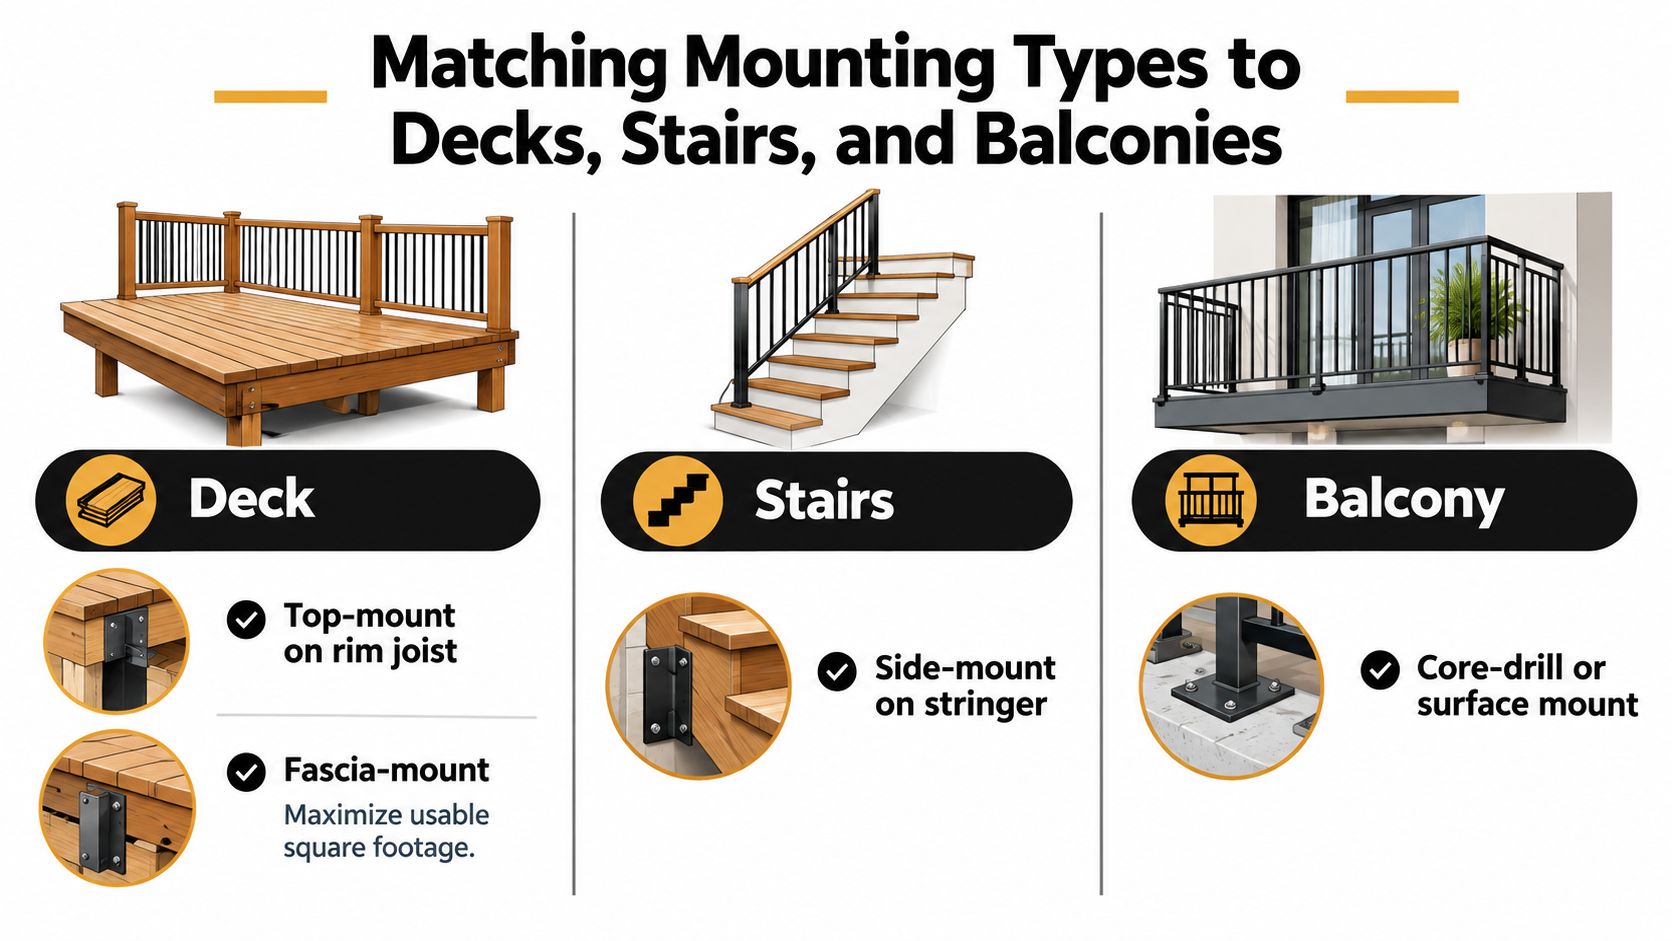
Level decks
On a basic wood-framed deck, top-mount on solid framing is often the cleanest answer from an installation standpoint. It's familiar, easier to lay out, and more forgiving when you're working around existing conditions.
If preserving square footage matters more, fascia-mount often makes better use of the platform because the posts move outside the walking area. That's especially appealing on narrower decks where every inch at the perimeter matters.
Stair runs
Stairs punish awkward mounting decisions fast. A top-mounted stair post can work, but it often complicates angle transitions and consumes tread-adjacent space you'd rather keep clear.
For many stair runs, side-mount on the stringer or a fascia-style attachment along the stair edge gives a neater line and a more natural fit. The post follows the stair geometry instead of fighting it. If you're using a pre-engineered railing kit, one option in this category is the deck- or stair-mounted systems supplied by Ultra Modern Rails, which are configured for residential and commercial railing layouts and can be adapted to the project geometry.
A quick installation visual can help here before you lock in your detail.
Balconies and edges over occupied space
Balconies over living space raise another concern. You don't want a mounting choice that creates unnecessary penetrations through waterproofed surfaces if the edge condition offers a better option.
For that reason, concealed and fascia-style approaches are often attractive on balconies because they preserve a cleaner top surface and better sightlines. On concrete balconies, surface-mounted and core-drilled approaches are both common families in industry practice, with the choice driven by the slab detail, edge condition, and finish expectations.
On balconies, the prettiest mount is usually the one that works with the waterproofing plan, not against it.
A practical default for each location
If you need a starting point, this is a sensible first pass:
- Decks: Top-mount if framing access is easy. Fascia-mount if deck area is tight.
- Stairs: Side-mount on the stringer when the structure allows it.
- Balconies: Fascia, concealed, or concrete-specific mounting based on edge and membrane conditions.
Retrofits can change the answer. Existing structure often forces a less elegant but more buildable detail, and that's better than forcing a mount the substrate can't support well.
Code Loads and Structural Consequences
A railing post usually gets judged in two places. First by the inspector, who wants to see how the load reaches real structure. Then by the person who grabs the rail, leans on it, and notices right away whether the connection feels firm or springy.
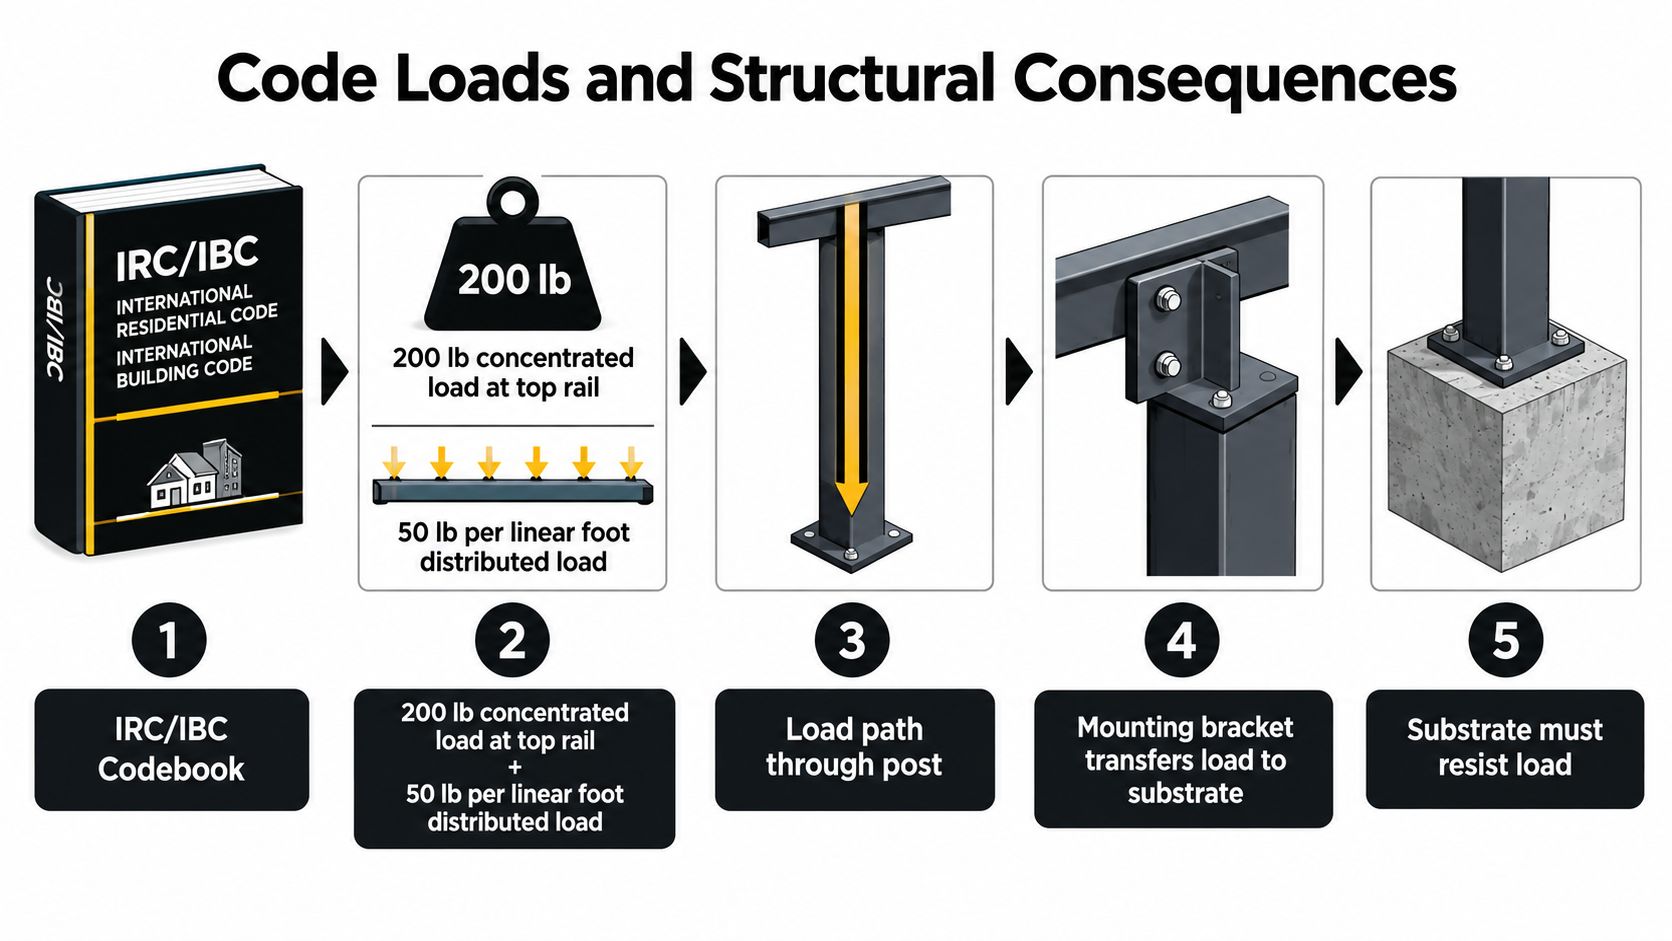
What inspectors actually check
Inspectors rarely care that a post looks heavy. They care whether the mount is tied into framing, concrete, or steel in a way that matches the approved detail. On a wood deck, that often means confirming the post lands over blocking, a rim member, or another reinforced connection point rather than just decking. On concrete, they want anchors, edge distance, and embedment to match the system detail and the slab condition.
A failed field check is usually pretty ordinary. Missing blocking. Fasteners sunk into finish boards instead of structure. Anchors placed too close to a slab edge. A fascia bracket bolted to a weak rim without reinforcement. None of those mistakes look dramatic on day one, but they show up fast when the rail gets pushed.
Same code target, different stress points
Section 2 already covered the code load requirement itself. What matters here is where that force concentrates once it reaches the building.
A top-mount pushes load down into the surface and tries to twist the framing below. A side-mount pulls on bolts and asks the vertical face, plus whatever sits behind it, to resist rotation. A fascia-mount often saves walking area, but it can put serious demand on the outer band, edge beam, or slab edge because the rail is acting from the side instead of over the support.
The practical lesson is simple. Two mounting types can satisfy the same code on paper and still require very different reinforcement in the structure.
Why connection details change cost
Projects get expensive. Not because the railing changed, but because the substrate detail was never matched to the load path.
A common example is a finished deck where the owner wants fascia-mounted posts after the surface is complete. If the rim area was not framed for that connection, the installer may need to open the edge, add blocking or steel backing, then patch finishes. On a balcony, the wrong anchor layout can force redesign because the slab edge or waterproofing detail cannot accept the original post spacing.
Before ordering parts, review the cable railing code requirements and compare them against the actual post-to-structure detail, not just the infill or top rail selection.
A post passes inspection when the force has a clear, supported path into the structure below it.
Common Misconceptions Worth Clearing Up
Bad assumptions cause more railing revisions than bad materials. Three myths show up constantly on deck and balcony jobs.
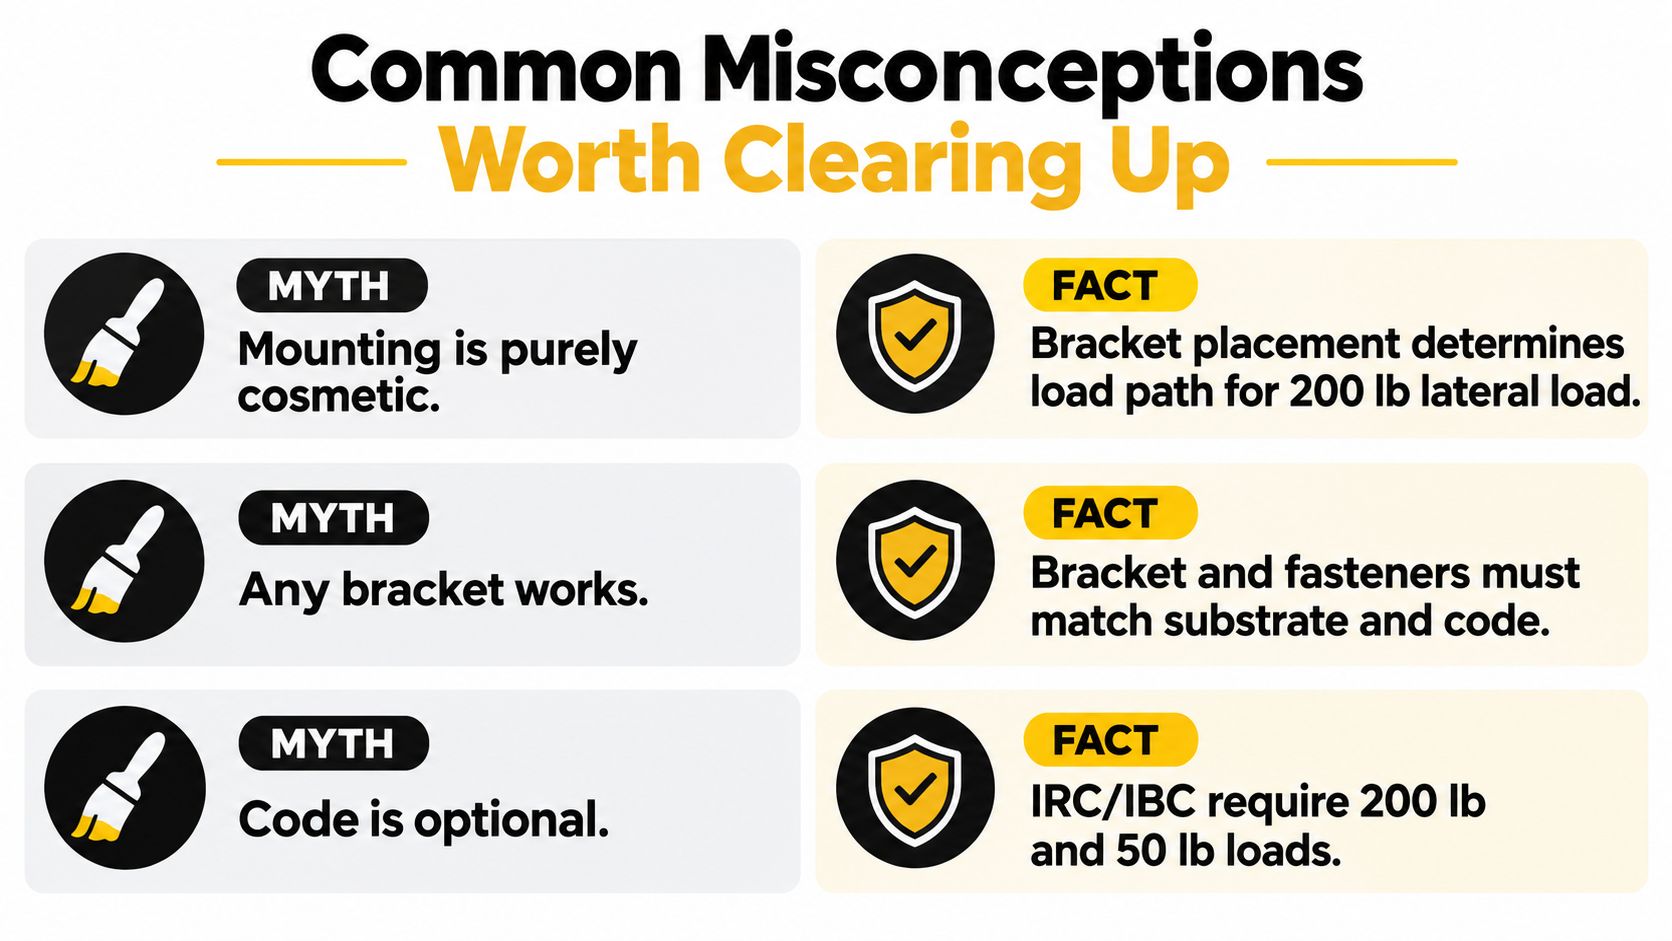
Mounting is cosmetic
It isn't. The bracket location decides how force enters the building. On a concrete edge, the wrong choice can overstress anchors or slab edges. On a wood deck, it can split a rim member or leave the rail feeling springy.
All posts transfer load the same way
They don't. A top-mount, side-mount, and fascia-mount may share a cable pattern above, but they work the structure differently below. Stair posts are another good example. The geometry changes the connection demands, so a detail that feels solid on a flat run may behave differently on a stair line.
Retrofit always means top-mount
That's a common shortcut, not a rule. Top-mount is often the easiest retrofit, but not always the smartest one. A tight deck edge, a thin top surface, or an awkward waterproofed balcony can make side or fascia mounting the more practical fix.
The useful habit is to stop asking, “Which mount looks best?” and start asking, “Which mount gives this structure the cleanest load path?”
A Simple Decision Framework and Next Steps
You are at the point where the railing style looks settled, but the mount still is not. That is where expensive mistakes start. A post can look right on paper and still force load into the wrong part of the deck, stair, or balcony.
Use this four-step filter instead. It keeps the decision tied to structure first, then to space and appearance.
Ask these in order
-
What is the substrate?
Start here because the substrate is the part doing the work. Wood framing often needs blocking or rim reinforcement. Concrete depends on edge condition, thickness, and anchor placement. Steel usually calls for a welded or bolted attachment detail. -
Where is the railing located?
A flat deck, stair run, and balcony edge create different connection demands. Stairs add angle and concentrated force at the post base. Balcony edges often raise slab-edge and waterproofing questions that change the best mount. -
How do you want the load to travel?
This is the decision many people skip. Top-mount pushes force down into the surface below the post. Side and fascia mounts push force back into the face or edge structure. If deck area is tight, a side or fascia mount may save usable space, but only if the edge framing or slab can accept that load cleanly. -
What should the finished railing look like?
Now choose around the structure you know you can support. You weigh cleaner sightlines, visible versus less visible hardware, and whether preserving walking space matters more than hiding the connection.
Turn answers into action
Before you order material, write down a short job specification. It should include:
- Mount type selected: Top, side, fascia, surface, or concealed
- Support required: Blocking, reinforced rim, slab review, or steel attachment detail
- Fastener approach: Lag bolts for solid wood framing, anchor bolts for concrete, or machine screws with nuts and washers or lock washers where through-bolting or steel attachment is required
- Field checks: Framing depth, slab-edge condition, finish thickness, drainage layers, and waterproofing conflicts
That list sounds simple, but it prevents the field version of "make it fit."
Bring in an engineer if the connection is outside ordinary residential conditions. Tall decks, commercial balconies, thin slabs, mixed-material substrates, and unusual edge details all deserve a stamped connection detail before fabrication starts.
One habit saves a lot of rework. Verify the structure first, then order posts.
If you want help turning your substrate and mounting choice into a buildable railing package, Ultra Modern Rails supplies custom cable railing systems for decks, stairs, balconies, and commercial spaces. Request a free quote and drawing within 24 hours, and include your substrate and preferred mount type so the drawing reflects the actual connection detail before you place the order.