

Would your pool still be protected if someone left the patio door open, the alarm lost power, or a guest forgot to close the gate? That's the gap in gadget-first pool safety. Buying several devices doesn't create reliable protection unless each one addresses a different way someone could reach the water or get hurt.
The setting matters, too. The Virginia Department of Health reports that 70% of pool- or spa-related drownings among U.S. children under fifteen occur at home. A familiar backyard still needs deliberate access control.
Think of pool safety features as an engineered system. The barrier separates the water from everyday activity. The gate restores that boundary after someone passes through. Alarms warn of a breach, while deck finishes, lighting, and entry hardware support safer movement. Rescue equipment and practiced responses address emergencies those preventive layers haven't stopped.
Good design doesn't require a cluttered pool surround. Clear sightlines, coordinated hardware, carefully positioned posts, and restrained lighting can preserve a modern appearance. But appearance comes after the safety geometry. A sleek railing isn't automatically a pool barrier, and an expensive alarm doesn't make an unreliable gate acceptable.
Table of Contents
- 1. Code-Compliant Pool Barrier and Perimeter Railing
- 2. Self-Closing and Self-Latching Safety Gate
- 3. Pool Alarm and Surface-Water Monitoring
- 4. Anti-Dive Pool Depth Markings and Safer Diving Areas
- 5. Low-Slip Pool Deck and Coping Surfaces
- 6. Pool-Specific Lighting and Visible Depth Contrast
- 7. Pool Rescue Equipment and Emergency Response Planning
- 8. Safer Pool Entry With Handrails, Ladders, and Ramped Access
- Pool Safety Features at a Glance
- Build Your Layers for a Code-Compliant Pool
1. Code-Compliant Pool Barrier and Perimeter Railing
Start with isolation, not the property line. A backyard fence may keep strangers out while leaving a direct route from the kitchen to the pool. A pool barrier must address that route.
The Consumer Product Safety Commission's Safety Barrier Guidelines recommend a barrier that completely separates the pool from the house, stands at least four feet high, and provides no climbable footholds or handholds. That's safety guidance, not permission to ignore stricter local requirements.
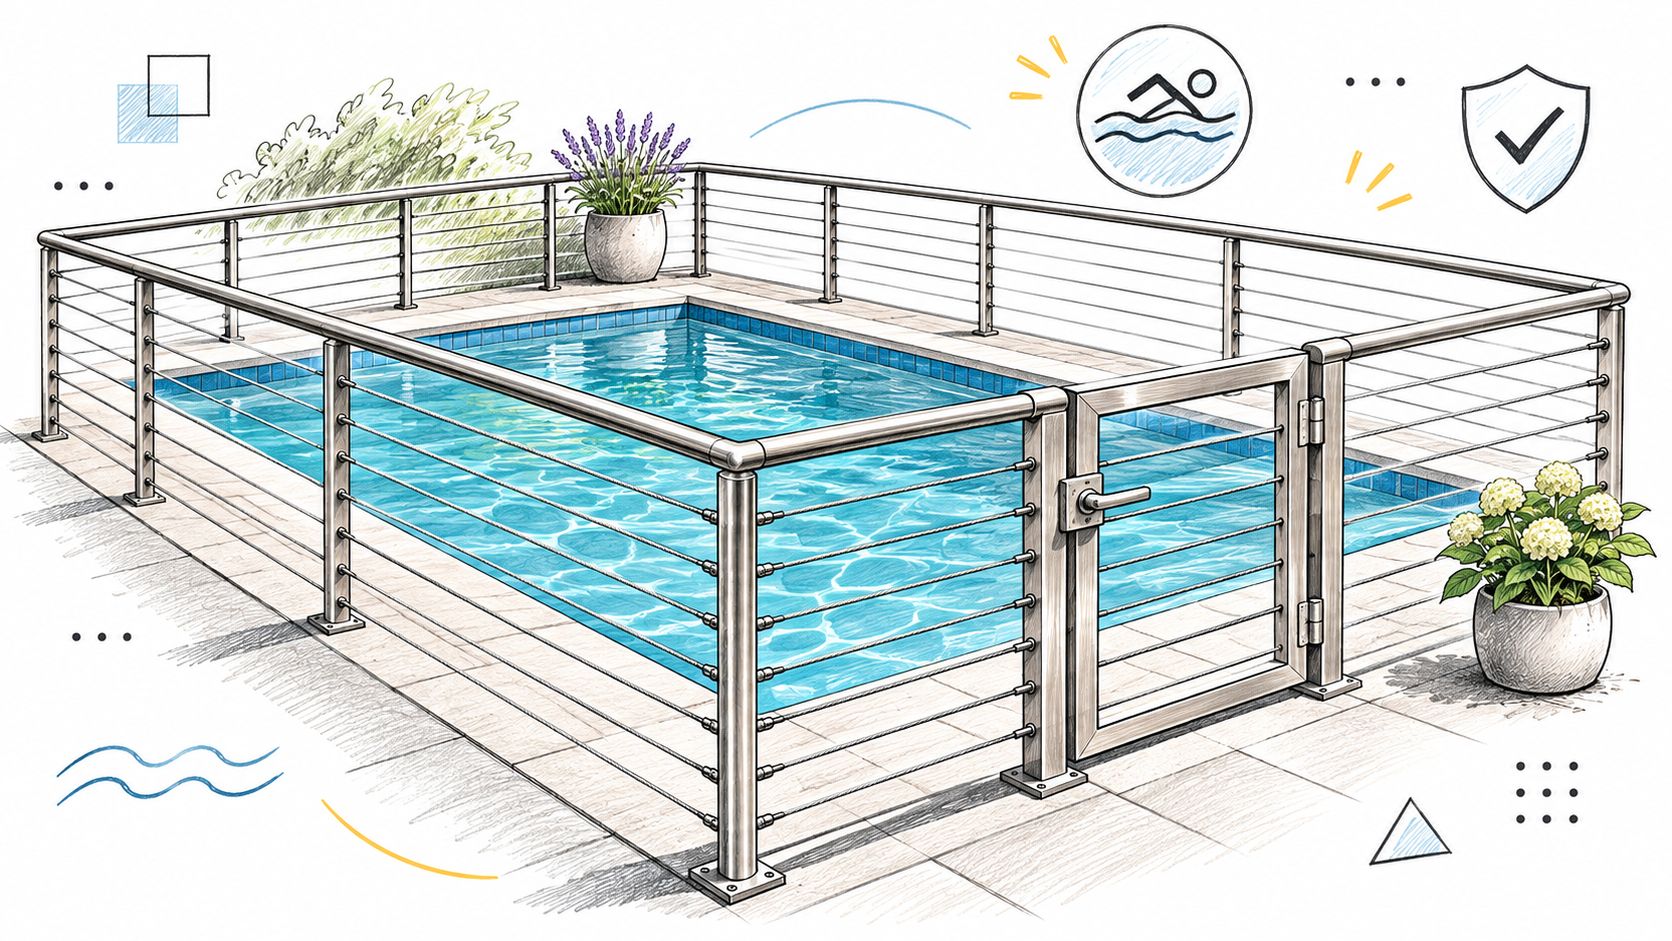
Specify the complete assembly
For a residential pool beside a raised deck, distinguish the deck guard from the pool-access barrier. They may share posts or finishes, but they serve different functions. Review deck railing code requirements alongside the jurisdiction's pool-barrier rules before choosing the layout.
Cable infill preserves views, but cable railing isn't automatically suitable as pool fencing. Horizontal cables can introduce climbability concerns, and openings must remain acceptable under the applicable loading and installation conditions.
- Map every transition. Show stairs, retaining walls, corners, building connections, and changes in ground level.
- Design the anchorage. Fasten posts into suitable structural backing, not deck boards alone.
- Remove climbing aids. Keep chairs, planters, storage boxes, and decorative features away from the barrier.
On sloping ground, check the bottom clearance along the entire run rather than only at the posts. A clean-looking elevation can conceal an access gap where the grade drops.
Inspect tension, fasteners, post alignment, and corrosion after severe weather and during routine maintenance. A continuous boundary matters more than matching components.
2. Self-Closing and Self-Latching Safety Gate
A gate that closes almost all the way is a failed access point. The closer must move the leaf into position, and the latch must engage without someone lifting, pushing, or shaking it.
The CPSC drowning-prevention guidance recommends a barrier completely surrounding the pool with a self-closing, self-latching gate. Those functions need to work together, not merely appear on the hardware packaging.
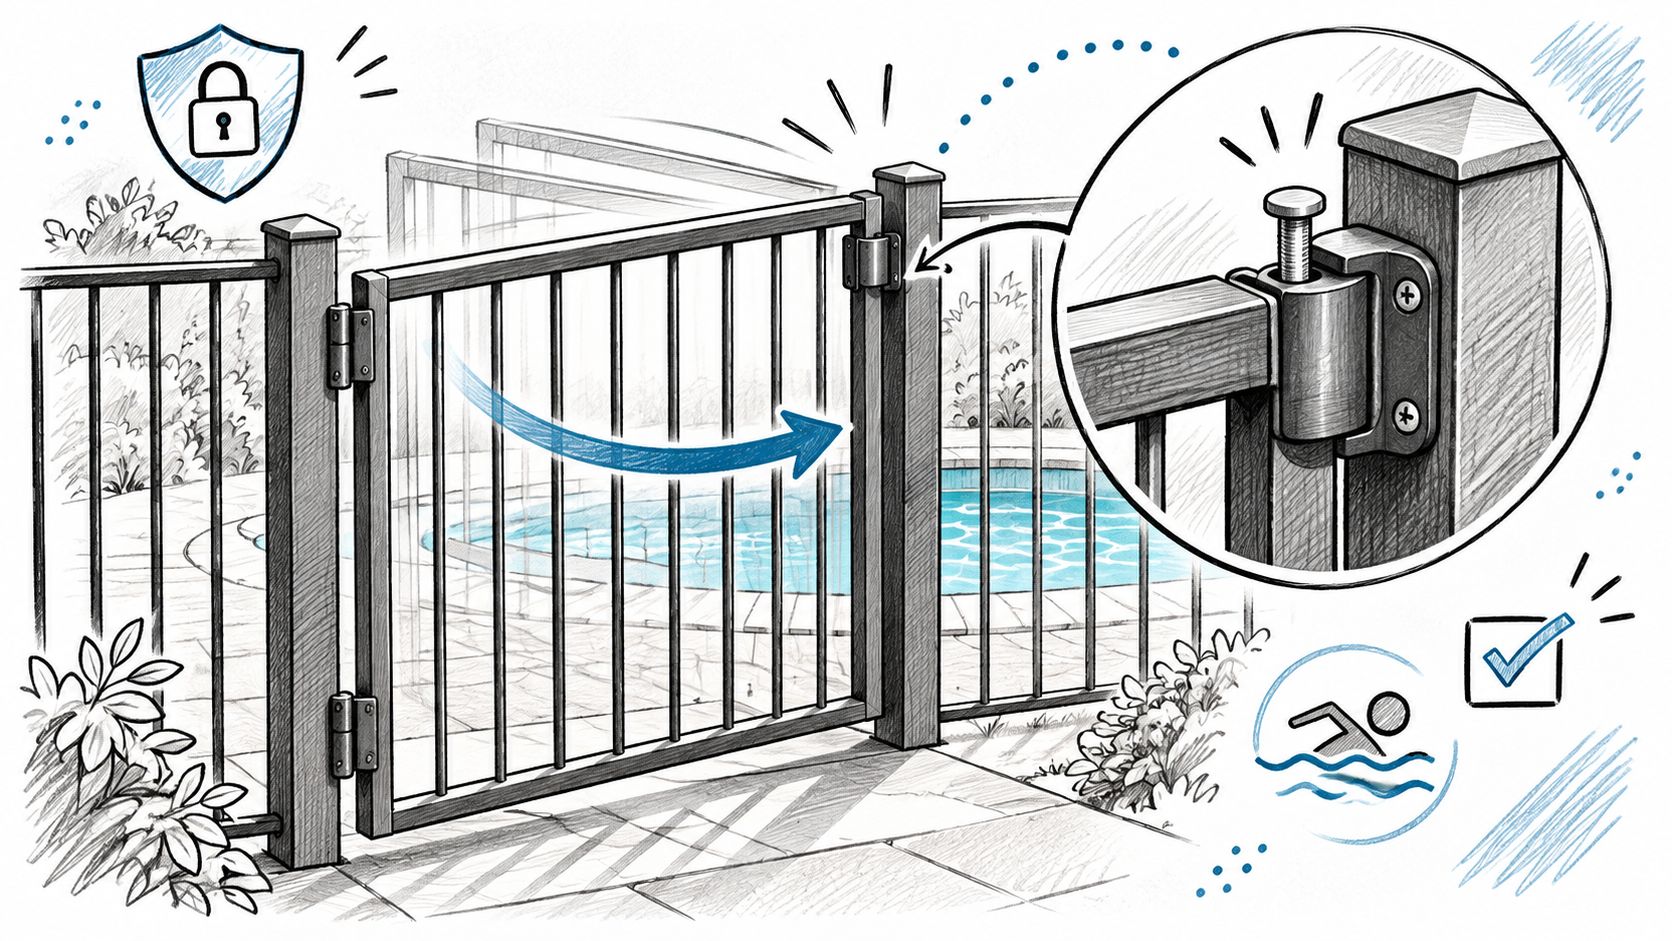
For a hotel courtyard, an electronic reader can control who enters, but it doesn't solve mechanical closing problems. Sagging hinges, a loose latch receiver, or a dragging bottom edge can leave the opening unsecured after an authorized guest passes through.
Field test: Release the gate from different open positions, including barely open. Watch for complete closure and positive latch engagement without assistance.
Specify dedicated pool-gate hinges and latching hardware suited to the gate's weight, dimensions, material, and exposure. Confirm outward opening, latch placement, operating requirements, and any commercial egress obligations with the reviewing authority.
Keep the swing path clear
Provide a stable landing and enough unobstructed space for the full gate movement. Don't let a sloping deck, drain cover, or movable lounger interfere with closure.
Check the hinge-post anchorage before increasing closer tension. A flexible post can shift under the closing load and spoil latch alignment.
If guests routinely prop the gate open while carrying food or towels, address the circulation problem. Move the serving station or provide a more convenient approved access arrangement. A doorstop defeats the system, regardless of how good the latch is.
3. Pool Alarm and Surface-Water Monitoring
An alarm detects a problem. A barrier can prevent access. That distinction should guide the purchase, installation, and response plan.
The CPSC technical letter on computer-vision pool alarms discusses these systems as an evolving safety technology. Treat camera-based monitoring as a supplemental layer, not a reason to relax barrier design or supervision.
For a family pool, a surface-disturbance alarm can provide an audible warning when unexpected movement occurs. An underwater detector uses a different detection method. Neither should be confused with a water-level monitor intended to identify leaks or overfilling.
Match detection to the actual pool
A shaded rectangular pool and a freeform pool with water features present different operating conditions. Check the manufacturer's coverage limits, mounting requirements, arming procedure, and instructions for swimming periods.
- Test the warning path. Confirm that responsible adults can hear or receive alerts from normally occupied indoor areas.
- Check operating conditions. Evaluate wind, moving water, pets, glare, darkness, and obstructions where relevant to the detection method.
- Plan for outages. Understand what happens when batteries run down, connectivity fails, or power is interrupted.
- Review camera privacy. Establish who can access images, where recordings are stored, and whether remote processing is involved.
A hospitality property might combine gate alerts, water monitoring, and staff observation. Someone still needs explicit responsibility for responding.
Don't accept frequent nuisance alarms as normal background noise. Investigate placement, settings, and product suitability rather than silencing the device indefinitely. An alert without an available responder isn't a complete protective layer.
4. Anti-Dive Pool Depth Markings and Safer Diving Areas
A shallow end can look deeper than it is, especially when dark finishes, reflections, or decorative lighting obscure the bottom. Depth markings must communicate clearly before someone enters, not become readable only after they're standing at the edge.
For a residential recreation pool without an engineered diving area, specify clear no-diving communication rather than implying that a visually deeper corner is suitable. A depth numeral alone doesn't establish safe diving clearance.
Contrasting waterline details, visible depth numerals, and distinct transition markings help users interpret the pool. Keep decorative patterns from competing with those cues.
Never create a designated diving area by adding a sign or diving board to an existing pool. Have the pool geometry and equipment evaluated together by a qualified pool designer.
Make the message readable when wet
At a community teaching pool, distinguish the shallow teaching area from the adjoining swim zone with approved markings and the separation measures required for that facility. Children and visiting caregivers shouldn't have to infer the transition from tile color alone.
- Verify actual depths. Coordinate marker values with the finished pool and its normal operating water level.
- Specify suitable materials. Use markings intended for the installation location, chemical exposure, and wet-foot traffic.
- Check placement and contrast. Confirm lettering, orientation, spacing, and visibility against local requirements.
- Maintain legibility. Remove deposits and replace faded, peeling, or damaged markers promptly.
Keep depth information visible from likely approach routes, including gates and pool stairs. Furniture shouldn't hide it.
Railings can guide users toward intended entrances, but they don't make diving safe. Pair physical cues with understandable rules and active supervision, especially when guests aren't familiar with the pool.
5. Low-Slip Pool Deck and Coping Surfaces
The wrong sealer can undermine an otherwise sensible deck specification. A textured sample may feel secure when dry but behave differently once it's wet and coated with sunscreen residue.
Specify the finished surface system, including the substrate, texture, coating, drainage, and cleaning method. Don't select the paving first and leave the sealer decision until the end.
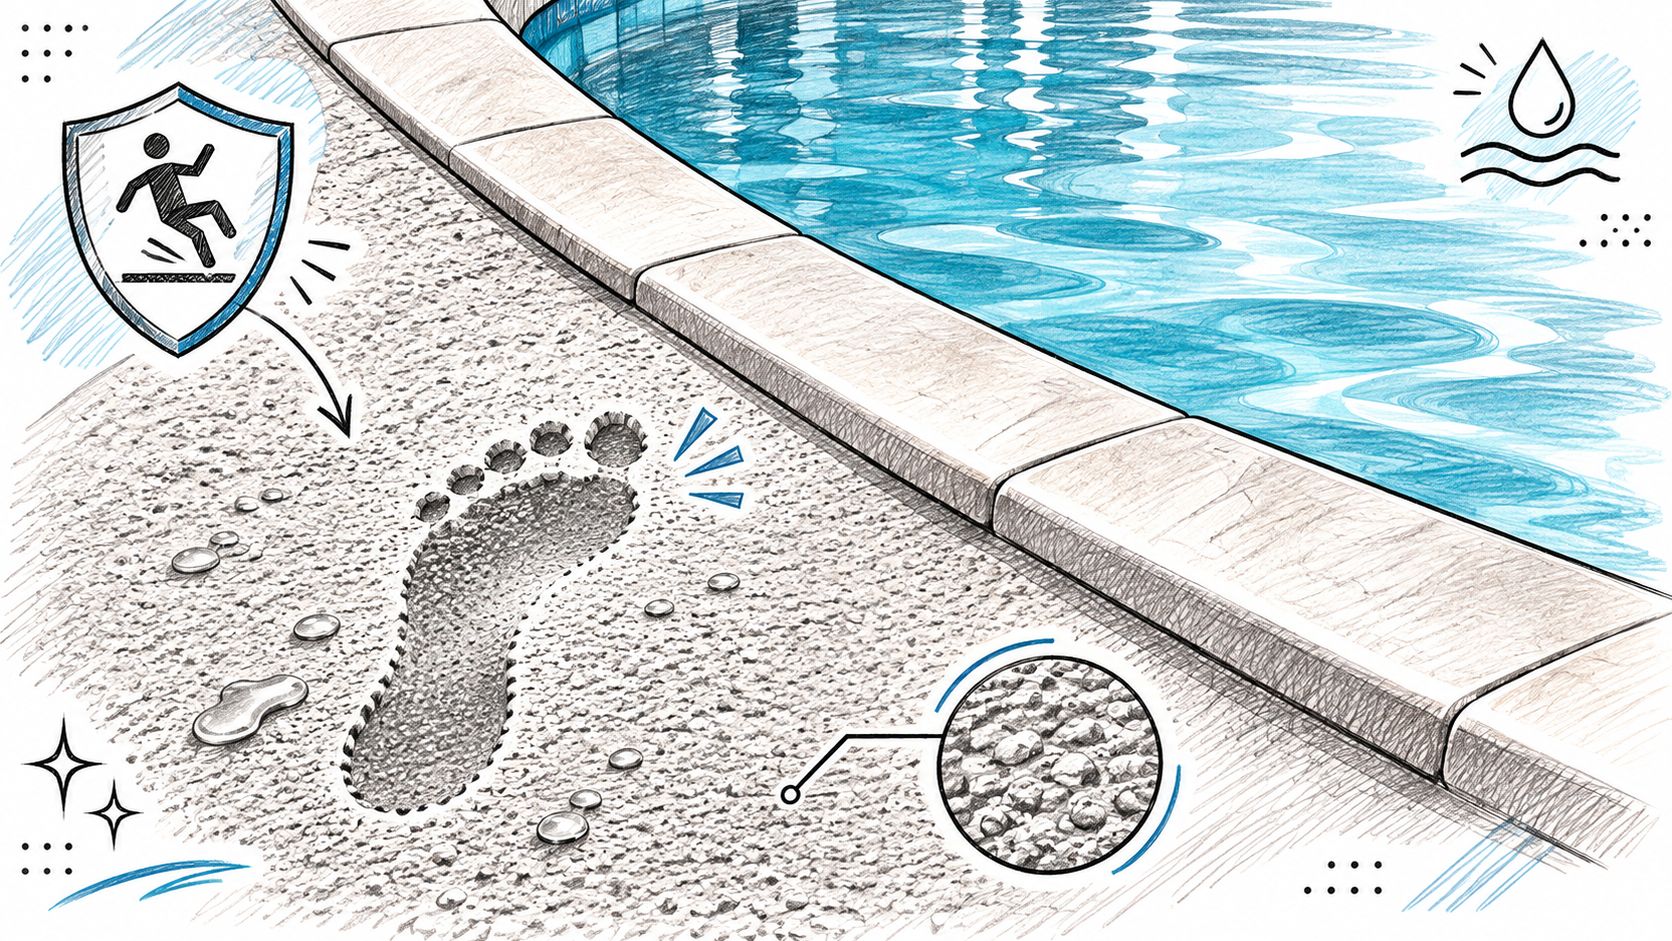
Textured concrete, appropriate exterior porcelain, and suitable stone can all be candidates. Each involves trade-offs among wet traction, barefoot comfort, cleaning, heat exposure, and appearance. More texture isn't automatically better if it makes the surface abrasive or difficult to maintain.
Review the wet route, not just the material
For a hotel pool with porcelain decking, obtain wet-condition slip-resistance information applicable to the proposed use. Review a finished mockup that includes grout, drainage transitions, and the actual maintenance products.
Pay particular attention to the route between the pool stairs, gate, changing area, and seating. Those are places where wet feet, turning movements, and carried items can coincide.
- Drain deliberately. Grade the deck toward appropriate drainage without creating abrupt changes underfoot.
- Keep transitions flush. Coordinate coping, drain grates, thresholds, and repairs to avoid trip edges.
- Clean compatible surfaces. Remove algae, oils, and residue using products that won't damage the finish.
- Reassess coatings. Don't apply a replacement sealer without checking its suitability for wet pool surrounds.
Handrails provide support, but they can't correct standing water or a slick finish. Repair the walking surface rather than expecting users to compensate by holding the railing.
6. Pool-Specific Lighting and Visible Depth Contrast
Decorative lighting and safety lighting aren't interchangeable. An attractive glow under the coping may leave the gate latch, stair edge, or pool bottom difficult to see.
Light the tasks first. People need to identify the entrance, operate hardware, judge changes in level, and see what's happening in the water. Then adjust the decorative effects around those needs.
For a backyard pool beside a raised deck, use coordinated underwater illumination and deck lighting rather than relying on a bright fixture mounted on the house. A single strong source can produce glare and leave shadows behind posts or furniture.
Check visibility from where people actually stand
Review the layout from the gate, seating areas, stairs, and normal supervision positions. Check whether reflections obscure the bottom or wash out depth markings. Evaluate the scene after dark, not just on a lighting plan.
- Use suitable fixtures. Specify products listed for their actual underwater or wet-location application.
- Coordinate electrical protection. Have a qualified electrician address applicable bonding, grounding, circuit protection, and clearances.
- Keep contrast useful. Make stair edges, depth cues, and entry hardware distinguishable from surrounding finishes.
- Maintain the installation. Clean lenses, replace failed fixtures, and test timers and automatic controls.
Rail-mounted solar lighting can supplement a circulation route, but evaluate its output and operating duration for the location. Don't make a critical stair or gate dependent on a decorative fixture with inconsistent charging conditions.
Color-changing lighting deserves a separate visibility check in each intended operating mode. A pool that looks dramatic in photographs may still be difficult to supervise. Keep a practical, clearly illuminated setting available for normal use.
7. Pool Rescue Equipment and Emergency Response Planning
A life ring behind locked storage isn't immediately available rescue equipment. Neither is a rescue pole buried beneath cushions and maintenance tools.
For a home pool, establish a visible equipment station with a suitable reaching pole and throwable flotation aid. At a staffed facility, select equipment and training around the pool layout, operating procedures, and applicable requirements.
Keep the equipment reachable from the deck, with a clear route to the water. Don't mount it where someone must climb furniture or enter the pool enclosure through an inconvenient secondary route.
Response planning: Decide who calls emergency services, who brings rescue equipment, and who meets responders at the entrance before an emergency occurs.
Practice the response as a group
A hotel's written emergency plan should identify the pool's address, emergency access route, communication method, and staff responsibilities. Include the actual gate and door arrangements responders will encounter.
For a household, post the address and emergency contact instructions where a visiting caregiver can find them. Keep a working phone available without requiring someone to leave the pool area.
- Train responsible adults. Seek recognized CPR and water-rescue instruction appropriate to their role.
- Inspect rescue tools. Check poles, ropes, flotation devices, mounting brackets, and first-aid supplies.
- Plan medical equipment. Where an automated external defibrillator or other equipment is provided, include maintenance and training.
- Rehearse access. Make sure emergency responders won't be delayed by an unknown lock or blocked service entrance.
Use a reach-or-throw approach from a safe position when possible. An untrained person entering the water can become another casualty.
Swimming ability, rescue equipment, and alarms don't replace active supervision. Assign that responsibility clearly whenever people are using the pool.
8. Safer Pool Entry With Handrails, Ladders, and Ramped Access
A swimmer carrying a towel shouldn't have to step over coping and search for a handhold. Pool entry needs an obvious route, stable support, and visible changes in level.
Keep the adjoining emergency station easy to recognize as part of that arrival area.
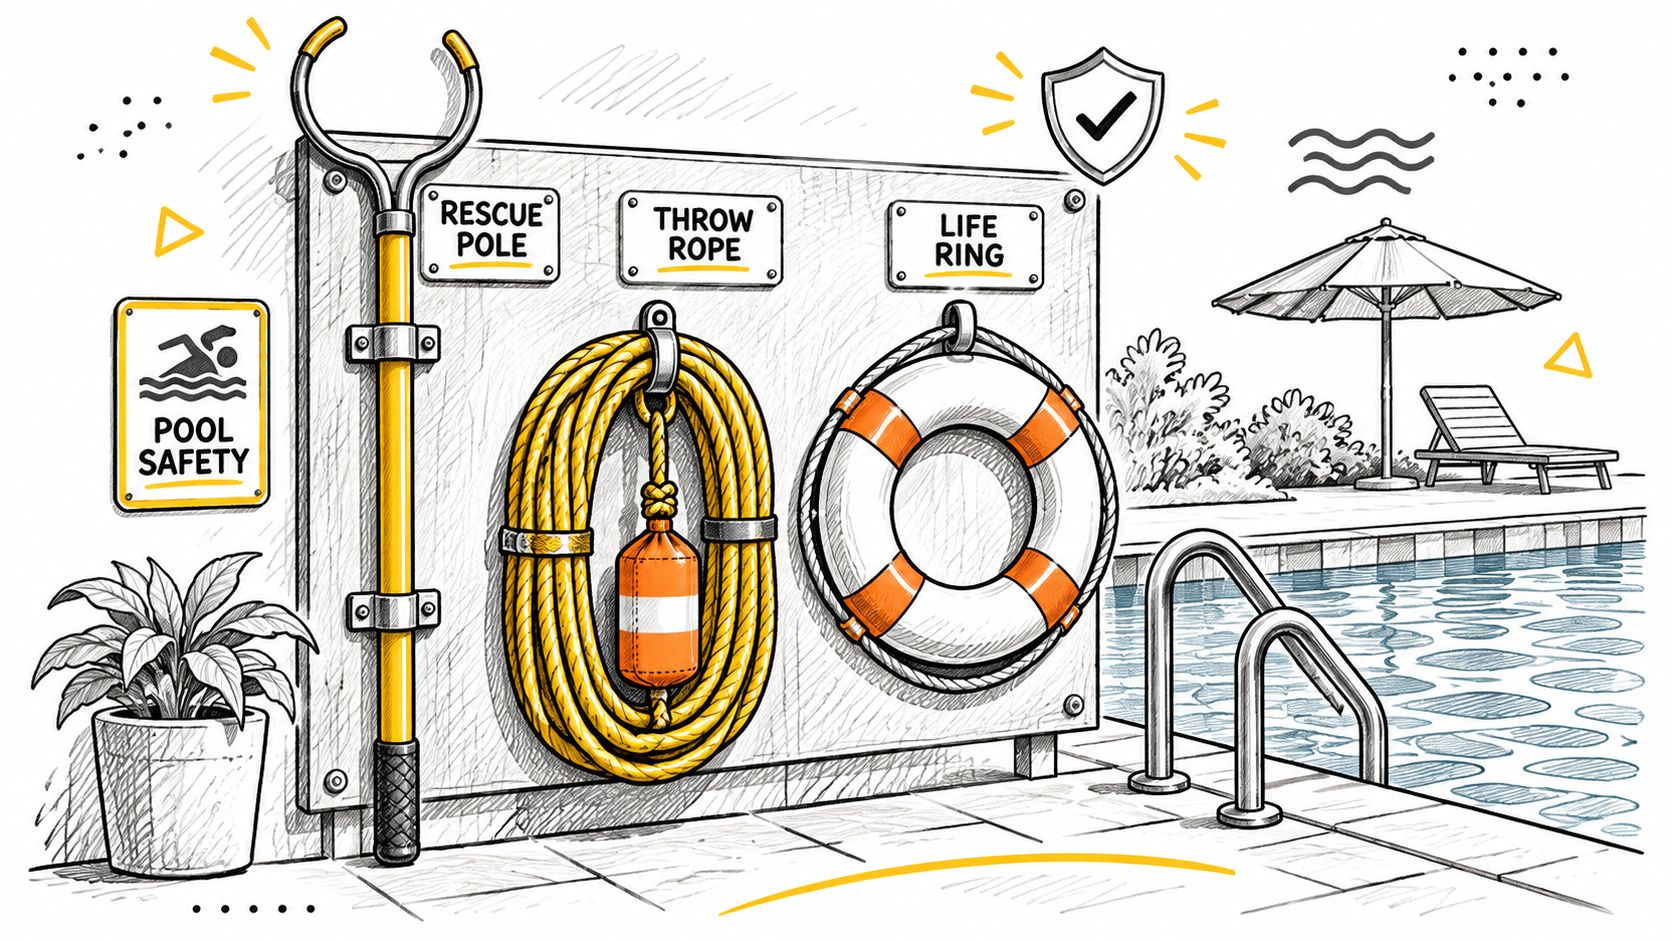
For a residential renovation, contrasting stair edges and securely anchored handrails can make the intended entry easier to use. For a hotel or community facility, determine applicable accessible-entry requirements early. A shallow beach-style entrance isn't automatically a compliant accessible route.
Coordinate support from deck to water
Position graspable rails so users can maintain support through the transition, rather than losing their grip before reaching stable footing. Check ladder tread condition, attachment points, clearances, and the surrounding deck.
Where a deck-side stair uses wall-mounted support, understand how wall-mount handrail brackets connect to suitable backing. That detail doesn't establish whether a bracket or rail is appropriate for submerged pool use.
The video provides additional visual context for the pool-area discussion.
Review the entry route with furniture in its intended position. A technically adequate landing can become unusable once loungers and towel stations occupy it.
Keep handrails and ladders free of loose connections, sharp edges, and corrosion. Coordinate perimeter fencing separately so an entry rail, equipment platform, or adjacent step doesn't create a climbing aid or access gap. Convenient entry for swimmers must not become uncontrolled entry for children.
Pool Safety Features at a Glance
| Item | Primary Purpose | Best For | Key Limitation |
|---|---|---|---|
| Code-Compliant Pool Barrier and Perimeter Railing | Restricts unauthorized pool access | Enclosing pool areas while preserving visibility | Must meet local codes and cannot prevent all drownings |
| Self-Closing and Self-Latching Safety Gate | Controls pool access and closes automatically | Barrier entry points needing reliable closure | Hinges and latches require regular testing and maintenance |
| Pool Alarm and Surface-Water Monitoring | Detects water entry or abnormal water levels | Adding an alert layer to a pool safety plan | Can produce false alarms and does not replace barriers or supervision |
| Anti-Dive Pool Depth Markings and Safer Diving Areas | Shows pool depths and identifies no-dive zones | Helping swimmers recognize depth changes | Markings can fade and cannot ensure safe diving decisions |
| Low-Slip Pool Deck and Coping Surfaces | Reduces slips and falls around the pool | Wet decks and pool-edge walking areas | No surface is completely slipproof; textured finishes need maintenance |
| Pool-Specific Lighting and Visible Depth Contrast | Improves visibility of water, edges, and access points | Safer pool use and supervision after dark | Poor placement can cause glare or dark zones; electrical work must meet code |
| Pool Rescue Equipment and Emergency Response Planning | Supports rapid response to swimmer emergencies | Homes and facilities with trained responders | Equipment is ineffective if inaccessible, damaged, or used incorrectly |
| Safer Pool Entry: Handrails, Ladders, and Ramped Access | Supports stable and accessible pool entry and exit | Users needing extra support or accessible access | Must be properly designed to code; wet steps can still pose fall risks |
Build Your Layers for a Code-Compliant Pool
Start with the barrier and gate, because they address access before someone reaches the water. Trace every route from the home, yard, parking area, and adjoining deck. Resolve openings, climbability, grade changes, and automatic gate operation before spending the remaining budget on electronics or decorative upgrades.
Then add protection for different failure conditions. An alarm needs a reliable warning path and an available responder. A deck needs wet traction and drainage. Lighting needs to reveal the water and walking routes, while entry hardware needs sound anchorage and usable clearances.
Put the system on the drawings
Before ordering, give the building department and installer a coordinated layout showing the barrier, gates, stairs, retaining walls, deck levels, and nearby structures. Identify the intended railing system and hardware rather than describing the enclosure only by material or appearance.
Our railing kits are IRC/IBC compliant, but general railing compliance doesn't establish approval for every pool-barrier application. Confirm the project's pool-specific height, opening, climbability, gate, and installation requirements. Our Cable Railing Safety Code page can support design review, but local approval must address the actual assembly and site.
Keep other pool hazards in scope, too. Have a qualified pool professional review suction fittings, drain covers, circulation safeguards, and any proposed diving equipment. A perimeter barrier cannot address a hazard someone encounters after entering the water.
Hand over a maintenance plan
Commission the installation as a working system, not a collection of finished parts. Operate the gates, check alarm audibility, inspect walking routes when wet, and review lighting after dark. Make sure rescue equipment is accessible and responsible adults understand the emergency plan.
Assign maintenance tasks by component and keep the manufacturer's instructions available. Recheck the layout whenever furniture moves, landscaping changes, decking is replaced, or new equipment is added. Those changes can introduce climbing aids, obstruct visibility, or interfere with a gate that previously worked correctly.
Modern aesthetics and practical safety can coexist. Preserve views with an approved barrier configuration, align posts with the architecture, and integrate lighting without hiding critical edges. The successful result is a pool surround that looks intentional and continues to function when someone forgets, gets distracted, or needs help.
We offer custom railing systems for pool surrounds, decks, and stairs, with layouts fitted to corners, mounting conditions, and access points. Visit Ultra Modern Rails to request a custom quote and drawing, and bring your local pool-barrier requirements so the proposed railing layout can be reviewed before installation.