

You've replaced the old stair rail, matched the finish to the room, and lined up the first bracket. Then you notice the wall isn't where you expected, the rail angle changes at the landing, and the mounting kit includes screws that look too small for the job. That's the point where a clean-looking installation can turn into a loose rail, damaged wall, or failed inspection.
Stair rail mounting hardware is part of the safety system, not a decorative accessory. Brackets, mounting plates, anchors, fasteners, and post connections must work together with the rail material, substrate, stair pitch, and expected loads. The right hardware can disappear visually, but it still has to transfer force into a sound wall, post, tread, or structural frame.
This guide focuses on what holds up in real installations, what commonly fails, and how to balance modern low-visibility design with code-aware construction. The principles apply to stainless cable systems, black metal rails, wood handrails, and mixed-material stair assemblies.
Table of Contents
- Why Stair Rail Mounting Hardware Matters Before You Drill
- Understanding Types of Stair Rail Mounting Hardware
- Measuring and Planning Your Mounting Layout
- How to Install Stair Rail Mounting Hardware Securely
- Matching Hardware to Modern Rail Styles and Finishes
- Final Checks and Pro Tips for a Lasting Install
Why Stair Rail Mounting Hardware Matters Before You Drill
A rail can look perfectly aligned and still fail at the first hard grab. The usual causes are predictable: an anchor set only in drywall, a fastener chosen for its finish instead of the substrate, a missing mounting plate, or brackets placed without accounting for sideways and forward force. Once one connection shifts, the rail transfers movement through the rest of the assembly. Brackets flex, holes enlarge, and the wall finish cracks around the attachment point.
Stair rail mounting hardware is part of the safety system. Brackets, plates, anchors, fasteners, and post connections must share a reliable load path through the rail, wall, post, tread, or structural frame. Hardware can disappear visually, but it cannot bypass the structure behind the finished surface.
California Title 8 provides a practical performance reference. The completed handrail structure must withstand at least 200 pounds applied in any direction at any point on the rail. On non-private stairways, the rail must extend at least 12 inches beyond both the top and bottom risers. Brackets must sit below the rail so they do not interrupt a smooth gripping surface. These requirements influence hardware size, spacing, plate design, and anchor placement. Review the broader stair railing requirements before drilling.
The rail has to feel solid in the hand
People pull sideways, push forward, and grab suddenly while recovering from a stumble. A rail may look acceptable during a visual check yet feel unsafe when brackets flex or anchors shift under changing force. A one-piece rail with well-spaced, properly anchored mounts often feels more secure than a heavier rail attached through weak surface material.
Grip clearance matters alongside strength. A bracket that rises into the hand path can support the rail while creating an uncomfortable contact point. Keep the top and side surfaces smooth, particularly on a wall-mounted handrail where the hand slides along the full length.
Practical rule: Choose the anchor path first, then choose the bracket that makes that path look clean.
Treat the wall, post, and rail as one assembly. Stainless rail needs compatible hardware to limit premature corrosion. Hollow-wall construction requires an anchor strategy that does not rely on drywall alone. At an angled transition, connectors or posts must follow the stair geometry without forcing the rail into a twist.
Code changes made the distinction clearer
OSHA's walking-working-surface update took effect on January 17, 2017. For situations covered by the rule, new installations require the top rail and graspable handrail to be separate components. OSHA also requires guardrails and equivalent systems to resist 200 pounds of force. The requirements favor deliberate use of mounting plates, anchors, brackets, and post connections instead of improvised shared rails. See this OSHA guardrail and handrail requirements summary.
For Ultra Modern Rails stainless systems, the same planning applies to low-visibility designs becoming more common in 2026. Concealed and visible mounts can be structurally equivalent when they use the same sound substrate, fastener capacity, and load path. The visible option is easier to inspect and replace. The concealed option offers a cleaner profile but leaves less room for installation error. Finish choice also affects service life, since incompatible metals, exposed cut edges, and poorly protected coatings can create corrosion or visible wear before the rail itself shows a problem.
Understanding Types of Stair Rail Mounting Hardware
A rail can look properly fitted and still fail at the connection. The common cause is mixing attractive parts that do not transfer force through the same structural path. Wall-mounted handrails usually need brackets and anchors matched to the substrate. Cable systems may also need post bases, intermediate posts, and rail-to-post connectors.
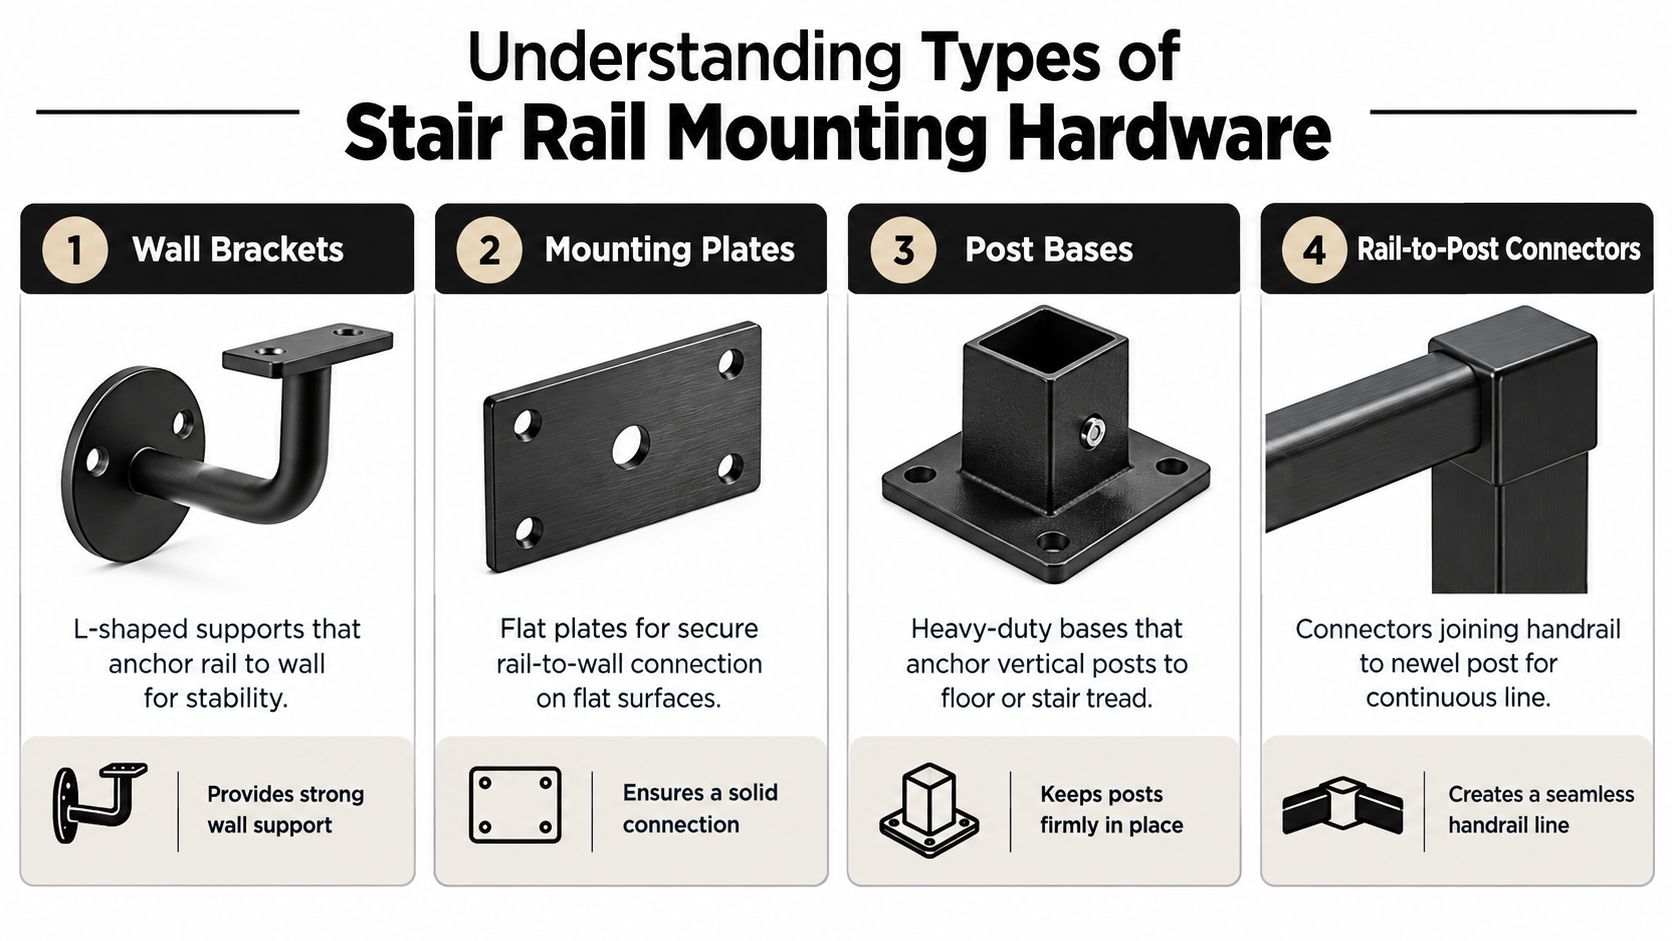
The four hardware families
Wall brackets support a handrail directly from a wall. L-shaped brackets keep the connection visible and easy to inspect. Low-profile versions reduce visual bulk for the low-visibility look common in 2026 installations. The bracket arm matters, but the mounting plate, fastener capacity, and structure behind the wall determine whether the connection can carry the required load.
Mounting plates spread force across a wider area and create a stable interface between the bracket and wall. They suit flat walls where the rail or bracket uses a specialized connection. A plate can also support concealed hardware, provided it is fastened to sound blocking or masonry, not finish material alone.
Post bases secure vertical posts to stair treads, landings, decks, or floors. The base must limit movement in several directions because the post transfers rail force into the supporting surface. Stair installations also require attention to slope, edge distance, and the tread or framing thickness below the base.
Rail-to-post connectors join a handrail, top rail, or stair section to a newel or intermediate post. They matter at direction changes and where an angled stair run meets a landing. The connector must match the rail angle and engage mechanically. A forced angle can stress fasteners and leave a visible break in the rail line.
| Hardware Type | Best Use Case | Key Strength Factor |
|---|---|---|
| Wall brackets | Direct wall-mounted handrails | Sound attachment into studs, blocking, or masonry |
| Mounting plates | Flat wall connections and concealed interfaces | Load distribution across a stable backing surface |
| Post bases | Vertical posts on stairs, floors, or landings | Secure transfer into structural framing or concrete |
| Rail-to-post connectors | Changes in direction and post-supported rails | Correct angle, fit, and mechanical engagement |
Material compatibility affects service life. Stainless fasteners suit many exposed stainless and exterior applications. Galvanized zinc-coated exterior fasteners specified to ASTM A153/A153M are identified in the U.S. government's metal-railing specification for suitable exterior use. The same guidance covers wall brackets, wall returns, and embedded pipe sleeves installed with nonshrink grout or quick-setting anchoring cement, with the anchorage selected for the installation. UFGS metal-railing specification guidance
Visible brackets are easier to inspect, service, and adjust. Concealed mounts create a cleaner profile, but substrate mistakes become harder to find and correction usually requires more disassembly. For Ultra Modern Rails systems, either style can meet the same code load objective when the bracket, fastener, backing, and load path are properly designed. Finish still matters. Incompatible metals, exposed cut edges, and damaged coatings can cause corrosion or visible wear before the rail itself shows a problem.
Measuring and Planning Your Mounting Layout
A stair rail that looks straight on the wall can still feel wrong under the hand if its pitch, height, or end points are inconsistent. Establish the finished rail line before selecting bracket locations. Measure from the stair nosings or walking surface, confirm the height required for the project, and transfer that measurement along the stair pitch.
Painter's tape makes the layout visible without marking the finished wall. Use a long level, laser level, or straightedge held parallel to the intended rail. Mark both ends first, including any required extensions, then work inward to the bracket positions. On non-private stairways, California Title 8 requires the handrail to extend at least 12 inches beyond the top and bottom risers, so allow for those extensions before cutting or drilling.
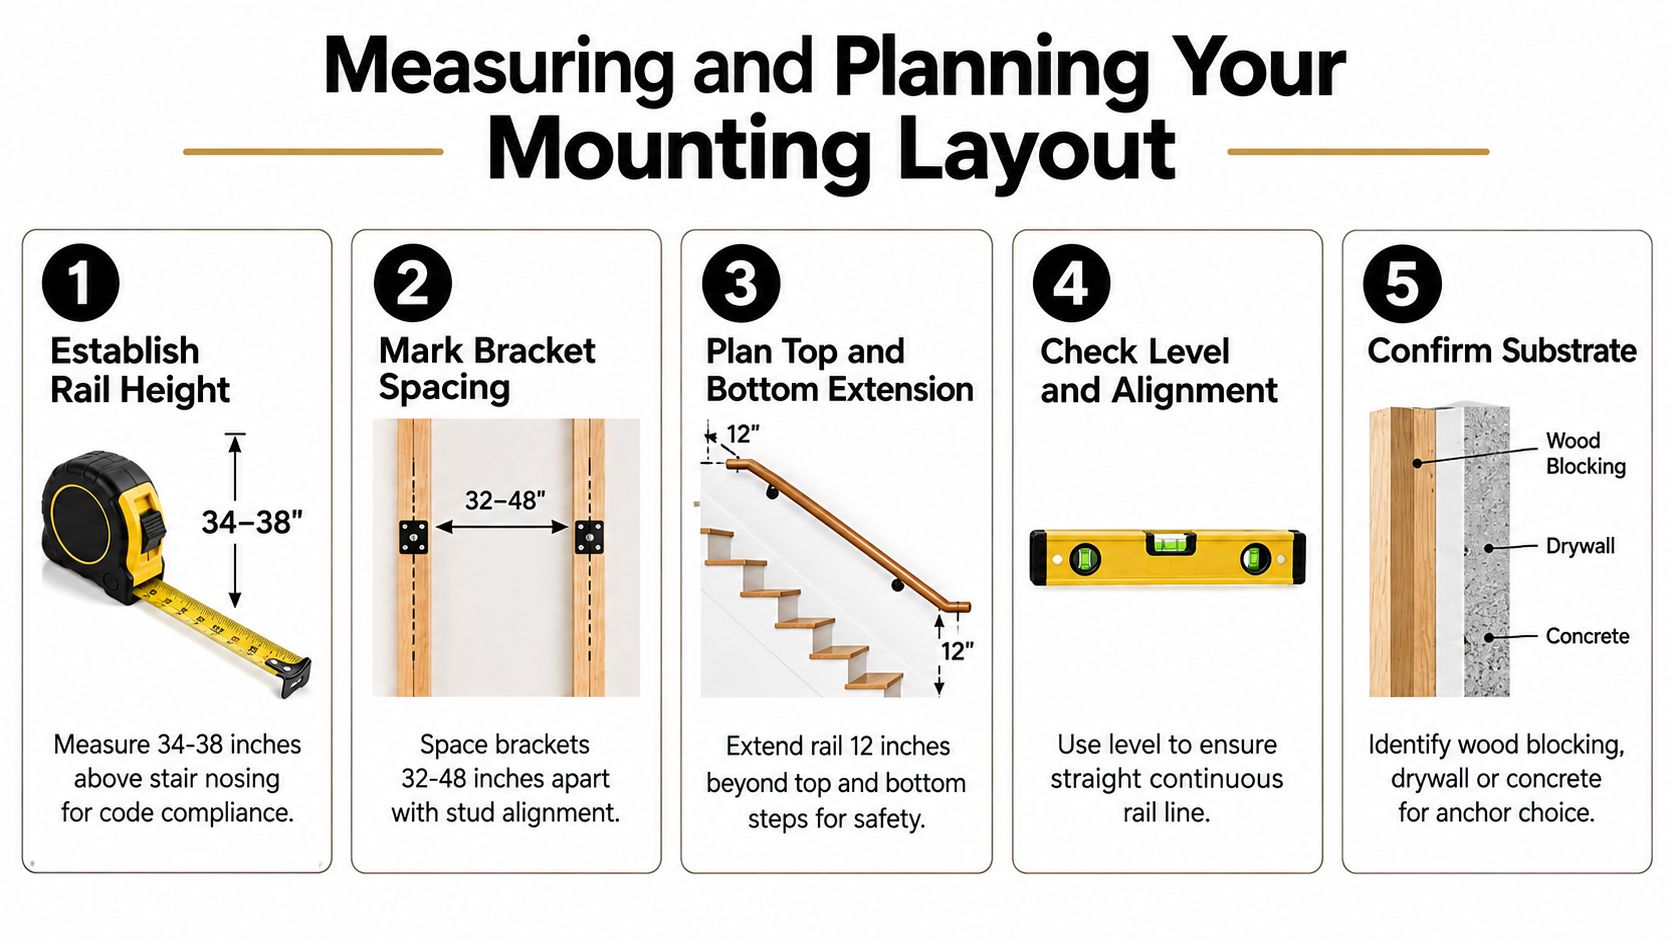
Mark the structure, not just the finish
Find studs or installed blocking before finalizing a wall-mounted bracket layout. A bracket placed for visual symmetry is useless if its fasteners miss the structural backing. Bracket spacing guidance commonly uses no more than 8 feet between wall-mounted brackets as a baseline, with the supports attaching below the rail so the top and sides remain smooth. Wall-mounted handrail bracket spacing guidance
Treat that distance as an upper limit, not an automatic layout. A heavy rail, thin wall, busy commercial stair, or bracket near an end may need closer support. Keep fasteners away from stud edges, tread edges, and masonry joints. Concealed mounts can give a low-visibility profile suited to current 2026 design preferences, while visible brackets are easier to inspect. Both can carry the same code load when the substrate, fasteners, bracket, and load path are properly sized.
Dry-fit before drilling
Place the rail, posts, brackets, and connectors in their intended positions without final tightening. Check that the rail follows the stair pitch naturally, with no forced bend at a joint. For cable systems, transfer the stair angle to the post tops and confirm that each transition fitting seats fully.
Mark holes through the actual hardware. Separate measurements can drift, especially where several rail sections meet. Label each section and connector before removing the dry fit. This prevents drilling a clean pattern for a bracket that is reversed, offset, or incompatible with the rail's mounting face.
A dry fit catches alignment problems while the wall is still repairable.
Record section lengths, post locations, and transitions on a worksheet or with the deck railing calculator from Ultra Modern Rails. Use the result as an organizing tool, then verify every measurement against the actual stair and substrate. Walls bow, treads vary, and drawings cannot reveal a hidden pipe or a misplaced stud. Finish selection also belongs in the layout review. Protect coated surfaces from drilling damage, and avoid forcing dissimilar hardware together where corrosion or premature wear could follow.
How to Install Stair Rail Mounting Hardware Securely
A rail can look perfectly aligned and still fail at the first hard grab if the bracket is fastened to weak backing. Before drilling, identify the connection carrying the load. For a wall-mounted rail, confirm solid backing at every bracket. For a post-supported cable system, verify the base, framing, and post alignment before joining the rail sections. Concealed and visible mounts can meet the same code load when the bracket, fasteners, substrate, and load path are properly sized. Concealment changes access for inspection, not the structural requirement.
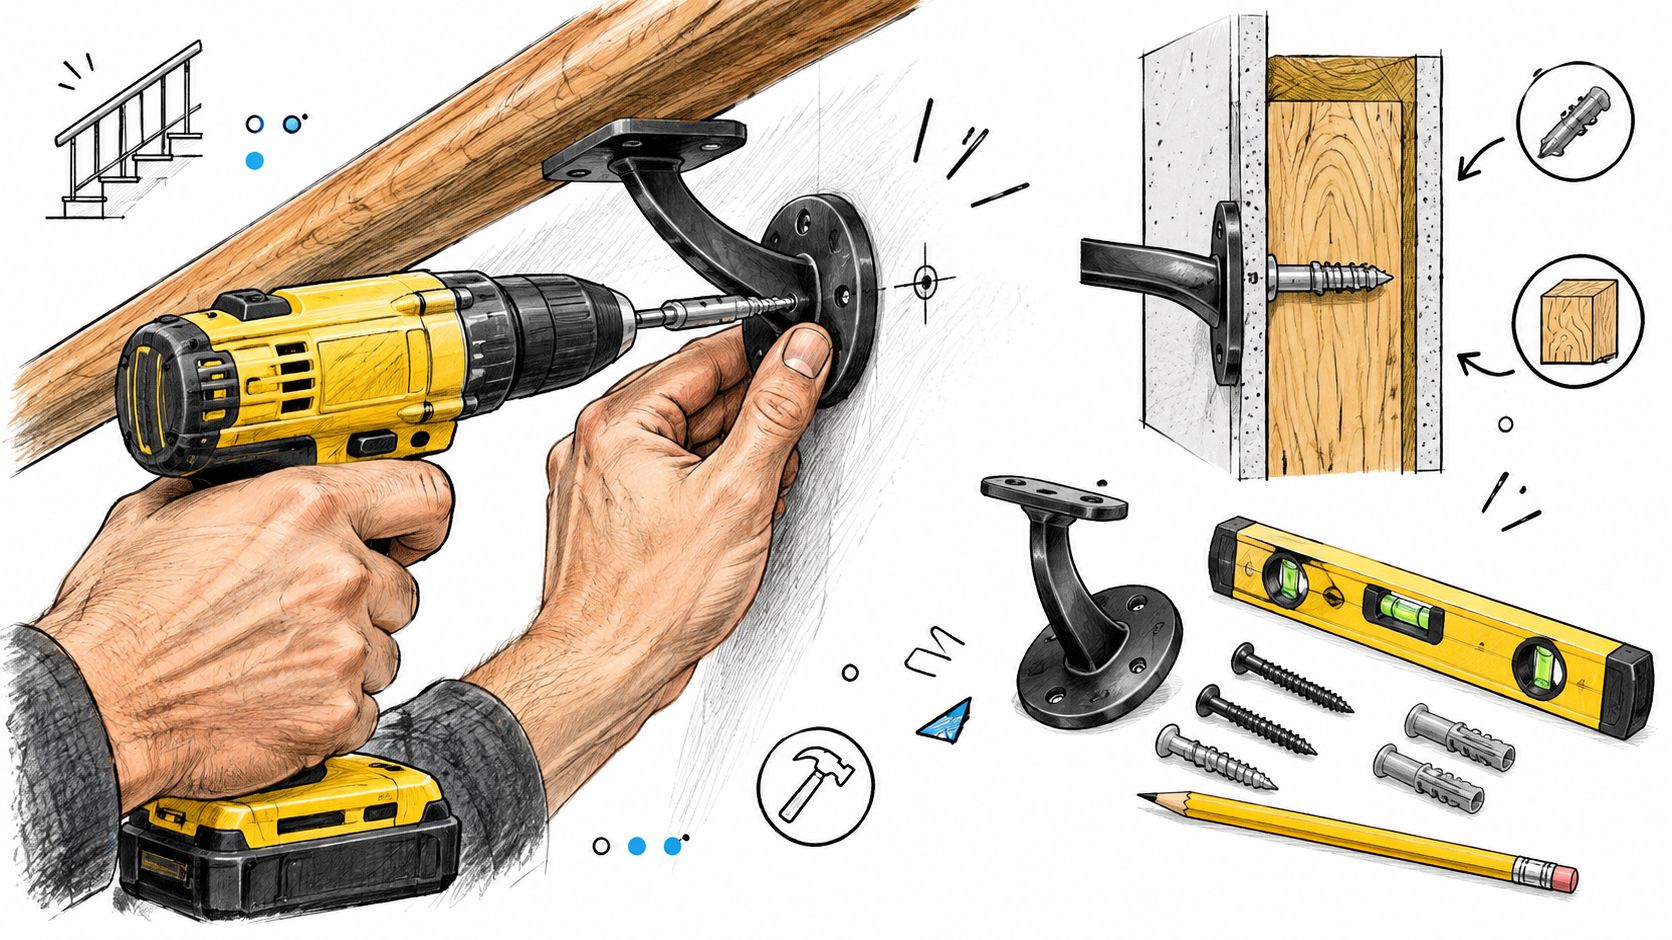
Wood, drywall, masonry, and metal need different anchors
Solid wood or blocking provides the most predictable hold. Drill a pilot hole suited to the fastener and keep it centered in the stud or blocking. Hold the drill straight. A short screw that only catches drywall and the edge of framing is not a structural connection.
Drywall alone isn't structural backing. If no stud or blocking can be reached, choose an anchor rated for the expected load and the wall construction, then confirm that the anchor and bracket work together. A toggle-style anchor may suit some conditions. An anchor that spins, collapses, or pulls into a damaged cavity will not hold a rail reliably.
Concrete and masonry require the correct bit, embedment, and anchor type. Remove drilling dust before inserting the anchor. Dust can interfere with expansion or bonding, while a hole placed in a weak mortar joint may hold less than one drilled into sound concrete or masonry.
Metal posts need fasteners matched to the post wall thickness and connection geometry. A wood screw in thin metal may strip, and a fastener that bottoms out before the bracket clamps firmly leaves the joint loose. Hollow posts may require an internal sleeve, rivet nut, through-bolt, or engineered insert.
For exposed exterior work, match fastener metallurgy to the environment. The UFGS specification calls for galvanized zinc-coated exterior fasteners to ASTM A153/A153M and lists embedded pipe sleeves secured with nonshrink grout or quick-setting anchoring cement where embedded support is required. Exterior railing fastener and anchorage guidance
Tighten in stages and test before finishing
Set every bracket loosely at first. The rail can then establish its line before one connection pulls the assembly out of alignment. Tighten progressively, alternating between fasteners when a bracket has more than one attachment point.
Use a torque-controlled driver when the manufacturer specifies a torque value. Too much torque can crush soft material, strip threads, deform a thin mounting plate, or pull an anchor out of line. Too little leaves movement that may appear only when someone grips the rail with force.
After initial tightening, apply firm hand pressure in several directions along the rail. Listen for rattles and watch the bracket-to-wall interface, not only the rail. If the rail moves while the bracket stays fixed, inspect the rail connector. If the bracket moves with the fastener head, stop and correct the anchor or backing before adding trim.
Fix problems at the source
A stripped wood hole needs new structural material or an application-approved repair. Driving a larger screw into damaged wood can feel tight without restoring adequate holding power. An off-center stud may call for a mounting plate, relocated bracket, or added blocking. Driving a fastener at an angle is rarely a sound substitute.
Uneven walls can make a concealed mount appear aligned during dry fit, then bind as the fasteners are tightened. Use shims or a designed spacer where appropriate, and keep the bracket face square to the rail connection. Do not bend a mounting plate to correct a wall defect unless the manufacturer permits that method.
For wall-mounted systems, wall-mount handrail bracket guidance from Ultra Modern Rails can help with bracket selection for a modern rail. The finished rail should feel firm, follow the stair pitch, and provide a continuous, smooth grip with no hardware projecting into the hand path.
Matching Hardware to Modern Rail Styles and Finishes
The projected 2026 railing design direction favors slimmer geometric metal rails, minimalist cable systems, mixed wood-metal-glass assemblies, LED-integrated rails, and decorative accessories in bronze and champagne gold, as described in independent trend coverage. 2026 railing design trends and finish discussion The practical challenge is making low-visibility hardware fit those styles without confusing concealment with reduced engineering.
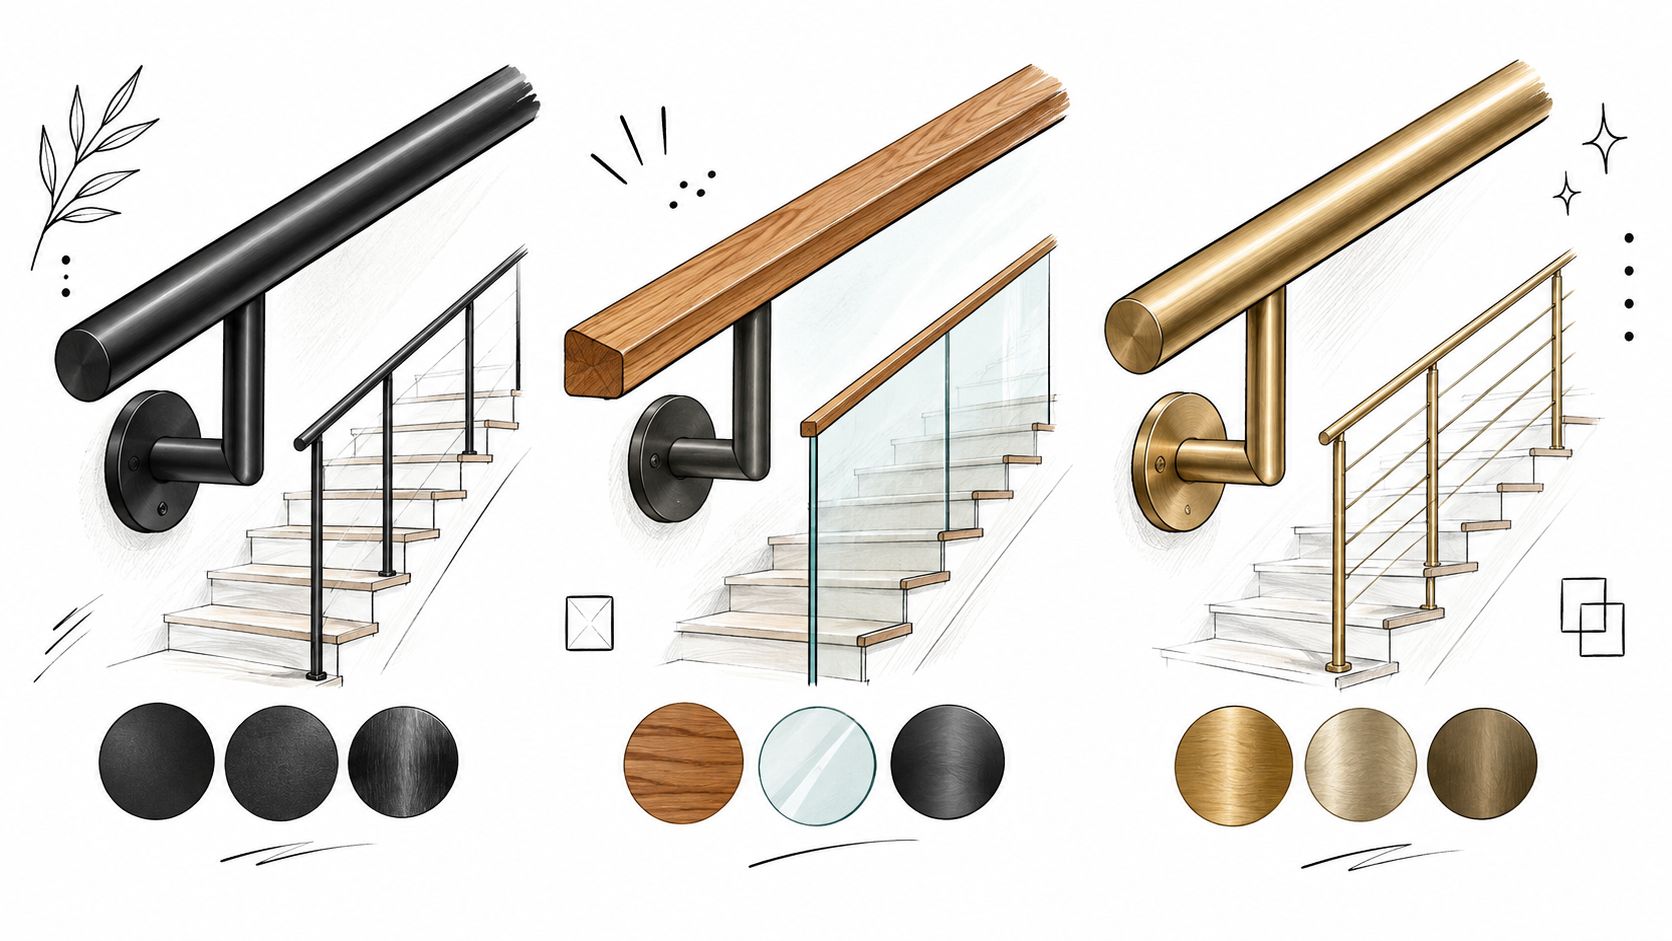
A concealed bracket can be structurally equivalent to a visible bracket when both use comparable load-bearing material, suitable fasteners, and the same quality of structural backing. The difference is access. A visible bracket makes loose fasteners and wall movement easy to spot, while a concealed bracket depends more heavily on accurate fabrication and careful installation because the critical connection is hidden after the trim is fitted.
Finish is not the same as corrosion protection
Color-matched screws and brackets improve visual continuity, especially on black metal rails or warm decorative finishes. They don't automatically provide the same corrosion resistance as a properly specified stainless or galvanized fastener. A decorative coating can scratch during installation, and exposed cut edges may weather differently from the finished face.
For exterior systems, keep dissimilar metals from creating an avoidable corrosion problem. Use compatible washers, sleeves, or isolating materials when the design requires contact between different metals. Rinse exposed hardware periodically with clean water, remove deposits with a suitable mild cleaner, and avoid abrasive tools that score the finish.
Choose visibility based on service conditions
A visible black bracket can be the sensible choice on an exterior stair where future inspection matters more than a completely uninterrupted line. A concealed mount may suit an interior stair with a refined architectural finish, especially when the wall has been prepared with accurate blocking.
Mixed-material rails need extra attention at the transition points. Wood can move differently from metal, glass requires carefully controlled clamping, and cable systems need posts and connectors that preserve the intended line. The hardware should be selected before the finish package is finalized, not added after the designer has reduced the available mounting surface.
Ultra Modern Rails offers custom-made stainless steel and black metal cable railing systems, with options for stair sections, mounting styles, handrails, and wood tops. That makes it one option for projects where the rail style, mounting method, and finish need to be coordinated before fabrication.
Final Checks and Pro Tips for a Lasting Install
A finished stair rail should pass a short inspection before the tools leave the site. Look at the connection from the user's point of view, then test it like someone who needs the rail suddenly.
Run this punch list
- Load path: Confirm each bracket, plate, post base, and connector transfers force into structural backing.
- Smooth grip: Slide a hand along the rail and check that no bracket, fastener, trim edge, or connector interrupts the path.
- Alignment: Sight down the rail from the bottom and top of the stairs. Small errors become obvious along a long slope.
- Hardware seating: Check that every screw head, washer, cover, and connector sits fully and squarely.
- Substrate condition: Inspect for cracked masonry, crushed drywall, split wood, or a fastener that has missed the intended backing.
- Finish integrity: Look for chipped coatings, exposed metal, water traps, and incompatible contact between dissimilar materials.
Give the assembly another movement check after the installation has settled. If a fastener needs adjustment, correct the cause rather than tightening harder. Keep spare finish-matched screws and any removable trim pieces with the project records, because a small repair is easier when the exact hardware is available.
Complex stairs deserve a drawing before fabrication. Multiple flights, tight landings, unusual wall conditions, mixed materials, and concealed connections can change the hardware package even when the rail profile looks straightforward. Request a custom drawing from the supplier when the layout can't be verified with a simple straight run and a known structural backing.
The durable installation is rarely the one with the least visible metal. It's the one where the hardware, substrate, rail geometry, and finish were chosen as one system, then tested before the wall is closed up.
Visit Ultra Modern Rails to coordinate stainless or black metal cable railing sections, stair layouts, mounting styles, and custom drawings before you drill. Request a custom quote and drawing so your stair rail mounting hardware supports the design without sacrificing a secure, code-aware installation.