

You're halfway through a renovation, the old staircase is gone, and the new design is starting to take shape. The open risers look clean, but the narrow boards under consideration don't yet feel substantial enough. You're wondering whether thicker stair treads will make the staircase safer, stronger, and more modern.
That instinct is understandable, but thickness is only one part of a stair system. The span between supports, stringer spacing, riser design, nosing projection, wood species, fasteners, and railing connections all affect the result. A thick board can still flex if it spans too far, while a thinner tread can perform well when the framing underneath is properly designed.
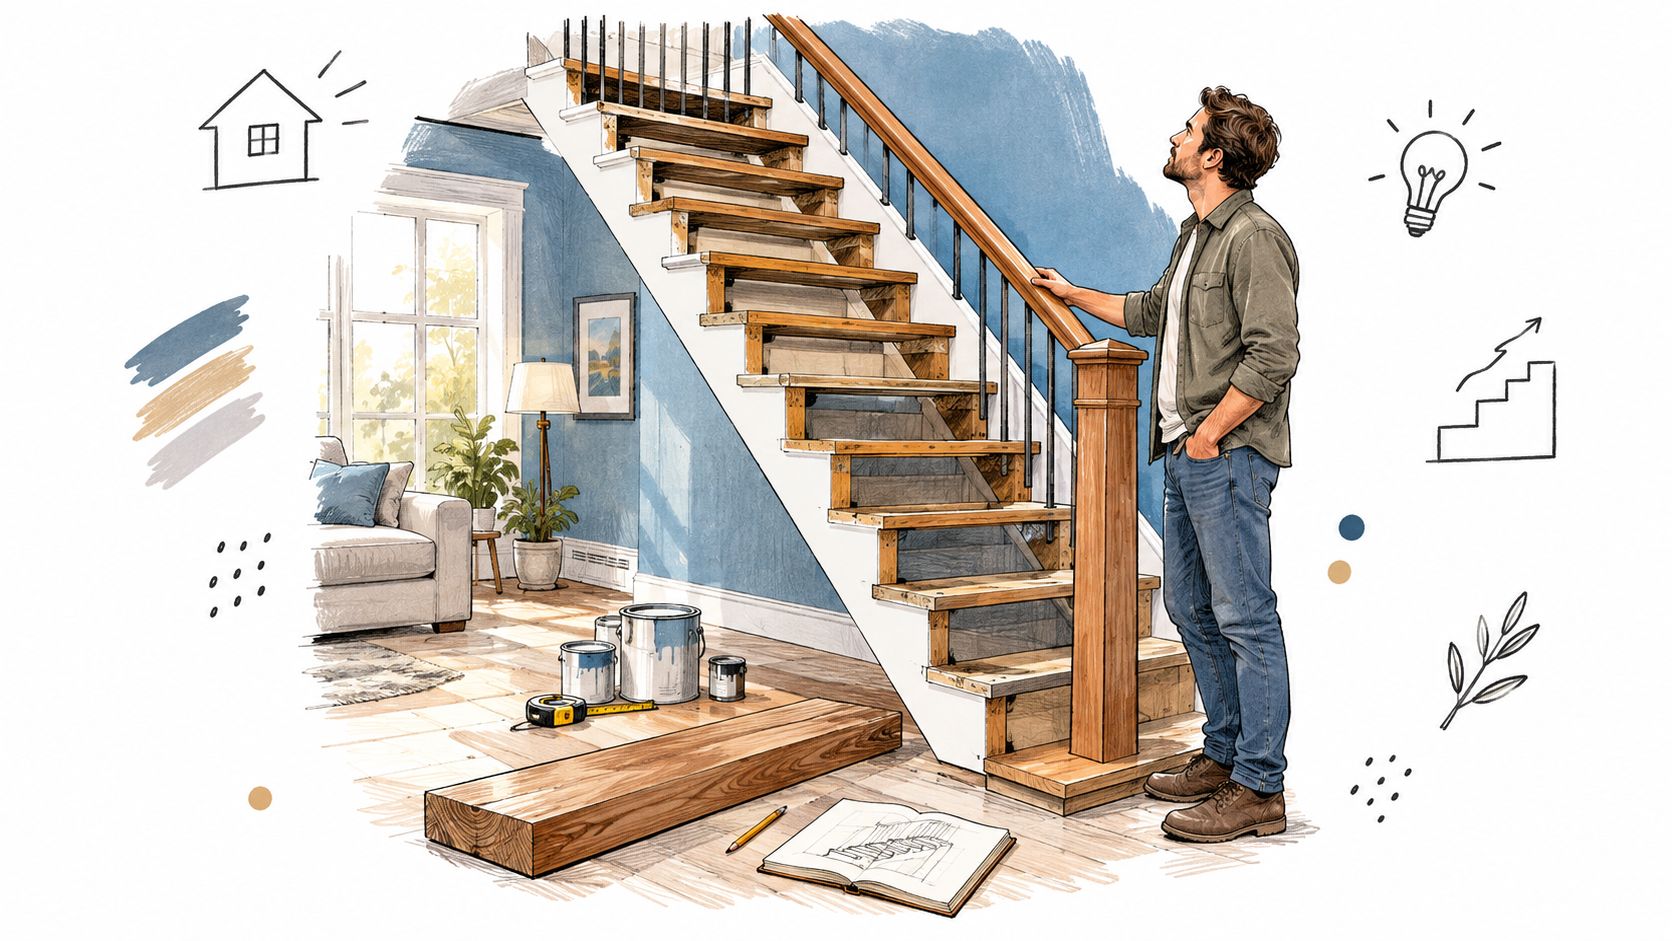
This guide treats thick stair treads as a structural and layout decision, not merely a style upgrade. You'll learn how the industry distinguishes ordinary and plank treads, how to compare materials, how support spacing changes the specification, and why adding thickness can alter walking safety if the stair geometry isn't recalculated.
Practical rule: Don't order the thickest tread that looks attractive. First establish the span, support arrangement, riser type, and finished walking dimensions.
Table of Contents
- Why Stair Tread Thickness Is Worth Thinking About
- What Makes a Stair Tread Thick
- Material Choices for Thicker Treads
- Span, Stringers, and Riser Design
- Thick Treads and Walking Safety
- Pairing Thick Treads with Modern Railings
- Installation and Finishing Recommendations
- Verification Checklist and Next Steps
Why Stair Tread Thickness Is Worth Thinking About
A homeowner standing beside an unfinished open staircase often asks the same question: “Would a thicker tread make this feel safer?” The answer is sometimes yes, but not because thickness automatically creates safety. A substantial tread can reduce bending, add visual weight, and make a floating staircase feel more settled. It still needs suitable framing and properly designed connections.
The visual change can be dramatic. A slim board may look appropriate on a conventional closed stair, where risers and stringers create a continuous structure. On an open-riser staircase, each tread is exposed. The edge becomes part of the architecture, and a thicker profile can provide the solid, sculptural appearance many homeowners want.
That appearance can also hide a problem. If the tread bridges a wide gap between stringers, a visually impressive slab may deflect under repeated foot loads. If a railing post is attached to the tread, the board may also receive lateral forces that a standard residential step was never intended to carry.
The questions that matter before ordering
Start with the staircase itself, not the product photograph. Record:
- Support spacing: How far must each tread span between stringers, brackets, walls, or concealed supports?
- Riser arrangement: Are the risers closed, partially open, or entirely absent?
- Finished stair width: Is the stair narrow, or does it exceed the width covered by your local guidance?
- Walking geometry: Will the new tread change the usable run, nosing, or rise?
- Railing load path: Will posts mount on the tread, beside the tread, or into the supporting structure?
The answer may be a solid hardwood plank, an engineered wood assembly, or a thinner tread supported by a more closely spaced frame. The correct specification depends on how the entire stair carries load.
Thickness helps, but it doesn't replace design
A thicker tread can support a wider span and resist long-term deformation more effectively than a thin board, all else being equal. It can also produce the strong edge profile associated with contemporary floating stairs. But thickness alone doesn't prove structural adequacy, especially on open stairs with widely spaced supports.
The safe approach is to treat the tread, stringers, brackets, fasteners, risers, and railing as one system. If any of those parts is undersized or poorly connected, increasing the board thickness may improve appearance without solving the actual weakness.
What Makes a Stair Tread Thick
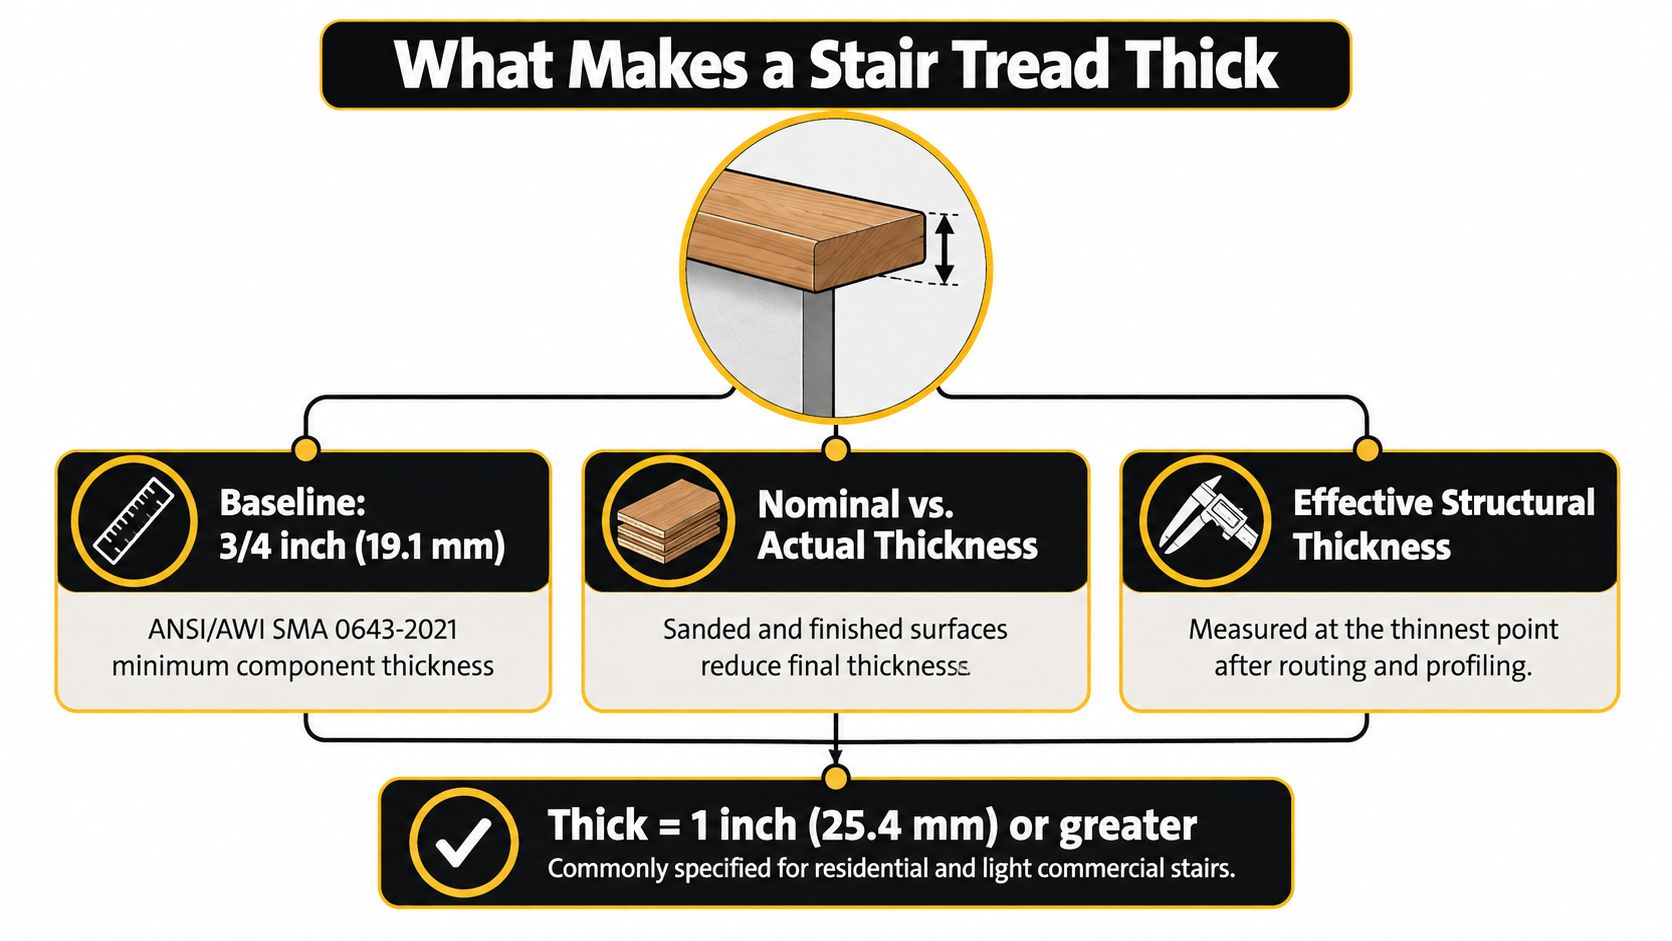
“Thick” has a practical meaning in stair construction. It isn't merely a homeowner's impression that one board looks chunkier than another. ANSI/AWI SMA 0643-2021 identifies 19.1 mm, or 0.750 inch, as a minimum thickness for wood stair components, while defining a plank tread as 38.1 mm, or 1.500 inches, or greater in thickness. These thresholds are described in the ANSI/AWI SMA wood stair requirements.
A useful thickness hierarchy
The ¾-inch threshold is best understood as a baseline component dimension, not a universal recommendation for every finished stair. The same standard requires exposed staves used to form plank treads to be at least 19.1 mm thick, using full-length, edge-glued pieces. That requirement points to the difference between a structural wood component and a thin decorative layer applied over a weaker core.
The 1½-inch threshold marks a different design conversation. A tread at or above that thickness has more visual mass and may offer greater resistance to bending, depending on its span, species, grain direction, and support arrangement. It's the profile commonly associated with substantial plank treads and feature staircases.
A finished tread also needs to be measured carefully. Nominal stock dimensions may be reduced through sanding, planing, routing, or edge profiling. Measure the actual thickness at the thinnest structural point, not only at the center of an untouched top surface.
International guidance shows why one number isn't enough
Other standards reinforce the same principle. India's IS 1634:1992 specifies a minimum finished tread thickness of 32 mm for residential wood stairs up to 1.2 m wide, with thickness potentially increasing when the stair exceeds that width. Australian guidance similarly distinguishes internally supported treads by stair width, recommending 19 mm for stairs up to 1,000 mm wide, and 30 mm for stairs wider than 1,000 mm up to 1,800 mm, with 30 mm recommended for feature stairs regardless of width. These dimensions are available in the IS 1634:1992 wood stair standard.
That comparison matters because a 30 to 32 mm tread is roughly 18 to 20 percent thicker than a 25 mm board, while a 38.1 mm plank tread is about 50 percent thicker than a 25 mm board. Those differences affect stiffness and appearance, but they don't determine adequacy without the support layout.
European practice also uses formal calculation methods. EN 16481:2014 addresses mechanical resistance, stability, and serviceability for solid-wood stairs and their components, which is another reminder that a tread dimension is only one input in a structural check.
Material Choices for Thicker Treads
The material affects more than appearance. It changes the tread's weight, movement, stiffness, finish requirements, connection details, and tolerance for moisture. A good selection begins with the unsupported span and works outward to the visual finish.
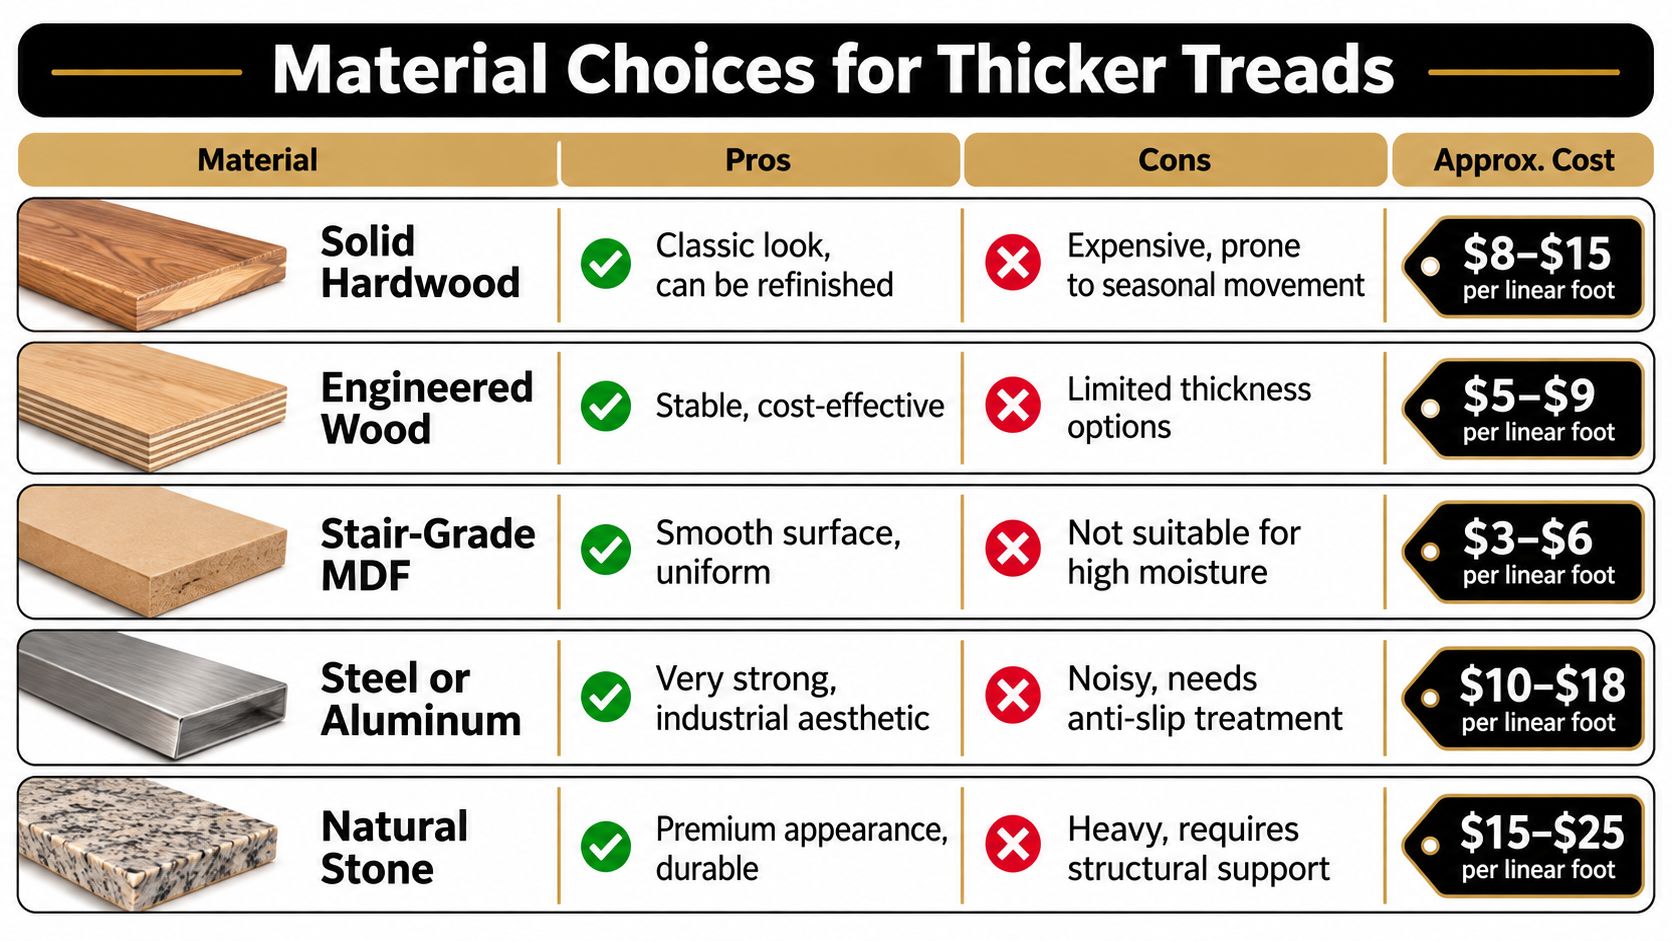
Solid hardwood
Solid hardwood gives the most traditional stair experience. Oak, maple, walnut, and similar species can be shaped, stained, repaired, and refinished. The grain direction should run along the tread depth where the design requires the board to resist bending between supports.
The limitation is movement. Solid wood responds to changes in moisture, so wide pieces need room to move and careful sealing on exposed faces and end grain. Species strength also varies, and a thick board doesn't eliminate the need to check its span.
Engineered wood
Thick plywood, laminated veneer lumber, and glulam assemblies can provide more predictable behavior than a single wide solid board. Their layered construction helps distribute movement and can make it easier to build a deep section with consistent dimensions.
The trade-off is visual. Exposed edges may require a hardwood face, veneer, or carefully finished lamination. The supporting system also needs to accommodate the assembly's weight and fastening requirements.
Stone and concrete
Stone creates a premium, permanent appearance, but it introduces substantial dead load. The supporting structure must be designed for that weight, and the substrate must remain stable enough to prevent cracking.
Concrete treads can work in feature stairs with a suitable steel frame or reinforced structure. They're less forgiving during remodeling because thickness, weight, reinforcement, edge protection, and lifting access all need to be coordinated before installation.
Steel and aluminum
Metal treads suit industrial interiors and can span efficiently when formed or reinforced correctly. Steel can feel rigid, but it can also transmit sound and become slippery without an appropriate surface treatment. Aluminum reduces weight compared with steel, though its finish and stiffness must match the intended use.
A metal tread may be the right answer when the structure already relies on a steel frame. It may be the wrong answer when the project depends on the warmth and quiet feel of wood.
Choose by system, not by material label
Ask what the material must bridge, how it will be supported, and how it will be finished. A beautiful hardwood tread can fail to meet the design need if the span is excessive. A laminated assembly may perform better structurally but require more work to achieve the desired edge.
The most useful material comparison is therefore practical:
- Solid hardwood: Warm appearance, repairable finish, but movement and species strength require attention.
- Engineered wood: Stable and adaptable, though exposed edges may need additional treatment.
- Stone or concrete: Durable and visually substantial, but heavy and demanding on the supporting structure.
- Steel or aluminum: Strong and architectural, with sound, slip, and finish considerations.
Span, Stringers, and Riser Design
The structural question is not “How thick should my tread be?” It's “How far must the tread span, and what supports carry the load?” A tread that crosses a short distance between closely spaced stringers has a different job from one attached to two distant side supports on an open staircase.
Common guidance calls for stringers about every 30 inches for 1⅛-inch treads and every 31 inches for 1½-inch treads, while Canadian guidance specifies at least 25 mm actual thickness for lumber, plywood, or OSB treads in dwelling units, increasing to 38 mm when open risers are used and stringer spacing exceeds 750 mm. The IRC 2024 stairway guidance summary provides those support and thickness references.
A practical reference matrix
The table below is a planning aid, not a substitute for structural design. “Typical” means a starting point for discussion with the stair builder, engineer, or building official. It doesn't certify a particular tread, species, fastener, or connection.
| Tread thickness | Typical span or stringer spacing | Riser type | Stair width | Notes |
|---|---|---|---|---|
| 1 inch | Closely supported span | Closed risers | Narrow to moderate | Verify actual thickness after finishing and confirm deflection |
| 1¼ inches | Moderate support spacing | Closed or partially open | Moderate | Use species, grain direction, and fastener design to confirm performance |
| 1½ inches | About 31-inch stringer spacing as common guidance | Closed or open | Moderate | A plank profile, but support and connections still control performance |
| 1½ inches or more | Wider or more exposed span | Open risers | Wider stairs | Treat as a structural feature stair and verify the entire support system |
| 2 inches | Project-specific span | Open risers or floating configuration | Any width | Thickness may improve stiffness, but it cannot compensate for inadequate framing |
The matrix helps separate two ideas that are often confused. A thicker tread may allow a longer span, but it doesn't automatically authorize a longer span. The stringers, brackets, wall anchors, and connections must carry the resulting loads without excessive deflection or movement.
Closed and open risers behave differently
Closed risers can tie the stair together and help maintain consistent geometry. They don't remove the need for correctly sized treads, but they can make the stair behave more like a connected assembly.
Open risers expose the underside and place more attention on each individual tread and its connections. Canadian guidance increases the minimum actual tread thickness to 38 mm under the stated open-riser and wider-spacing condition, which illustrates how support conditions change the requirement. A floating or wall-mounted tread can demand even more careful verification because the concealed bracket and wall connection carry a large part of the load path.
Width increases the structural conversation
IS 1634:1992 uses 1.2 m as a residential stair-width reference for its 32 mm minimum finished tread thickness, with thickness potentially increasing above that width. Australian guidance likewise increases its recommended thickness as internally supported stair width increases. The recurring principle is straightforward: more unsupported width means more opportunity for bending and vibration.
For a detailed layout discussion that connects open stair proportions with railing choices, review this guide to stairs design for houses. Before fabrication, verify deflection, creep, grain direction, screw withdrawal, bracket capacity, and the strength of the supporting wall or stringer.
Thick Treads and Walking Safety
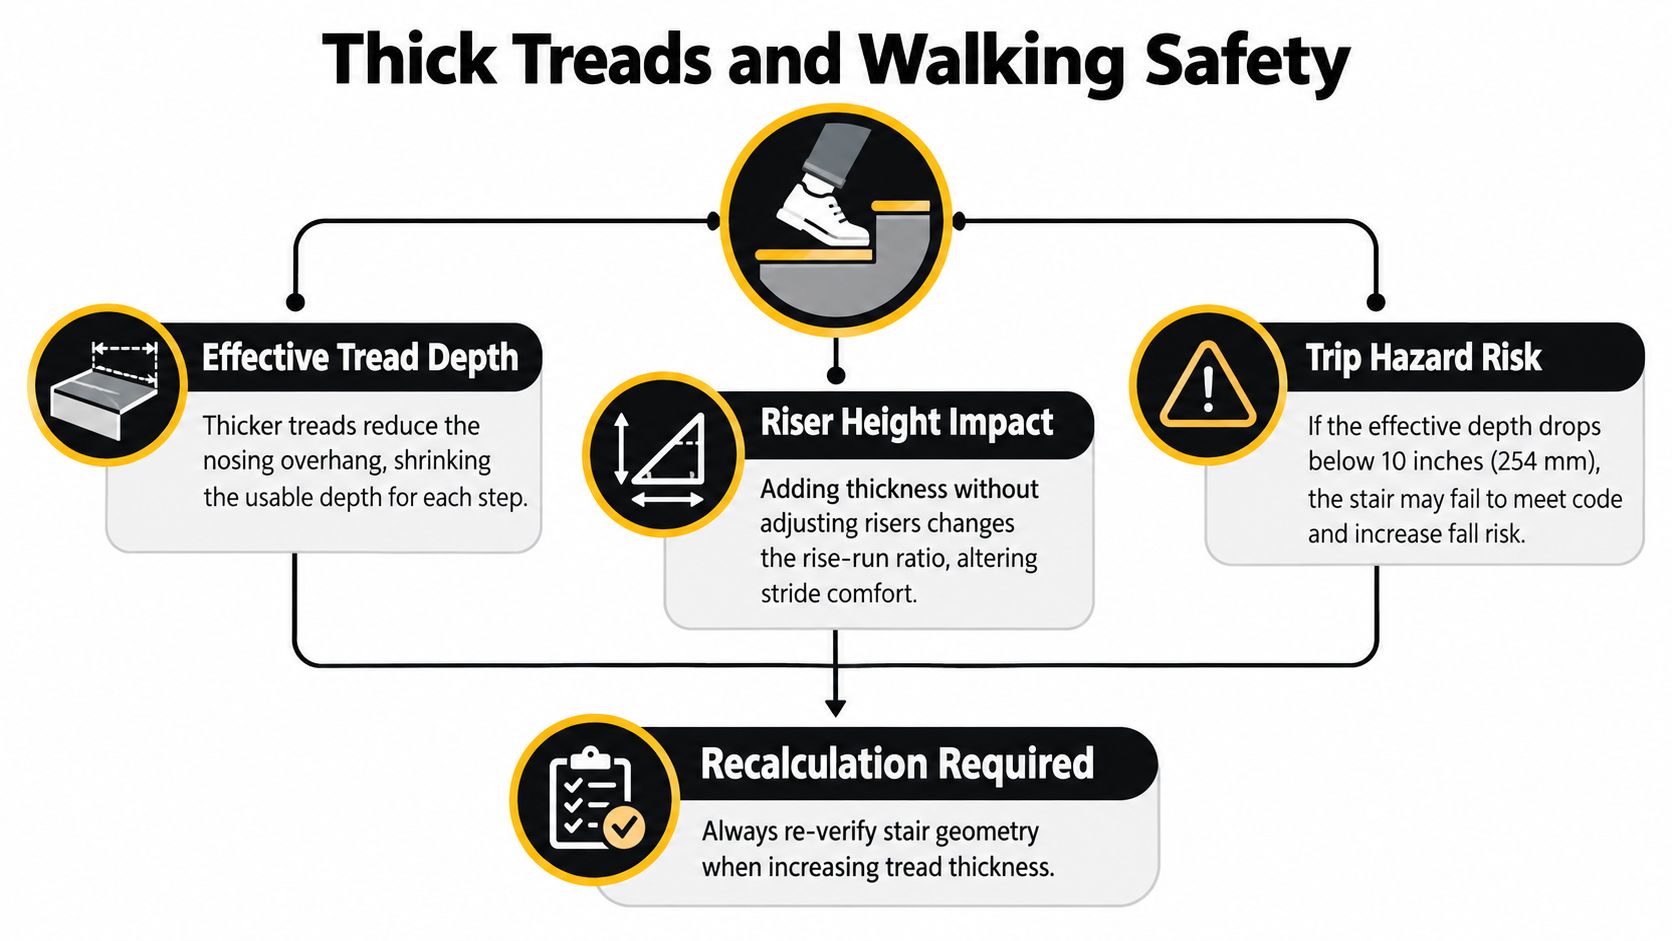
A thicker tread can make a staircase less safe if the installer changes the geometry without checking the finished dimensions. The useful walking surface is not always the full board depth. Effective tread depth subtracts the nosing overhang from the nominal dimension, so a new thick tread can reduce the usable run when it's placed over an existing stair layout.
A study of work-related stair falls found lower incidence on stairs with effective risers no greater than 7 inches and effective treads at least 11 inches, and associated nosing projections greater than 11/16 inch with higher incidence rates. Those findings are summarized in this stair measurement guidance.
How a remodel changes the run
Suppose an existing tread ends at a particular nosing line. You install a thicker board without moving the riser or adjusting the overhang. The top surface may move forward or backward relative to the riser, changing the effective depth. If the replacement also changes the front edge, the walking pattern can feel different even when the nominal stair dimensions appear unchanged.
Before cutting material, check:
- Existing rise: Measure from one finished walking surface to the next.
- New tread thickness: Include the finished board, adhesive, and any layer beneath it.
- Nosing projection: Measure the part that extends beyond the riser face.
- Effective depth: Subtract the nosing projection from the tread depth according to the adopted local method.
- Consistency: Confirm that every step follows the same finished geometry.
The top landing and bottom transition deserve the same attention. A thick replacement tread can create a height change at a doorway, landing, or finished floor. That small transition may become a trip point if it isn't resolved with the riser layout or adjacent flooring.
Consistency matters more than visual mass
People climb stairs using rhythm and repetition. A staircase with uniform rises and usable treads can feel predictable, while one with a single altered step can catch the foot. That's why a thick tread shouldn't be selected independently of the risers.
For open-riser layouts, the relationship between the visible gaps and the walking surface also affects perception. The design can look light and contemporary, but the open-tread stair design guide should be treated as an architectural reference, not a replacement for local code review and geometry checks.
Pairing Thick Treads with Modern Railings
A thick tread beside a slim railing can look calm and modern, but the pairing only works when both parts share the same support plan. Homeowners often judge this choice by appearance first. Builders have to read it like a load path. The tread is the walking surface and often part of the railing attachment zone, so thickness, post location, stringer position, and blocking need to agree before anyone drills a finished board.
The visual contrast is still useful. A 1½-inch plank profile paired with a narrow black metal handrail gives the stair some mass without making the whole run feel heavy. Glass, cable, and slim metal infill keep sightlines open, while the tread edge carries the warmth. The result feels balanced when the tread profile, post shape, and handrail finish belong to the same design family.
The railing changes the job of the tread.
A surface-mounted post pushes lateral force into the tread and then into its fasteners and support below. A fascia-mounted post shifts more of that force toward the stair side or adjacent structure. Neither method is automatically better. The right choice depends on how much material the tread provides, where the post lands, and whether there is real support under that connection rather than trim or empty space.
Mounting by tread thickness
A 1-inch tread gives you less room for deep fasteners, concealed hardware, and safe edge distances. In practice, that can mean adding blocking below, moving the post to the side, or using a separate structural member to carry railing loads.
A 1½-inch tread offers more flexibility, but it is not an unlimited anchor block. Post base size, screw length, washers or plates, and distance to the front and side edges still matter. Wood near an edge can split or crush if the connection is crowded.
A 2-inch tread often looks substantial enough to hold anything. That assumption causes problems. Extra thickness at the top does not fix weak stringers, poor blocking, shallow fasteners, or a connection driven into weak end grain. The stair works like a chain. The post, tread, support, and framing all need enough strength for the system to behave as one piece.
Keep the railing system coordinated
Choose the railing after the tread support layout is known. Post locations should land over a stringer, bracket, blocking, or wall support whenever possible. Mark those spots during dry fitting so the finished tread is drilled once, not corrected after the finish is applied.
If you want examples of how slim profiles pair with heavier wood sections, see this guide to contemporary railings for interior stairs. A supplier such as Ultra Modern Rails can also pre-plan stair sections, mounting styles, handrail lengths, and wood-top options so post spacing and attachment points are coordinated before fabrication.
Local approval still matters. Guard height, handrail continuity, opening limits, and attachment details vary by jurisdiction and by stair type. A minimalist railing needs the same careful support plan as the tread beneath it.
Installation and Finishing Recommendations
Treat installation as a controlled sequence. Thick stock is expensive to replace, and a small layout error can affect every visible edge.
Prepare the material
Acclimate the tread material to the installation environment according to the supplier's instructions. Check each piece for cupping, twist, cracks, loose knots, and inconsistent thickness. Mark the finished face, front edge, grain direction, and stringer locations before machining.
Dry-fit every tread. Confirm the riser relationship, nosing line, side gaps, wall conditions, and railing post locations before applying adhesive or drilling holes. If the tread will be trimmed, measure again after the cut because the remaining edge may become the thinnest structural point.
Fasten the assembly
Mechanical fasteners, structural adhesive, and concealed clips each solve different problems. Screws provide a direct mechanical connection and can be plugged or counterbored. Adhesive can reduce squeaks and distribute contact, but it must be compatible with the materials and shouldn't be used as a substitute for framing. Concealed systems protect the visible face, though they require accurate support locations and access for installation.
Seal exposed end grain before final finishing. It absorbs moisture more readily than the broad face and can contribute to movement if left unprotected.
Finish in the right order
Sand progressively without rounding the nosing unevenly. Ease sharp corners consistently, then remove dust before applying oil, hardwax, conversion varnish, or another compatible finish. Test the finish on an offcut, especially when the tread combines solid wood with a veneered or engineered section.
Protect the finished surfaces while the rest of the renovation continues. Railing installation, drywall work, painting, and flooring can leave grit or impact marks on exposed tread edges.
Verification Checklist and Next Steps
Take this checklist to the jobsite:
- Thickness: Is the finished thickness measured at the thinnest structural point?
- Span: Is the unsupported distance documented?
- Stringers: Are spacing and size confirmed?
- Risers: Are they closed, partially open, or open?
- Width: Does the stair exceed the width used by the applicable guidance?
- Effective run: Has the usable tread depth been recalculated?
- Rises: Are all finished risers consistent?
- Nosing: Is the projection uniform and appropriate?
- Connections: Are fasteners and brackets designed for the support material?
- Railing: Will posts attach to the tread, stringer, fascia, or wall?
- Finish: Are movement, end grain, and surface protection addressed?
- Approval: Has the local building official or qualified designer reviewed the configuration?
A structural engineer or experienced stair professional should verify deflection, connection capacity, wall or stringer strength, and any permit requirements. Request drawings and a quote, confirm that the selected railing system fits the tread and stair module, and schedule a site measure before cutting material.
Bring your tread thickness, support spacing, and railing layout to Ultra Modern Rails for a coordinated stair railing specification. Visit Ultra Modern Rails to request a custom quote and drawing, then confirm the mounting details before your stair material is fabricated.