

You've got the posts on the deck, the cable kit is open, and the first run looks straightforward. Then you reach a corner or stair section and realize the cable won't follow the same path as the level run. That's where many DIY installations go wrong. The most common failure isn't the crimper or the tensioning tool. It's cutting cable before the complete railing geometry has been measured and understood.
For a reliable cable deck railing how-to, slow down before drilling, ordering, or crimping. Plan each run, anchor every post to real framing, keep the finished openings compliant, and tension the system in a controlled sequence. The clean appearance comes from careful preparation, not from rushing through the visible parts.
Table of Contents
- Planning Your Deck Cable Railing Project
- Gathering Tools and Materials
- Installing Posts and Ensuring Structural Support
- Threading and Tensioning Cables
- Finishing Touches and Code Compliance
- Essential Tips for Long-Term Success
Planning Your Deck Cable Railing Project
A homeowner often starts by measuring the outside edge of the deck, ordering a railing kit, and assuming every section will be a simple rectangle. That approach can work on a straight level run, but it breaks down at corners, angled posts, and stairs. A stair cable run has a different slope, different terminal points, and often a different handrail arrangement.
Start with a sketch of the entire project. Draw each level section and stair section separately, then record the run length, stair angle, finished guard or handrail height, and mounting-surface type. The measurement for an angled run is taken between the actual end posts that receive the tensioning hardware. Don't add a correction just because the run is angled. The measured terminal-to-terminal distance becomes the cable length when the selected system specifies that method, as described in this cable railing installation guide.
Practical rule: Measure the installed post geometry, not the drawing you intended to build.
Before ordering materials, mark the location of every end, corner, and intermediate post. Check whether each post lands over a rim joist, blocking, or another structural member. If a post location only lands on decking, stop and resolve the framing before you finalize the railing layout. A railing post transfers force into the deck, so the measurement plan and structural plan have to agree.
Local code comes before the product order. The residential guard-height and railing requirements generally call for a guard at least 36 inches high where a deck is more than 30 inches above the ground, with cable openings smaller than 4 inches. Local authorities can amend those requirements, and commercial or multifamily work may fall under a different code classification.
Use a deck railing calculator as a planning aid, not as a substitute for checking the finished geometry. Before cutting, confirm the terminal posts, cable path, hole line, handrail relationship, and mounting surface for every run. Ordering extra cable is also sensible for a project with several sections, but the exact amount should follow the kit manufacturer's recommendation rather than replace accurate measurement.
Gathering Tools and Materials
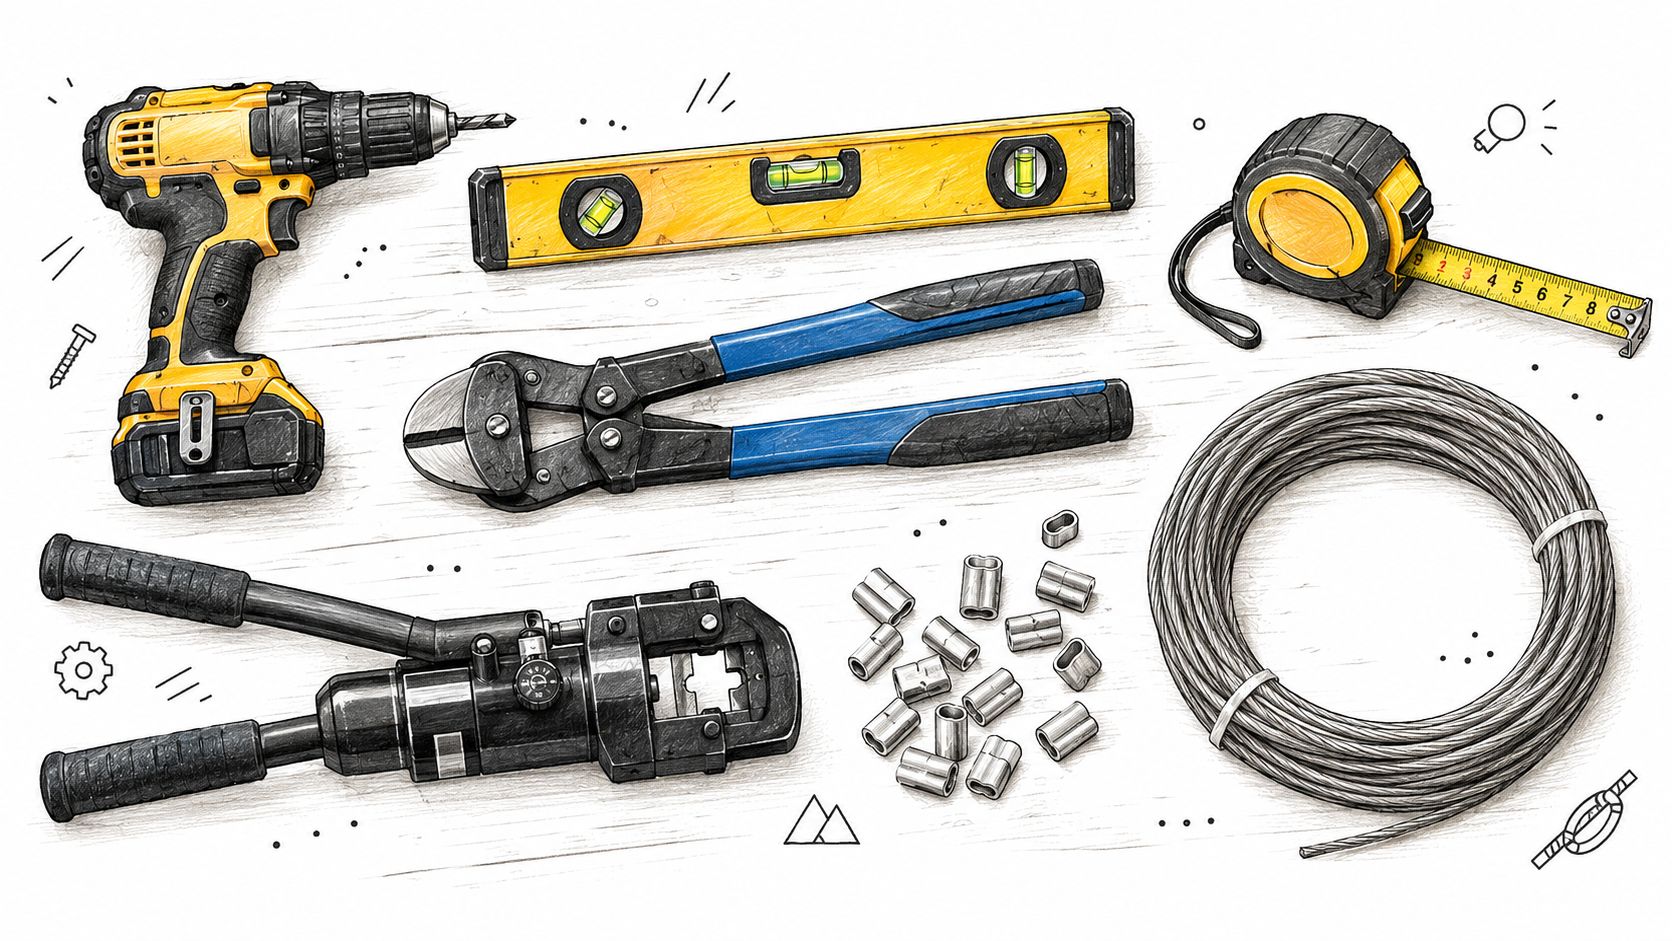
The right tools make cable railing more predictable. A basic installation usually calls for a drill and suitable bits, a level, a tape measure, a string line, a marking pencil, cable cutters, a crimping tool, and the tensioning equipment specified by the railing manufacturer. Some systems use a hydraulic tensioning tool, while others use a supplied wrench or threaded tensioning fitting. Use the tool designed for the fitting. Improvising with pliers can damage the cable or produce an unreliable crimp.
You'll also need stainless-steel cable, end fittings, cable stops, crimping sleeves, tensioning screws, post hardware, and a top rail or handrail. Many kits include pre-drilled posts, mounting bolts, and compatible hardware, but contents vary. Open the package and compare it with the installation documentation before you start drilling. Missing fittings discovered halfway through a run can turn a clean installation into a stalled project.
Match the hardware to the environment
Marine-grade 316 stainless steel is a sensible choice where the railing faces salt air, pool chemicals, or demanding outdoor exposure. Stainless components still need compatible hardware and clean handling. Cutting debris, chloride-containing cleaners, and contact with dissimilar metals can affect the finish and accelerate staining.
Check the local requirements before purchasing the kit. The railing must be sized and connected for the project classification, not just selected for appearance. A commonly cited residential baseline calls for the posts, top rail, anchors, and cable infill to transfer a 200-pound concentrated load at the top rail and a 50-pound horizontal load over a 1-square-foot area, as outlined in this stair and guard guidance. That is why a level, drill, and proper connection hardware matter as much as the cable itself.
Installing Posts and Ensuring Structural Support
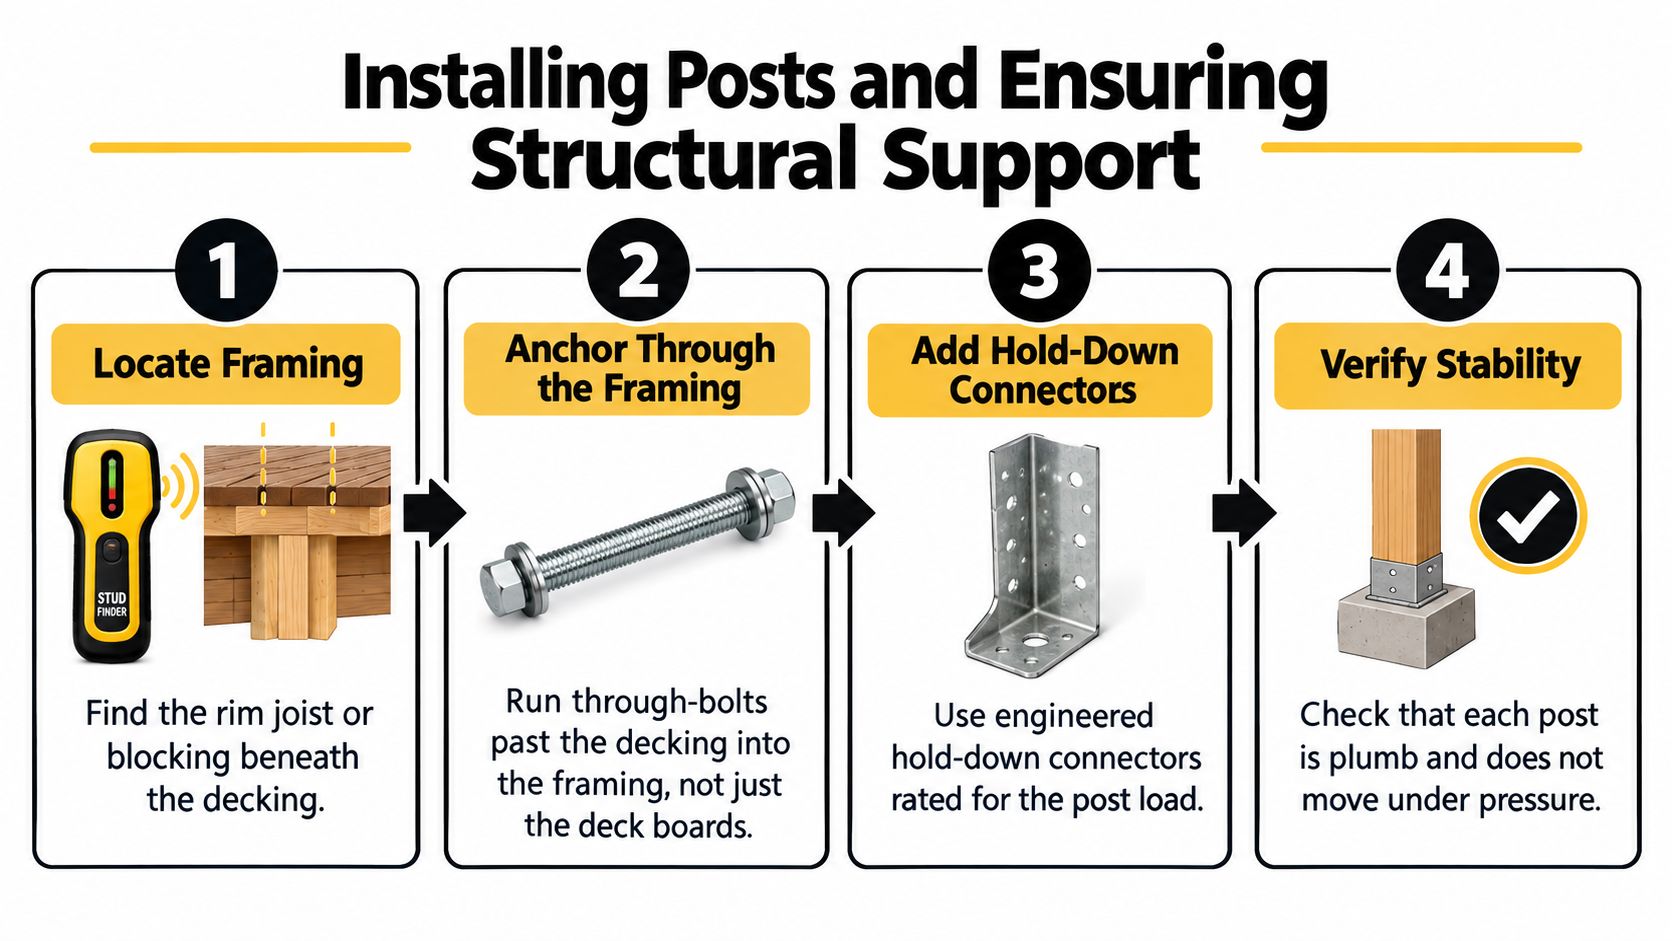
A post can look perfectly secure before the cables are tensioned. Once tension is applied, a weak connection may let the post lean, shift its fittings, or flex the deck edge. Cable railing posts transfer that force into the deck framing, so their position and attachment determine how the finished system behaves.
Start by locating the rim joist and any blocking. Establish the post line with a string, mark every position, then compare those marks with the framing beneath the deck surface. End and corner posts carry the combined pull from multiple cable runs and need particular attention. Use through-bolts or engineered hold-down connections when the system and framing call for them. Deck screws driven only into boards or thin fascia do not provide the same structural connection.
Before drilling, use this guide to mounting railing posts to a deck to compare mounting methods, then match the connection to the framing you have. If a marked post falls where there is no adequate support, install properly designed blocking or change the layout. Do not solve the problem with longer screws alone.
Keep the post line and hole line consistent
Intermediate posts are commonly set about 4 feet on center to limit cable deflection. Some installation guidance permits spacing up to 5 feet, while a wood-post guide sets an absolute maximum of 60 inches and recommends 4-foot spacing to reduce movement. The cable railing installation instructions outline these limits. Use the selected system's stricter requirement where they differ.
Check every post for plumb in both directions immediately after fastening it. A consistent jig or template keeps each cable hole aligned with the next post. One misplaced post changes the run length. A post that angles away from the cable path can bend the cable route or load the fitting sideways, creating problems during tensioning.
Threading and Tensioning Cables
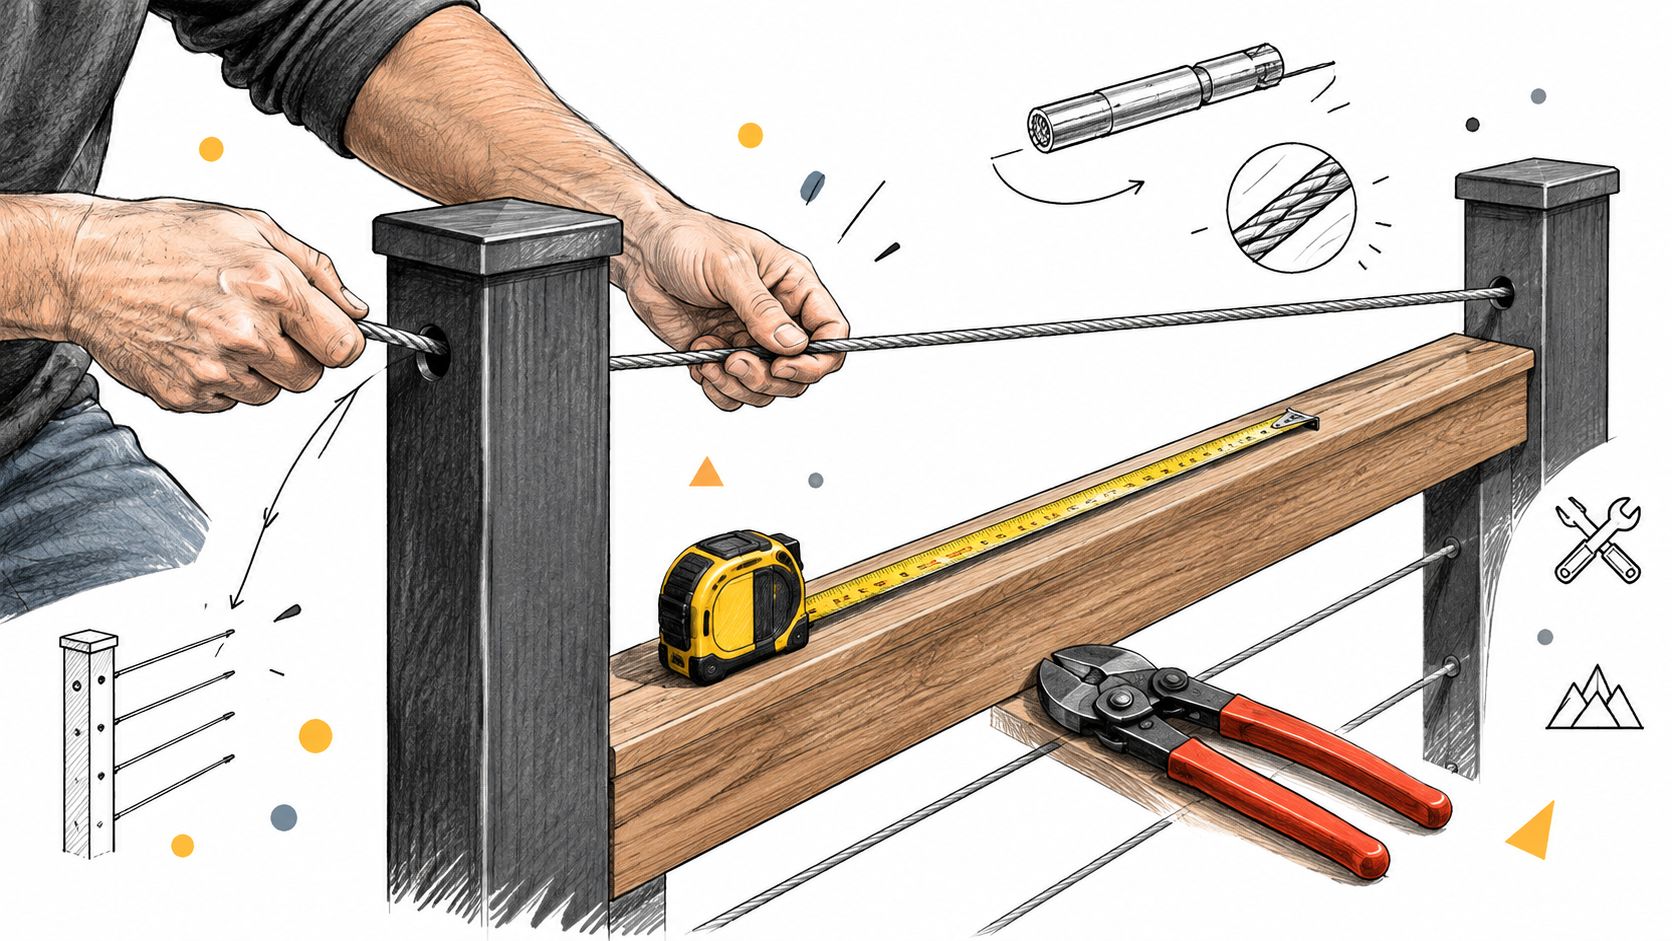
This is the point where accurate measurement pays off. For each run, identify the two terminal posts, confirm the cable path through every intermediate post, and measure between the fittings that will receive the cable. Don't cut from a rough outside-to-outside deck measurement. Once cable is cut and crimped, a mistaken length usually means replacing the cable or relocating hardware.
The fitting sequence matters. Insert the cable through the fitting, secure it with the cable stop, and crimp the sleeve twice before attaching the tensioning screw, following the product instructions. Keep the cut end clean and fully seated. A poorly positioned cable stop or incomplete crimp can allow the fitting to shift when tension is applied.
Tension in a controlled sequence
Don't fully tighten the first cable and then work upward. That can pull end posts out of alignment and make later cables difficult to tension evenly. Start near the center of the cable field, then work outward while alternating between opposite sides of the railing. This spreads the load and lets you see whether the posts are staying plumb.
After the first tensioning cycle, check the cable gaps, post alignment, and fittings. A cable can settle slightly as the system equalizes. Correct obvious movement before continuing rather than hoping the final screw adjustment will hide it.
The cable railing tightening guide can help you compare the sequence with your selected hardware. The goal isn't maximum tightness. The goal is a stable, properly aligned system without excessive force that bends posts or damages fittings.
A final tension check belongs after the system has equilibrated. Inspect for visible sag, loose fittings, post deflection, and changes in the spacing at the top and bottom of each run. Stair runs deserve the same attention as level runs because their angled geometry can make a small layout error more noticeable.
Finishing Touches and Code Compliance
A cable guard can protect the open side of a stair without serving as a graspable handrail. Install the top rail or handrail after the posts are stable and the cable layout is confirmed. For accessible stair projects, confirm whether handrails are required on both sides and whether they must continue along the full flight. The gripping surface is commonly 34 to 38 inches above the stair nosings. Check the applicable local requirements using this accessible stair guidance before treating a guard as a handrail.
Measure the finished clear openings after tensioning. The 4-inch sphere rule applies between cables and at boundaries such as the handrail, deck surface, posts, and nearby structures. Loading can shift cable position slightly, so a consistent hole pattern alone does not prove compliance.
Cable holes are commonly spaced approximately 3 1/8 inches on center to allow for cable diameter and installation tolerance, according to this 4-inch sphere compliance guide. Use that spacing as a starting layout, then test the completed railing. Sloped stair runs and uneven surfaces can create a larger opening even when the drilled pattern appears uniform.
Inspect the details people miss
Walk the full railing and check each point:
- Guard height: Measure from the finished walking surface to the finished guard top.
- Opening boundaries: Test the bottom cable, top cable, posts, deck surface, and nearby walls.
- Hardware alignment: Look for tilted fittings, loose fasteners, damaged threads, and cable ends that have not seated correctly.
- Handrail function: Confirm that required handrails are continuous and graspable.
- Post stability: Apply firm hand pressure. Investigate movement rather than hiding it with more cable tension.
Small finishing errors can create a failed inspection or a railing that feels unsafe in use.
Rinse stainless steel with fresh water after installation, particularly when dust or residue remains. In coastal or chlorinated-pool environments, use an approved stainless-steel cleaner or passivation product when appropriate. Avoid chloride-containing cleaners and abrasive methods that scratch the protective surface.
Essential Tips for Long-Term Success
The installation usually succeeds or fails before the first cable is cut. Sketch every run, identify the terminal posts, confirm angled and stair geometry, and verify the framing behind each post. If the measurement feels uncertain, stop there. A careful layout is cheaper than replacing a cable after an incorrect crimp.
Use the tools intended for the system, especially the cutter, crimper, and tensioning device. Tension progressively, alternate sides, and recheck post plumbness and cable spacing after the first cycle. The railing should settle into alignment rather than being forced into place with excessive tension.
Cable railing needs inspection, not just installation.
At follow-up inspections, look at cable tension, fitting alignment, post movement, fasteners, and finished openings. Seasonal movement and thermal cycling can change the relationship between posts and fittings. “100% stainless steel” doesn't mean maintenance-free. Fresh-water rinsing and approved stainless-steel cleaning products are recommended, while harsh environments may require more frequent cleaning and protective treatment, according to this stainless-steel cable railing maintenance guidance.
If the deck framing, local code, stair classification, or guard loads are unclear, bring in a qualified contractor, engineer, or building official before drilling. A professional review at the planning stage can prevent a structurally weak installation and a costly rebuild.
Ultra Modern Rails supplies custom stainless-steel cable railing systems for decks, balconies, stairs, patios, pools, and commercial spaces, with options for sections, handrails, mounting styles, and wood tops. Visit Ultra Modern Rails to request a custom quote and drawing, then use your measured layout to get a system that fits the actual project.