

The cable is already threaded through the posts. The tensioner is ready, the handrail is in place, and one stainless-steel ferrule is waiting to become the connection that holds the entire run. Many installations go wrong right here. The ferrule may look simple, but a single incomplete press, mismatched die, or contaminated fitting can turn a finished-looking railing into a termination that slips, cracks, or corrodes later.
Learning how to crimp stainless steel cable means treating the job as a verification task, not a final squeeze. The cable, ferrule, swager, die, tail length, compression sequence, gauge check, and inspection plan all belong to one tested assembly. The practical guidance below applies to single-layer, round-strand stainless wire rope of grade 1570, but your selected railing manufacturer's dimensions and instructions always control.
Table of Contents
- Why a Crimp Is the Part of the Railing You Cannot Fake
- Tools, Ferrules, and Cable Specs You Need to Gather
- The Crimping Procedure From Cable Cut to Final Crimp
- Hand Swager vs Hydraulic Press and What Strength to Plan For
- Stainless Is Not Maintenance-Free, Inspecting Crimp Health Over Time
- Troubleshooting the Crimp That Did Not Work
- A Field Checklist Before You Call the Railing Done
Why a Crimp Is the Part of the Railing You Cannot Fake
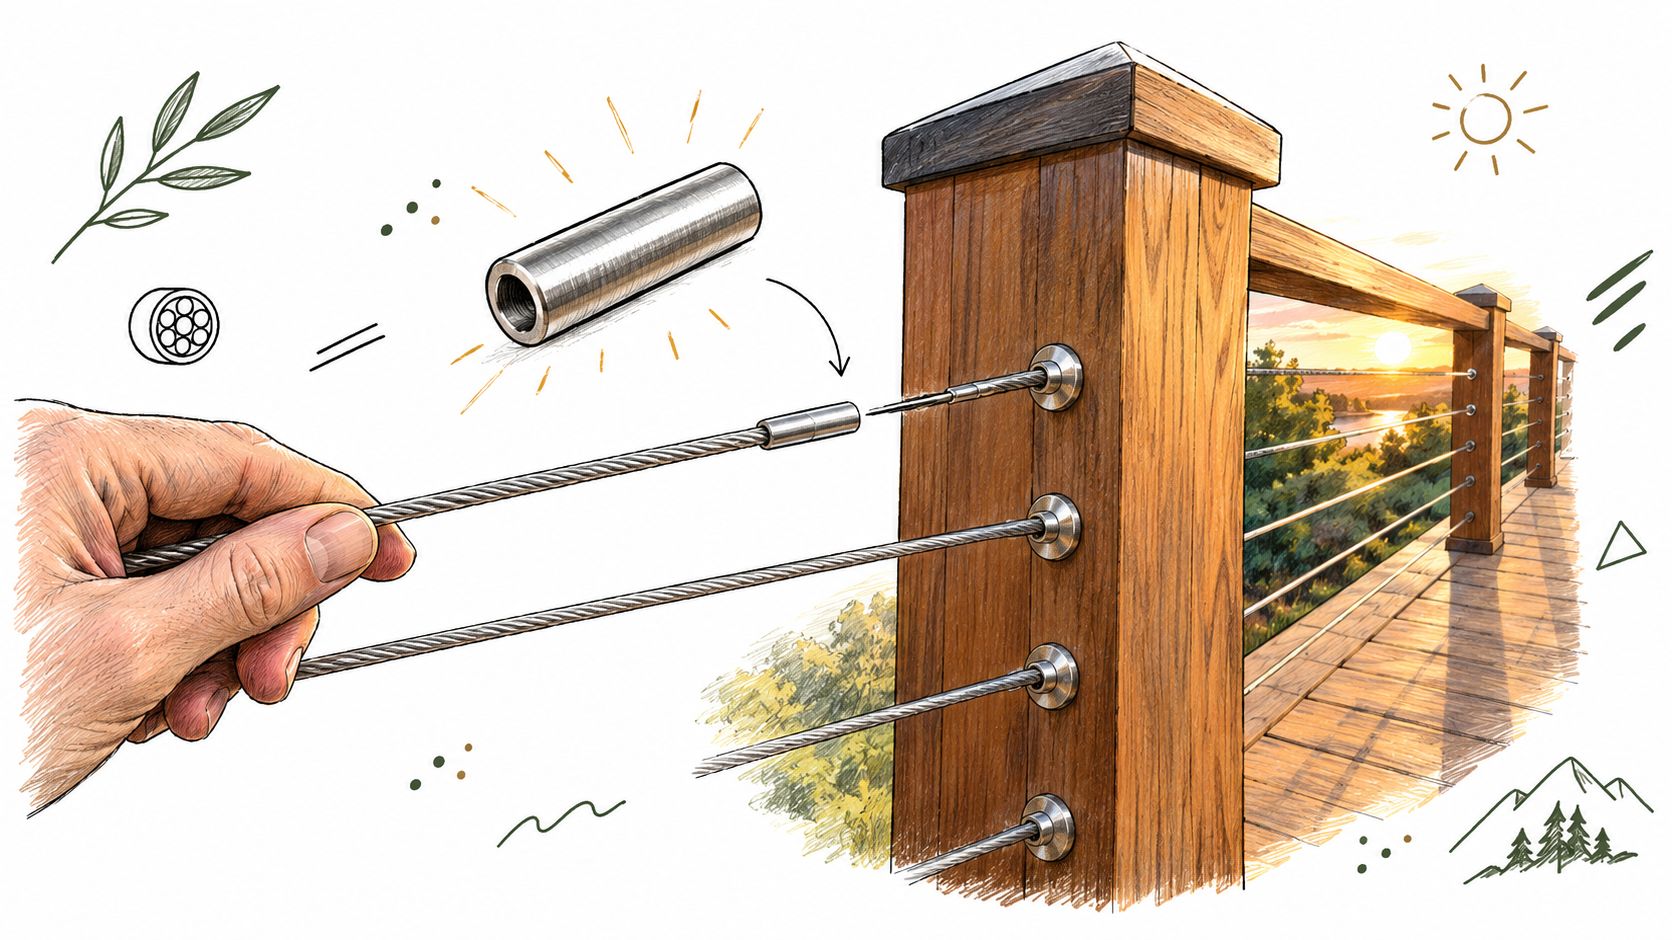
A cable railing can look complete before the termination has proved anything. The posts are aligned, the cable runs cleanly through the intermediate spacers, and the tension feels right in your hand. Then you reach the end of the run, form the loop, and compress the ferrule. That small sleeve becomes the load-bearing joint between the cable and the post.
A ferrule doesn't strengthen a poorly prepared cable. It holds the cable by controlled plastic deformation, which means the sleeve must be the correct material and size, the cable must engage far enough inside it, and the swager must compress the fitting in the prescribed locations. A one-time squeeze in the middle can flatten the copper while leaving an uncompressed path at the cable exit.
Practical rule: A crimp that looks neat is only a finished shape. A safe termination is a matched, measured, inspected assembly.
The installation details matter even before the tool touches the ferrule. Published ferrule guidance calls for the cable to pass through the fitting with at least one cable diameter protruding beyond it, then specifies pressing from the tail end with the full jaw width, rotating the ferrule 90 degrees, and repeating the sequence to spread deformation around the fitting. See the stainless-steel ferrule installation guidance for the procedure and its limitations.
A railing owner usually notices failure in one of two ways. The cable develops slack after tensioning, or the ferrule shows movement, staining, a crack, or damaged strands. Neither condition should be solved by just tightening the cable harder. If the attachment has slipped or corroded, the correct response is to remove the termination and reterminate it with the specified components.
For a useful overview of compatible components and connection styles, review this guide to stainless-steel cable-railing hardware. The hardware choice and the termination method should be planned together, particularly on stairs, balconies, pool edges, and commercial sites where access for later repairs may be difficult.
Tools, Ferrules, and Cable Specs You Need to Gather
A sleeve that fits over the cable can still be the wrong sleeve. Identify the cable's exact diameter, construction, and alloy before choosing a ferrule or die. Copper ferrules are intended for stainless-steel wire, while aluminum ferrules are intended for galvanized wire and are unsuitable for stainless cable, as explained in the ferrule selection reference.
Build the kit around the complete termination:
- Dedicated cable cutters: Make a square cut while keeping the strands compact. Side cutters can spread or crush the rope.
- Matched copper ferrules: Use the sleeve specified for the cable diameter and construction. A ferrule that accepts 3 mm cable is not automatically suitable for a different strand construction.
- A compatible hand swager or hydraulic press: The tool must accept the specified die and deliver the compression sequence required for that ferrule.
- A matched go/no-go gauge: Use one where the system specifies it. A neat-looking sleeve can still be oversized or under-compressed.
- A thimble or terminal fitting: Include it when the design requires a formed eye or protected loop.
- A file or deburring tool: Remove sharp burrs without shortening the required tail.
- Eye protection and gloves: Cut stainless strands can be sharp, springy, and difficult to control.
Keep the cable, sleeve, and tooling from one tested assembly whenever possible. A cable from one supplier, a ferrule from another, and a die chosen by appearance may produce a clean-looking crimp without the intended holding performance. The cable-rail hardware guide is useful for organizing compatible components, but the cable or ferrule manufacturer's installation sheet controls the final choice.
Matching cable diameter to ferrule and die
| Cable Diameter | Ferrule Size | Swager Die | Typical Use |
|---|---|---|---|
| 3 mm | Manufacturer-specified copper ferrule for 3 mm cable | The specified hand-swager opening, such as a 2 mm tool hole in the cited procedure | Light architectural railing runs where the system allows this cable |
| 4 mm | Manufacturer-specified copper ferrule for 4 mm cable | Matched die specified for that ferrule and cable construction | Residential decks, stairs, and balcony sections |
| 5 mm | Manufacturer-specified copper ferrule for 5 mm cable | Matched die or hydraulic tooling specified by the system | Longer, heavier, or commercial railing assemblies |
The table is a planning aid, not a substitution chart. One cited hand-swaging procedure uses a tool opening one nominal size below the cable diameter, so a 3 mm cable uses a 2 mm tool hole in that procedure. Do not extend that proportion to 4 mm or 5 mm cable without the selected system's instructions. Record the cable, ferrule, die, and gauge as a set before making the cut.
The Crimping Procedure From Cable Cut to Final Crimp
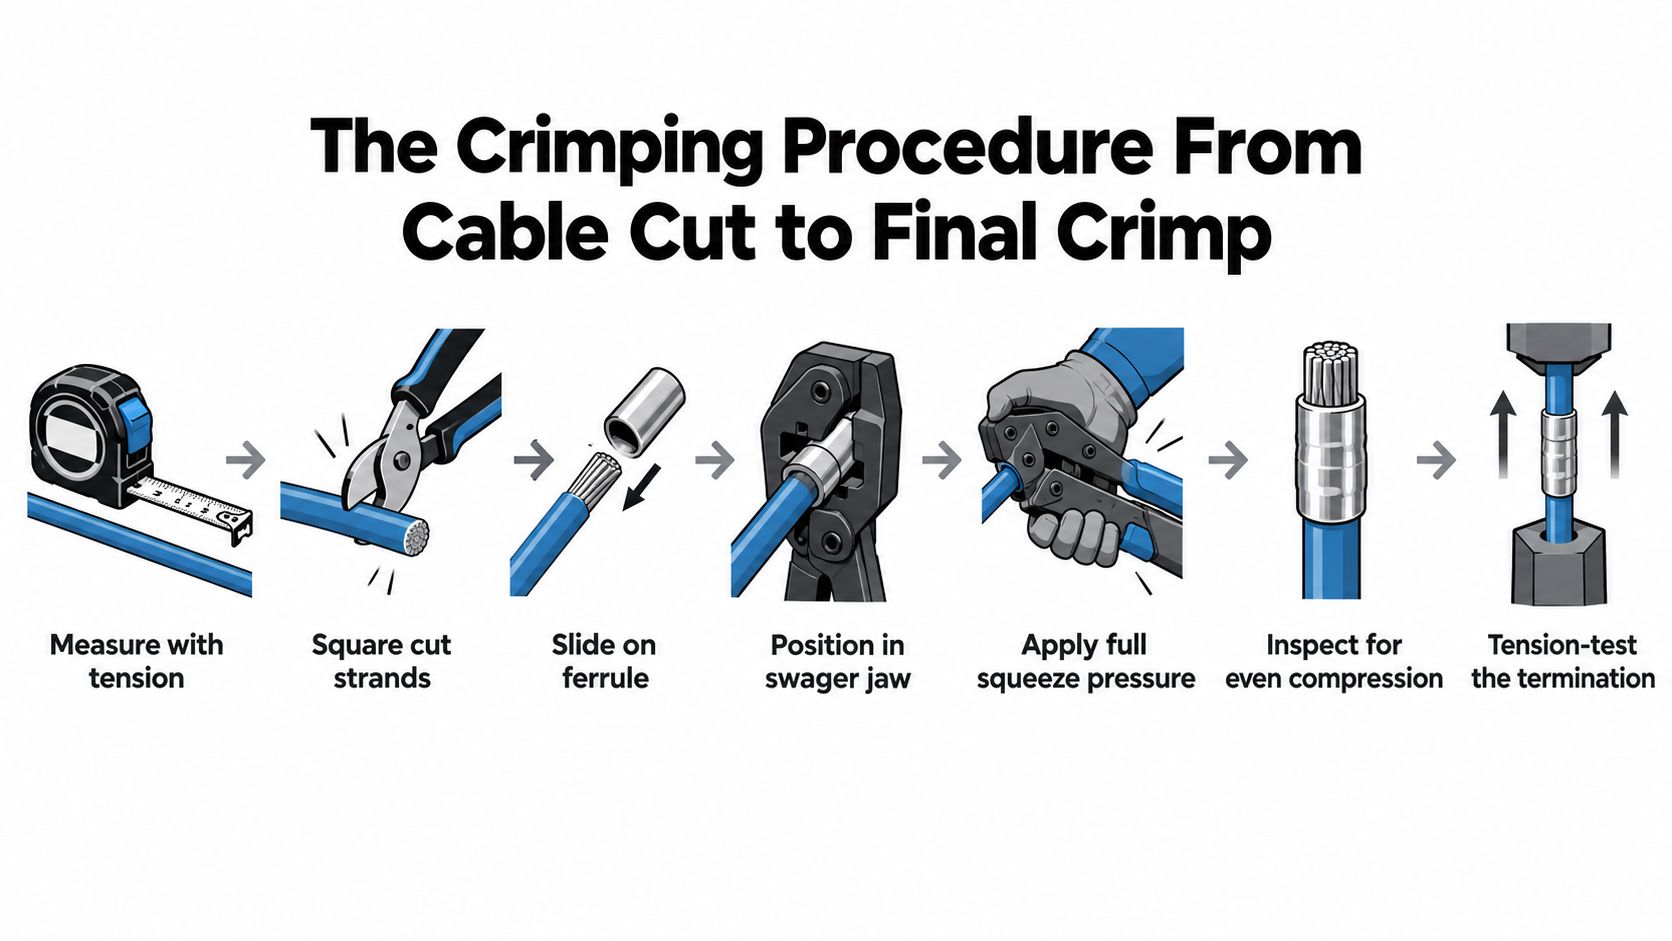
Measure the run with the finished tensioning arrangement in mind. Leave enough cable for the specified loop, thimble, fitting, and tail. The manufacturer's required tail length takes priority over a convenient cut mark, because shortening the tail after the cable has been formed can leave inadequate engagement inside the sleeve.
Make a square cut with a dedicated cable cutter. Keep the strands compact as you bring the cut end to the ferrule, then pass the cable through the sleeve and around the specified thimble or terminal. Where the fitting design requires a loop, return the tail through the ferrule. Set the sleeve and thimble so the strands don't cross, the thimble sits fully in the eye, and the cable exits in a straight line.
Before pressing, confirm the tail projects beyond the ferrule by the required amount. The published ferrule procedure calls for at least one cable diameter beyond the fitting, but your selected railing system may require a different documented dimension. Don't guess, and don't trim a tail merely because it looks untidy.
Place the sleeve in the correct jaw with the full width of the tool engaged. Begin compression at the tail end, then follow the specified sequence along the ferrule. Rotate the fitting 90 degrees before repeating the pressing sequence. That rotation distributes deformation around the sleeve instead of creating one flattened strip and leaving the opposite side relatively loose.
The number and position of compressions depend on the sleeve and tool. Use the manufacturer's sequence rather than copying a pattern from a different ferrule. A long sleeve may require several presses, while another fitting may use a different die geometry altogether.
After releasing the tool, inspect the complete termination before tensioning. Look for cracks, severe fins, uneven compression, a shifted thimble, misalignment, damaged strands, or cable protruding where it shouldn't. Where specified, check the sleeve with the correct go/no-go gauge. The finished sleeve should enter the “go” opening but not the “no-go” opening, according to the termination guidance in EN 13411-8 requirements.
Hand Swager vs Hydraulic Press and What Strength to Plan For
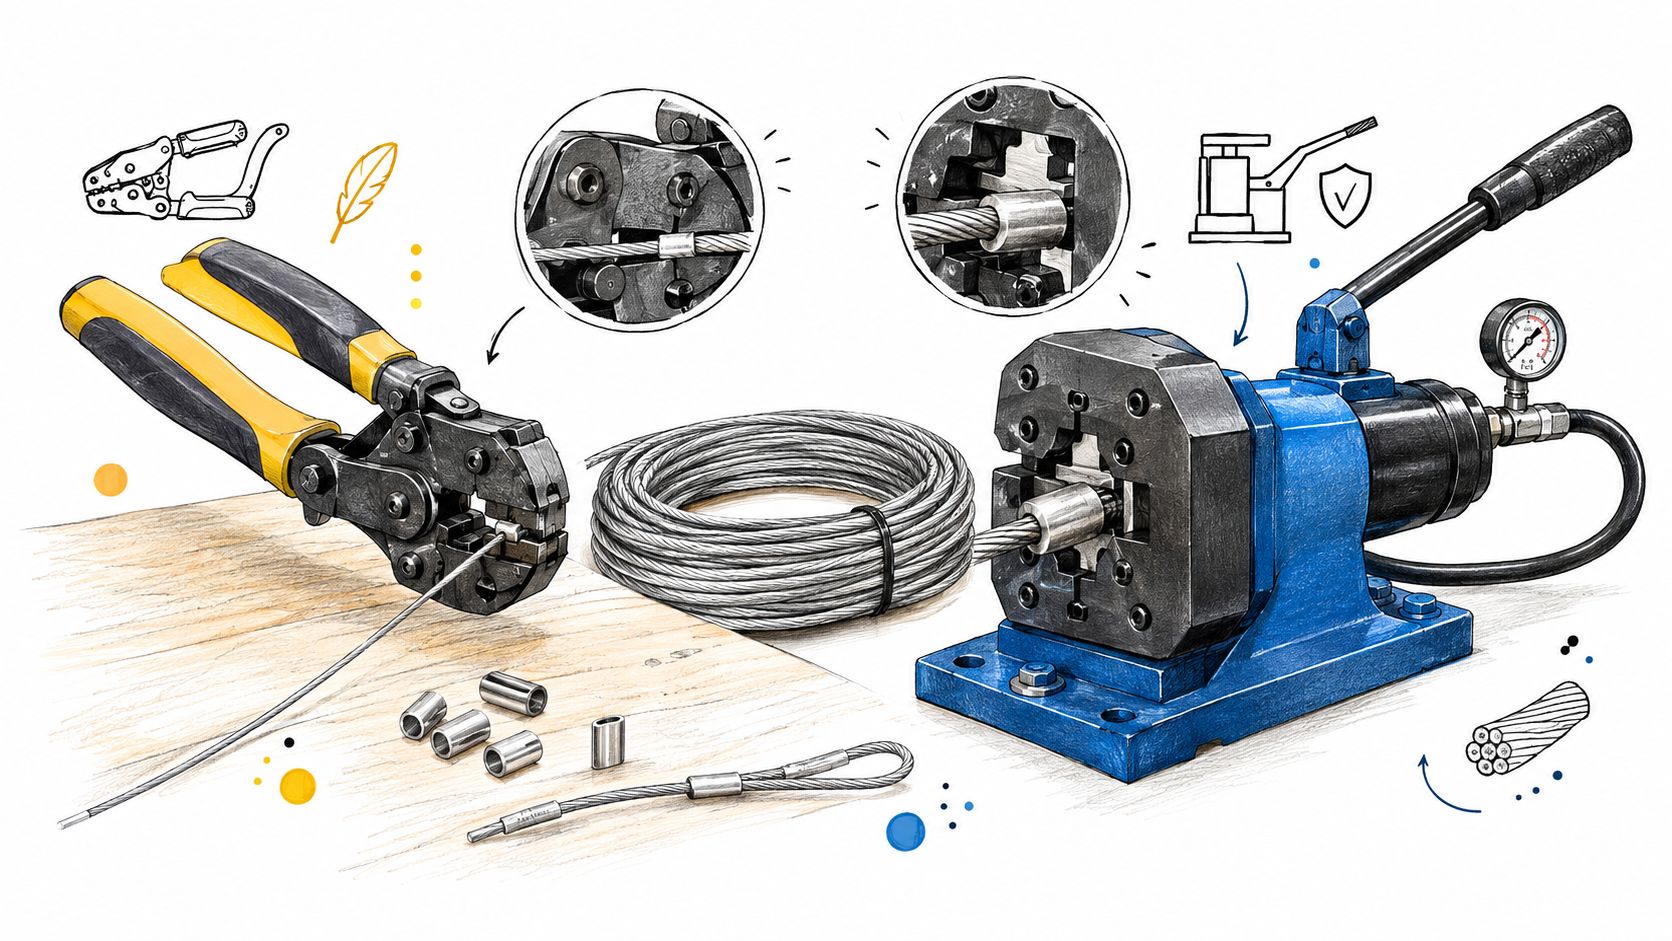
A hand swager suits a limited number of terminations when the cable diameter, ferrule, die, and tool rating all match the manufacturer's specifications. It travels easily and works well for smaller residential jobs. The trade-off is operator fatigue. As the work continues, inconsistent jaw alignment or incomplete compression becomes more likely, even when the sleeve looks acceptable.
A hydraulic press reduces hand strain and improves repeatability on long runs, larger cable, and commercial installations. Force alone does not correct a mismatched die. The wrong die can over-compress the ferrule, damage strands, or leave a sleeve that fails its dimensional check. The tool must match the exact ferrule and cable assembly.
| Situation | Hand swager | Hydraulic press |
|---|---|---|
| Limited residential work | Convenient when specifically approved | Often more equipment than needed |
| Many repeated terminations | Fatigue can affect consistency | Better repeatability with less operator strain |
| Larger cable or heavy sleeve | Use only within the tool rating | Often the more suitable option |
| Code-sensitive commercial work | Requires strict process control | Useful for calibrated, repeatable compression |
Review this practical demonstration before selecting tooling, particularly if your ferrule requires a pressing sequence different from the tool already on hand.
Strength planning requires more than reading the cable's nominal breaking strength. A technical ferrule reference reports that a correctly installed stainless-steel oval-ferrule termination will normally withstand about 90% of the wire rope's minimum breaking load, while stating that holding strength must be established through tension testing. Treat that figure as reference information, not an automatic design capacity. The MSHA termination inspection materials identify slippage, broken wires, corrosion, deformation, wear, and improper installation as conditions requiring attention.
Published guidance places ferrule termination efficiency in an approximate range of 70% to 90%, depending on ferrule material, dimensions, die selection, and the number and position of presses, as summarized in this wire-rope breaking-strength reference. Plan around the capacity of the completed, tested assembly rather than the cable alone. For calibrated tension monitoring on commercial projects, review this cable tension gauge guide. A documented hydraulic setup and inspection record can also make the finished installation easier to assess than an undocumented hand-swaged termination.
Stainless Is Not Maintenance-Free, Inspecting Crimp Health Over Time
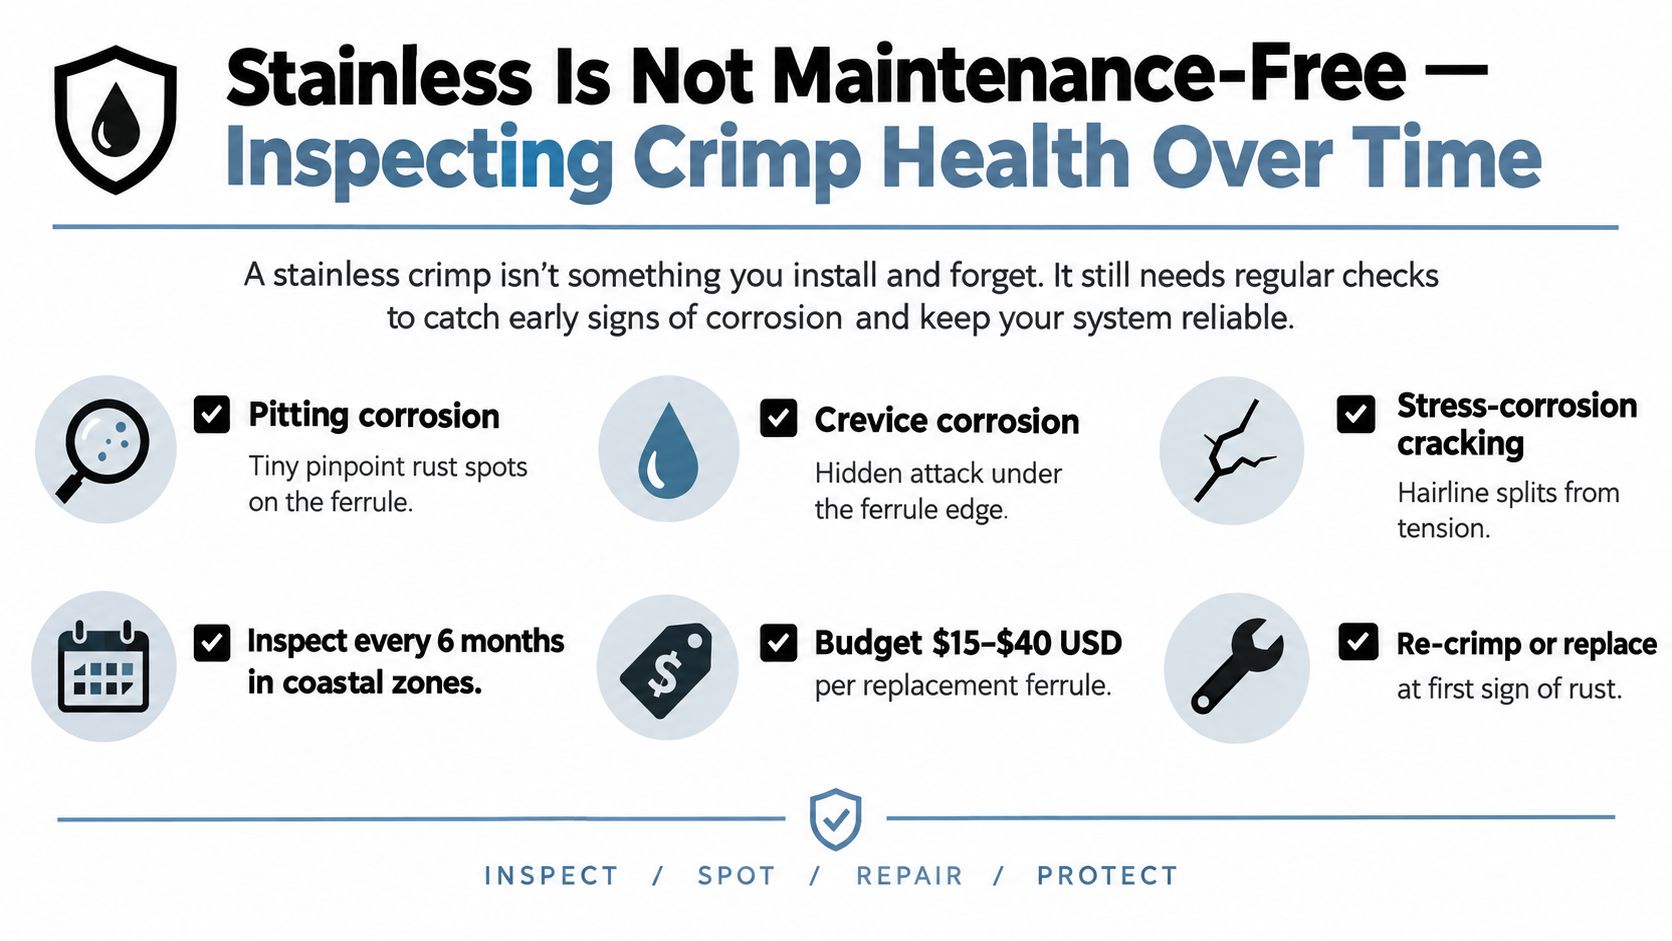
A stainless termination can look perfect on installation day and become the most vulnerable point months later. The ferrule edge creates a crevice, and that crevice can retain salt, pool chemicals, dirty wash water, or moisture. In marine exposure, stainless wire rope is vulnerable to pitting corrosion, crevice corrosion, and stress-corrosion cracking, particularly when the alloy and maintenance plan don't match the environment.
The classification guidance for stainless wire rope recommends stainless wire with a PREN of at least 30 for marine exposure. Nickel Institute guidance cited in the same technical discussion explains that galvanic-corrosion intensity depends on conductivity, oxygen availability, and the relative anode-to-cathode area. It also warns that wet, spooled 304 wire rope can be destroyed by crevice corrosion in under six months, which is a reminder that “stainless” isn't a maintenance category.
Where corrosion starts
A 316 or 316L cable and compatible fittings may be justified over 304 in coastal balconies, pool surrounds, marine-facing decks, and hospitality sites exposed to frequent cleaning. The choice still has to come from the railing manufacturer's tested assembly. Don't pair a higher-alloy cable with an incompatible sleeve, and don't introduce carbon-steel contamination through a dirty tool, abrasive, or wire brush.
Inspect the ferrule edges and cable exits for:
- Tea staining: Brown or bronze discoloration can indicate contamination or early corrosion, not merely a cosmetic defect.
- Pinpoint pitting: Small rust-colored spots may be the visible opening of deeper localized attack.
- Crevice deposits: Salt, residue, and dark buildup around the sleeve edge deserve close inspection.
- Broken or lifted strands: Strand damage near the ferrule can indicate movement, poor preparation, or fatigue.
- Slippage marks: A change in the cable's position relative to the ferrule signals that the attachment may be moving.
Inspect every termination before the railing enters service and during scheduled detailed inspections. A damaged or deteriorated rope should be cut off and reterminated when attachment slippage or corrosion is present. Large commercial installations may eventually supplement visual checks with data-assisted condition monitoring. Recent wire-rope research is applying time-series classification and deep learning to damage detection, but those tools don't replace the manufacturer's inspection and replacement criteria today.
Troubleshooting the Crimp That Did Not Work
A failed crimp is not a place to improvise. Diagnose the symptom, remove the questionable termination when necessary, and use a new ferrule rather than trying to rescue distorted copper.
- The cable pulls through: Check ferrule size, cable engagement, tail length, die selection, and compression sequence. Cut off the ferrule and reterminate with the specified parts. Don't add another squeeze to the same fitting.
- The sleeve is cracked or split: The ferrule was likely over-compressed, misaligned, damaged before pressing, or incompatible with the die. Discard it and investigate the tool setting before making another termination.
- The tail is too short: Don't rely on the sleeve's appearance. If the prescribed tail length isn't present, cut back the cable and form a new termination with adequate engagement.
- The tail is unusually long: Compare it with the manufacturer's requirement. Trim only if the instructions permit it, and don't cut into the engaged portion of the loop.
- The ferrule entered only partway into the die: Stop and reposition it. An off-center press can create uneven deformation and strand damage. If the sleeve has already been pressed unevenly, replace it.
- The thimble shifted: Remove the termination if the thimble no longer supports the eye correctly. Retensioning won't restore a displaced fitting.
- The visual check passes but the gauge fails: Treat the gauge result as the failure. A sleeve that won't enter the “go” opening may be under-compressed, while one that enters the “no-go” opening may be over-compressed. Replace it rather than re-crimping blindly.
- Rust or movement appears later: Take the section out of service as appropriate, cut off the affected termination, and inspect the cable for corrosion or broken wires before reterminating.
The inspection criteria used for safety-sensitive rope terminations include slippage, broken wires, corrosion, deformation, excessive wear, and improper installation. Those conditions call for a corrective action, not a cosmetic cleanup.
A Field Checklist Before You Call the Railing Done
Before the cable railing is placed in service, confirm:
- Matched components: Cable alloy, construction, diameter, copper ferrule, die, and tool belong to the specified assembly.
- Correct preparation: The cable is square-cut, the thimble is seated, strands don't cross, and the required tail length remains.
- Complete compression: The prescribed presses were made from the correct end, with the required rotation and coverage.
- Measured result: The finished sleeve passes the specified go/no-go gauge.
- Visual condition: No cracks, severe fins, uneven deformation, displaced thimble, damaged strands, corrosion, or slippage marks are present.
- System review: Posts, handrail, cable spacing, mounting surfaces, and local code requirements have been checked as one railing system.
- Maintenance plan: Inspection frequency reflects exposure, especially at coastal, pool, balcony, and hospitality installations.
A reliable crimp is one part of a tested railing specification. If you're planning a new system, Ultra Modern Rails offers custom stainless-steel cable railing systems, cable hardware, tensioning components, and installation tools such as hydraulic equipment and wire cutters. Request a custom quote and drawing so the cable, fittings, posts, and termination method are specified together for your deck, balcony, stairs, pool, or commercial project.