

You're standing on the bottom step with a tape measure in one hand and a post bracket in the other. The deck rim looks like the obvious place to start, but it can send the entire stair railing out of alignment. On stairs, the finished railing follows the nosing line, not the deck edge, so a layout that looks sensible from above may produce the wrong height, slope, or return at the bottom.
The reliable way to install deck railing on stairs is to treat the job as a geometry problem first and a fastening job second. Set the stair reference points, confirm the local rules, choose the structural attachment method, and only then drill. That order prevents the most expensive mistake on a stair run, building a clean-looking railing around the wrong measurements.
Table of Contents
- Why Stair Railing Starts Before the First Drill
- Measuring the Stair Run Like a Pro
- Installing Posts, Brackets, and the Handrail
- Code Essentials for Stair Railing
- Anchoring Methods Compared
- Graspability and Real-World Usability
- Pre-Inspection Checklist and Quick Fixes
Why Stair Railing Starts Before the First Drill
The homeowner on the bottom step usually wants to mark the first post immediately. That's where I stop the work and ask one question: where will the railing return? It may terminate into a newel post, a wall, a landing guard, or a separate top post. Until that end condition is known, the bottom post doesn't have a reliable direction to pull from.
Four decisions need to be fixed before any holes are drilled:
- Top termination: Decide whether the rail ends at the upper newel, turns into a landing rail, or continues into a wall-mounted return.
- Bottom termination: Identify the point below the lowest riser where the handrail will finish or return.
- Post side: Choose whether the posts attach to the tread, the stair stringer, or the deck fascia and supporting frame.
- Handrail material: Select the rail profile before laying out brackets, because wood, metal, and cable-compatible systems can use different supports and end treatments.
The common DIY mistake is measuring from the deck rim because it's easy to see and easy to mark. The stair geometry starts lower down. Establish the line connecting the leading edges of the treads, then work upward from that line. The applicable residential guidance places the handrail 34 to 38 inches above the stair tread nosing, measured vertically to the top of the rail, as summarized in this stair railing safety guidance.
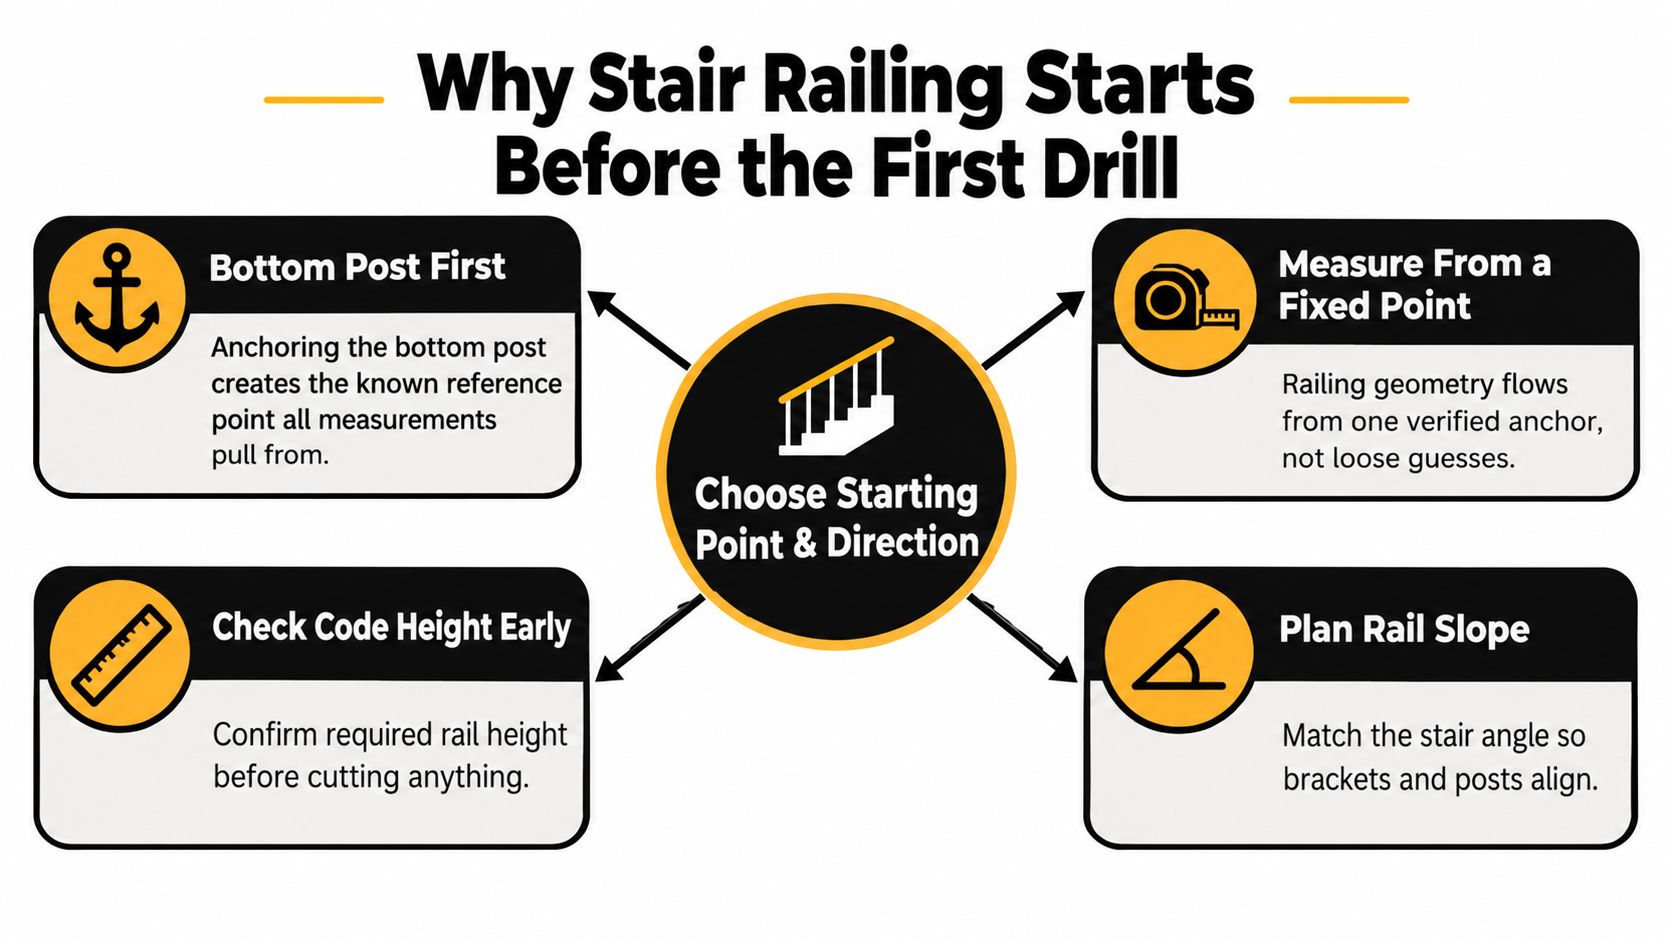
A small error at the bottom can become a visible alignment problem by the landing. Don't rely on an assumed drift amount, though. Snap a reference line, transfer it to the framing, and dry-fit the bottom bracket in its intended position. That bracket tells you whether the rail clears the walking path, whether the post sits over usable framing, and whether the chosen termination will work.
Practical rule: The bottom post is your reference point only after you've confirmed where the rail ends at both ends.
Mark the top and bottom termination points, connect them with the intended rail direction, and compare that line with the stair nosings. If the line doesn't produce the required height at the nosing, change the layout before ordering cuts or fastening hardware. A railing that starts with the wrong reference cannot be rescued by tighter screws.
Measuring the Stair Run Like a Pro
A stair railing job is decided by geometry before the first hole is drilled. The stair's rise, run, nosing line, rail height, post locations, and infill openings must agree as one layout. If you measure each item separately, a small error at the bottom can turn into a visible misalignment at the landing.
Build the measurement chain
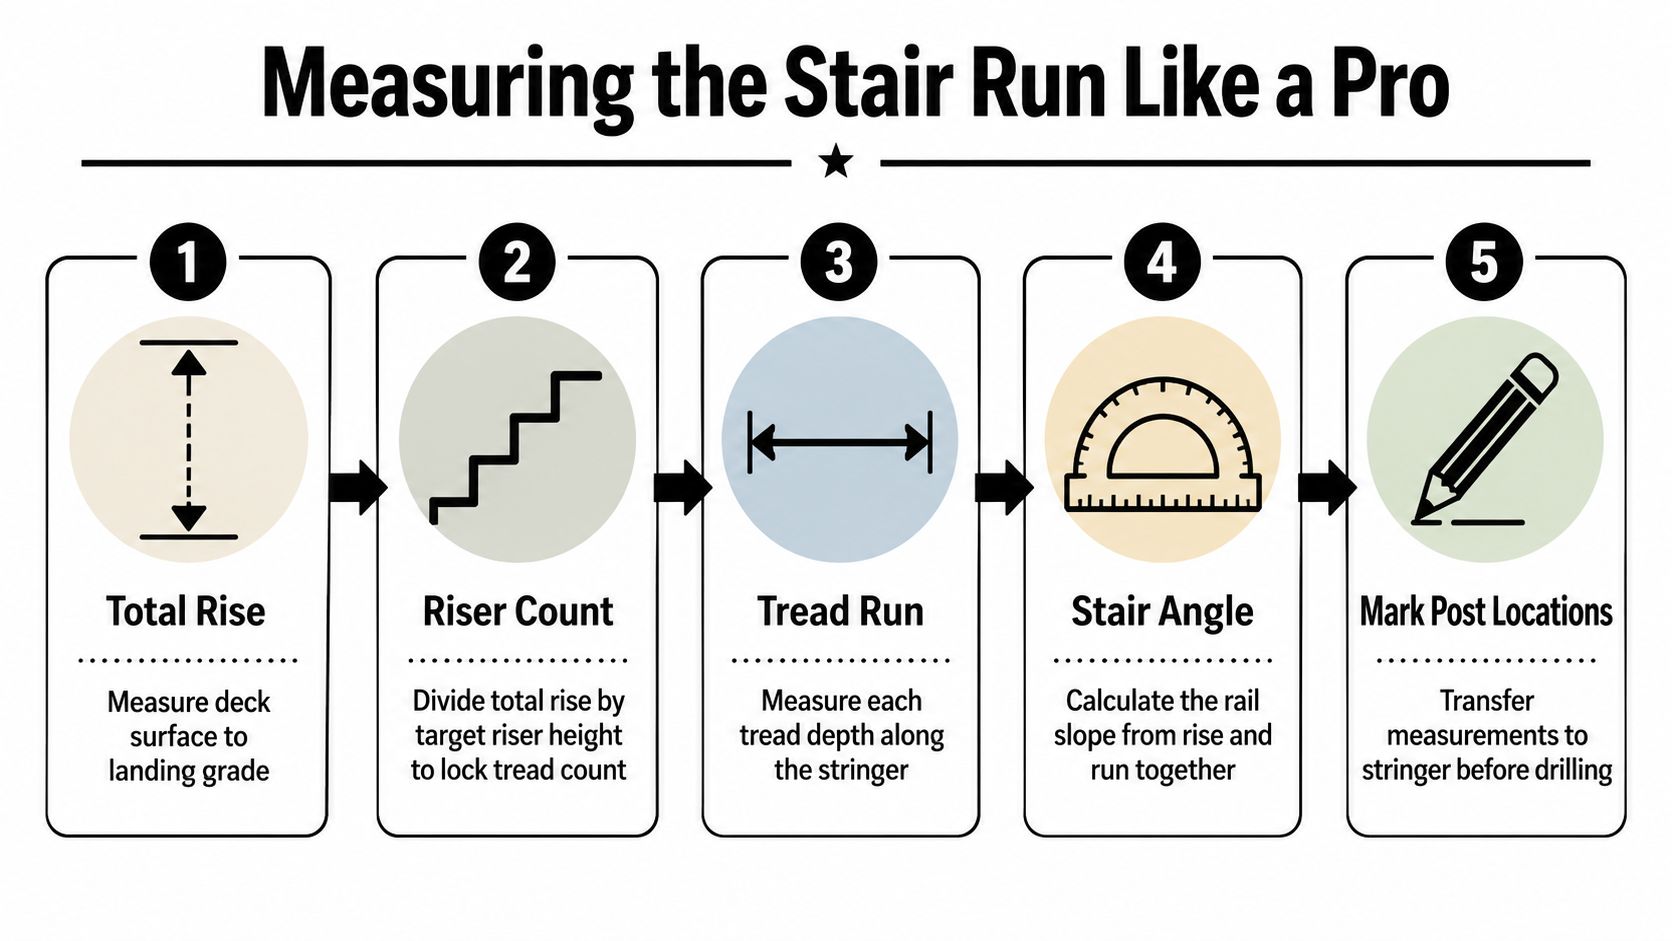
Begin with the finished surfaces. Measure the total rise from the upper deck surface to the lower landing or grade, then count the risers and measure each one. Residential guidance commonly places risers between 4 inches and 7 3/4 inches, with variation within one flight limited to 3/8 inch. Treads are generally expected to provide at least 10 inches of depth, as described in this stair design and railing reference.
The same reference point should guide the rail layout. The applicable handrail range is 34 to 38 inches above the stair tread nosing, measured vertically to the top of the rail. Check local amendments before cutting, since the adopted rule may differ from general residential guidance.
Use this sequence:
- Confirm total rise. Measure from finished surfaces, not rough framing.
- Verify each riser. Unexpected changes in stair height will show up in the rail slope and post positions.
- Locate the nosing line. Stretch a straightedge or use a laser to connect the leading edges of the treads.
- Measure the horizontal run. Record the stair direction, including the actual tread and nosing arrangement.
- Set the rail slope. Use the complete rise and run rather than copying the angle of one tread.
The nosing line controls the vertical handrail measurement. Measure from each tread nose to the top of the rail, not from the deck surface or the underside of the stringer. Mark the line on both sides of the stair so the brackets and posts have a physical reference.
Transfer the slope to the posts
Use a bevel gauge or digital angle finder to transfer the stair angle to the posts, brackets, and handrail cuts. Set the gauge against the nosing line or stringer, then test the angle on scrap before cutting the finished rail. The visible rail slope and the post attachment angle can differ when a post mounts to a horizontal tread or fascia.
Lay out post locations from the verified bottom reference, then check the available infill bays. Cable fittings, balusters, and glass supports need usable spacing that also meets the applicable opening rule. A stair guard's open side may allow a 4 3/8-inch sphere, while the triangular opening between the tread, riser, and bottom rail may allow up to a 6-inch sphere. Flat guards use the 4-inch sphere rule, as explained in this code-compliance explanation of railing openings.
For a project-specific run, a deck railing calculator can organize rise, run, and section measurements. It cannot confirm hidden framing, attachment strength, or local amendments.
A reliable final layout follows one decision sequence: mark every tread nose, draw the nosing line, check the handrail height, confirm whether the rail is being treated as a handrail or guard, and then place posts over solid framing. Check the infill openings before ordering material. Transfer the resulting angle to the brackets and rail ends only after both rail returns are established. The finished surfaces, required heights, and attachment points control the cut.
Installing Posts, Brackets, and the Handrail
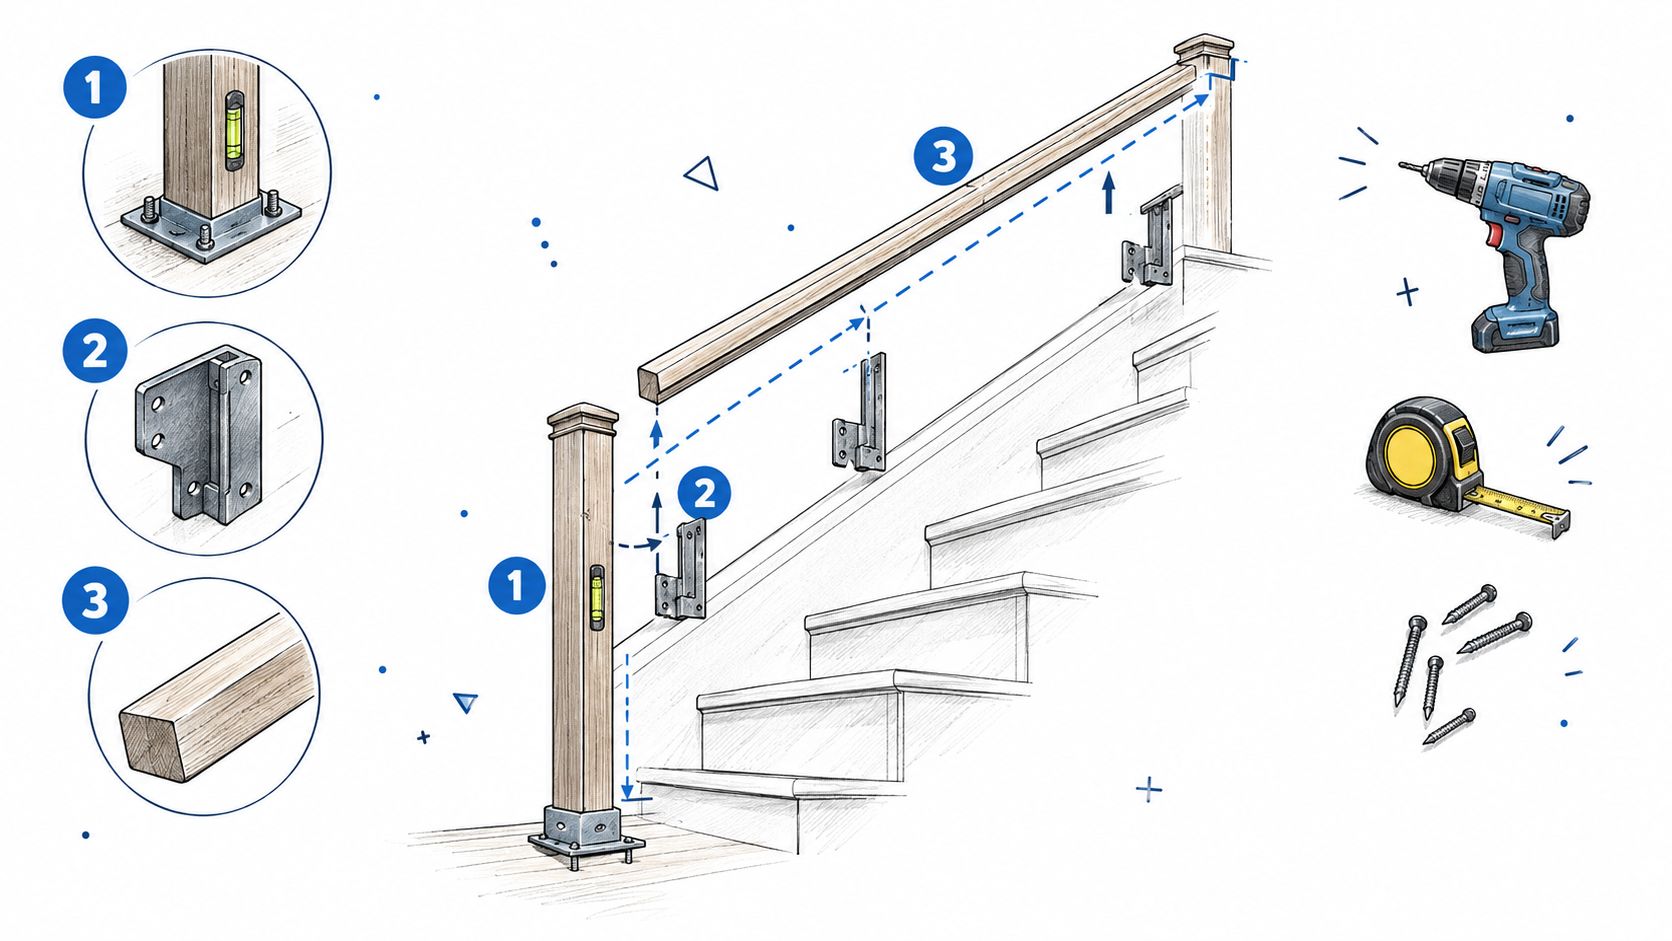
Once the layout is verified, build from known points outward. Install the bottom post first, then the top post, then the handrail, and finally the infill. That sequence gives you repeated opportunities to correct the slope before balusters, cable, or glass restrict access.
Set the structural posts
The bottom post must transfer movement and downward pressure into real framing. On a tread-mounted installation, inspect the tread, the blocking beneath it, and the connection back to the stringer. On a stringer-mounted installation, confirm that the stringer face can accept the connector and that the fastener path won't split the cut member.
A lag screw into thin decking isn't structural support. Where the design calls for a through-bolt, make sure you can reach the rear of the framing, install washers correctly, and tighten the connection without crushing the wood. If the post sits beside the stringer, add or expose blocking that gives the connector a full bearing surface.
The guide to mounting railing posts to a deck is useful for understanding how the selected post base transfers load into the supporting frame. The same principle applies on stairs, but the attachment surface is angled or offset, so the framing must be checked in place.
Install the upper post only after confirming where the rail meets the landing. Use a level on two faces, hold the post at the intended finished height, and mark the bracket or standoff position. Don't fasten the bracket just because the post looks correctly placed. Once the screws are seated, recovering a lost fraction of height may require moving the entire connection.
Dry-fit the rail before fastening
Cut the handrail with the actual stair angle, then test it between the posts. A graspable Type II profile may require a different end cut and support arrangement from a simple rectangular cap, so follow the rail manufacturer's cutting and bracket instructions instead of applying a universal angle allowance.
Clamp the handrail in position and measure vertically from the tread nosing to the top of the rail at the bottom, middle, and top portions of the run. The finished measurements must remain within the required range. If one point is short, stop there. Don't assume the bracket or fastener will pull the rail into compliance.
The best time to find a bad rail angle is while the rail is clamped, not after the infill is installed.
Use the following video as a visual reference for the relationship between posts, brackets, and the stair rail. It should supplement, not replace, the instructions supplied with your specific system.
After the handrail is secure, install the infill. Balusters should follow the established post line, cable fittings should remain accessible for tensioning, and glass or panel systems should be supported by their specified gaskets and connectors. Infill is a finishing component. It shouldn't determine where the structural posts must go.
Code Essentials for Stair Railing
A stair job can look finished and still fail inspection because the rail was laid out as a fastening problem instead of a geometry problem. Before choosing brackets or drilling posts, identify the walking line, the open edge, the surfaces used for each measurement, and the local rules that control the transition onto the deck.
The first distinction is function. A handrail gives a person a grasp while climbing. A guard limits a fall from an open side beside a walking surface. One stair run may require both, especially where it meets a deck landing. Treat the stair rail and deck guard as related parts with different requirements.
For stairs with four or more risers, residential code guidance requires a handrail on at least one side. Measure stair handrail height vertically from the tread nosing to the top of the rail. The finished height must be 34 to 38 inches, as described in this deck stair safety reference. A deck guard is measured from a different surface, commonly the finished deck, so do not extend the stair measurement across the landing without checking the transition.
Use one decision sequence
- Count the risers. Four or more risers trigger the handrail requirement in the cited residential guidance.
- Identify the open edge. Where a person could fall from the stair or landing, check whether a guard is also required.
- Use the correct reference surface. Measure the stair handrail from the tread nosing. Measure a guard from the finished deck or landing surface.
- Check every opening. Apply the applicable sphere test to the flat guard, stair side, and triangular opening.
- Confirm local amendments. The city or state may change guard height, load requirements, nosing treatment, returns, or transition details.
- Collect the documents before buying. Get the adopted code edition, local amendments, permit instructions, inspection checklist, and railing system installation requirements.
Stair geometry affects the rail layout directly. The code family limits the 7 3/4 inches maximum rise, 4 inches minimum rise, and 3/8 inch variation within one flight stated here. Uneven risers create an uneven rail line, inconsistent handrail height, and brackets that do not align cleanly.
Stair railing code at a glance
| Requirement | IRC Minimum | Common Local Tighter Rule | Where It Is Measured |
|---|---|---|---|
| Stair handrail | 34 to 38 inches | Local amendments may alter the adopted requirement | Vertically from tread nosing to top of rail |
| Handrail trigger | At least one side on stairs with four or more risers | Confirm with the local building department | Along the stair run |
| Flat guard opening | Must not pass a 4-inch sphere | Local rules may be more restrictive | Between guard components |
| Stair-side opening | May permit a 4 3/8-inch sphere | Confirm the adopted code and exceptions | Open side of the stair |
| Triangular stair opening | May permit a 6-inch sphere | Local amendments may reduce the opening | Between tread, riser, and bottom rail |
| Hand clearance | At least 1.5 inches from an adjacent surface | Verify local details and return requirements | Between handrail and wall or nearby surface |
Use the table to organize the layout, not to approve the installation. This stair railing requirements guide can help frame the questions, but the authority having jurisdiction controls the final interpretation. If the adopted local rule differs, follow that rule before ordering material or setting post locations.
Anchoring Methods Compared
The right anchoring method depends on where the stair framing gives you a dependable load path. A post can look solid while its fasteners hold only the tread skin, fascia, or a short piece of blocking. Compare the attachment surface before comparing the appearance.
Post to tread
A tread-mounted post places the bottom newel directly on the walking surface. It can work on closed-riser stairs where the tread and blocking connect firmly back to the stringer, but the post occupies space beside the person's foot and can create a trip concern. Some jurisdictions or system instructions won't accept this arrangement for the intended guard or handrail function.
This method is practical when the stair construction is compact and the post base can be fastened through the tread into substantial blocking. It fails when the installer relies on surface screws or can't verify the material below the tread.
Post to stringer
A stringer-mounted post attaches to the side of the cut stringer, normally with a structural connector and through-bolts where the framing permits. It keeps the post outside the walking line and gives the connection a more direct lateral support path.
The trade-off is access. You need enough room to drill accurately through the stringer, install the connector, and fit the washers and nuts. The stringer also needs adequate depth and sound wood around the connection. A decorative side board isn't a substitute for structural framing.
Fascia-side anchoring
Fascia-side anchoring attaches the post to the deck rim joist or fascia so the post runs parallel with the stairs. It usually produces the cleanest sightline and can simplify the rail layout, particularly where the deck frame provides a straight reference.
The load still has to travel into the rim and its backing. Use a connector rated for the intended railing load and verify that the rim is tied into the rest of the deck frame. A bracket fastened only to thin fascia can pass a visual check and still move under pressure.
Choose the method by tracing the load into the framing. Choose the finish only after that path is sound.
Graspability and Real-World Usability
A railing can meet its height measurement and still feel wrong in a person's hand. During a stumble, people don't grab the rail at a perfect angle. They reach quickly, often with one hand, while carrying something or trying to steady another person. The profile needs to provide a reliable grip, not merely occupy the correct space.
Handrails commonly use Type I or Type II graspable profiles. Type I profiles use a smaller, rounder or shaped cross-section that the hand can close around. Type II profiles add finger recesses and are intended to accommodate a broader grasping action. A wide board laid flat may satisfy a height layout while failing the practical grasp test because the fingers can't wrap around it.
Keep the grip continuous
The handrail should provide uninterrupted support through the stair run and return into a wall, post, or approved safety terminal. A rail that stops beside the bottom newel creates a dead end exactly where a person may reach for support while stepping off the stairs.
Maintain at least 1.5 inches of clearance from an adjacent wall or surface, as summarized in this handrail code reference. Check the bracket shape as well. A bulky support can reduce the usable grip even when the measured wall clearance appears correct.
Use these field checks before calling the job complete:
- Close your hand around the rail: You should be able to grip it without pinching your fingers against a bracket.
- Follow the full run: Move your hand from above the upper riser to below the lower riser without losing support.
- Inspect the returns: The rail should finish into a post, wall, or suitable terminal rather than ending as a sharp projecting edge.
- Stand at the landing: Check whether the rail remains easy to see and reach as the stair direction changes.
- Test the material: Bare metal may feel cold or harsh outdoors, while a smooth wood top may offer a warmer touch.
The code minimum is a useful floor, not a usability guarantee. Children, older adults, and people with limited grip strength benefit from a rail that feels secure, remains continuous, and doesn't force the hand into an awkward position.
Pre-Inspection Checklist and Quick Fixes
Do the final inspection from the bottom up. Start with the lowest post and follow the rail to the landing, checking structure before dimensions and dimensions before appearance. This order prevents a polished finish from distracting you from a weak connection.
Walk the installation in sequence
- Check post plumb: Hold a level against two faces of every post and correct movement before testing the rail.
- Inspect the framing: Confirm each structural fastener enters the intended blocking, stringer, rim, or supporting member.
- Look for movement: Push the post and rail steadily in the directions a user would load them. Movement means the connection needs attention.
- Measure handrail height: Measure vertically from the leading edge of the tread nosing to the top of the handrail at the lower, middle, and upper portions.
- Confirm continuity: Follow the graspable surface through every bracket and transition.
- Check returns: Make sure the ends return into the intended post, wall, or terminal.
- Verify clearances: Confirm the hand remains clear of adjacent surfaces and bracket obstructions.
- Inspect fasteners: Look for stripped heads, split wood, missing washers, and connectors that have not seated fully.
- Review the rail slope: Sight along the rail from the bottom and top to catch a twist that a level alone may miss.
- Test openings: Apply the appropriate sphere test around balusters, cable, panels, the bottom rail, and the stair geometry.
- Inspect infill: Confirm every baluster, cable fitting, or panel is seated and supported as the manufacturer requires.
- Compare documents: Match the installed system with the approved plan, local checklist, and product instructions.
Fix the failures that appear most often
The handrail measures short. This usually happens when the installer starts the rail one tread too high or measures from the deck surface. Re-establish the nosing line, mark the required vertical height at several treads, and adjust the post or bracket positions before cutting a replacement rail.
The infill fails at the stair edge. A post placed off the nosing line can create an oversized opening at the bottom rail or between the stair components. Recalculate the opening from the actual tread and riser surfaces, then move the infill support or replace the bottom rail with a layout that satisfies the applicable sphere rule.
The bracket splits or shifts. A bracket lagged into the rim or fascia without adequate backing may look correct but won't provide dependable support. Remove the inadequate fastener, expose the framing, install a structural connector with proper blocking or through-bolting where permitted, and retest the post before reinstalling the finish pieces.
Don't schedule inspection until the rail survives your own hands-on check. A clean stair railing should be straight, firmly anchored, easy to grasp, and measured from the surfaces people use.
Ultra Modern Rails provides custom stainless steel cable railing systems for decks and stairs, with options for stair sections, handrails, mounting styles, and wood tops. Visit Ultra Modern Rails to request a custom quote and drawing for your stair geometry before you order hardware.