

You've finished the deck boards, set the posts, and cut the rails. Then the spindle layout starts looking wrong: the first few gaps seem even, but the last opening at the post is noticeably wider. That's the point where many installations fail, not because the builder can't drive a screw, but because a small layout error has been repeated across the entire run.
Learning how to install deck railing spindles is mostly a measurement and verification job. The saw, drill, and screws matter, but an inspection-proof result comes from controlling every clear opening, keeping the rails aligned, and checking the completed assembly rather than trusting the first mark.
Table of Contents
- Understanding the 4-Inch Sphere Rule
- Measuring and Marking Your Layout
- Cutting and Fitting Different Spindle Types
- Fastening Spindles Correctly
- Avoiding Cumulative Spacing Errors
- Spindles Versus Modern Railing Systems
- Final Inspection and Code Verification
Understanding the 4-Inch Sphere Rule
The 4-inch sphere rule is the controlling constraint for most residential spindle layouts. In many markets, the International Residential Code requires guard openings to prevent a sphere larger than 4 inches from passing through, as explained in this overview of the 4-inch sphere railing rule. It turns a general child-safety requirement into a physical test an inspector can perform on site.
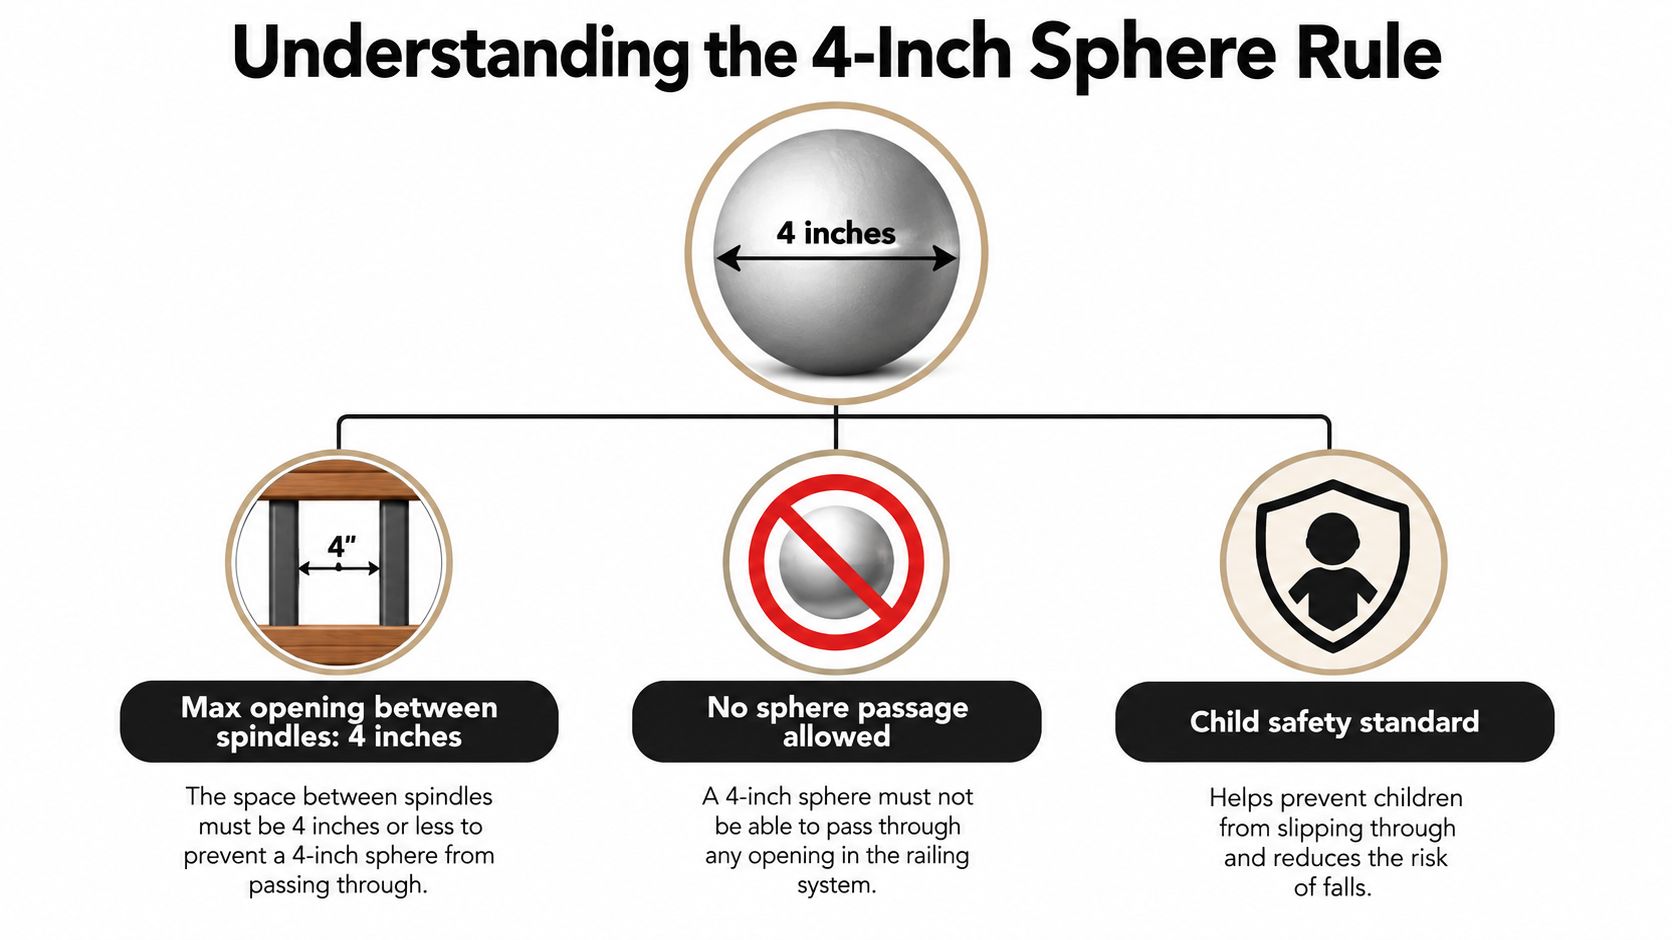
The important detail is that the rule applies to clear openings, not just the number written on a spacing chart. A common 1 1/2-inch square spindle may require roughly 5 1/2 inches center-to-center to leave a clear gap below 4 inches. That's why installers often target approximately 3 1/2 to 3 3/4 inches between balusters, allowing room for material width and field tolerances. The practical layout may vary with the spindle profile, but the clear opening remains the test.
Check every opening in the guard
Don't inspect only the space between two neighboring spindles. Check:
- Spindle to spindle: The obvious gap, measured at the widest relevant point.
- Spindle to post: End gaps are frequent failure points because the layout gets forced to fit the last space.
- Bottom rail to deck surface: A compliant spindle pattern can still fail if the lower opening is too large.
- Post and stair transitions: Changes in geometry can create openings that weren't present on the straight run.
The same logic applies at bottom rails and stair transitions. Level deck guards and stair sections may use different allowances, so confirm the requirements adopted by your local authority before cutting components. A useful reference for the broader requirements is this guide to deck railing code requirements.
Practical rule: Lay out for the smallest clear opening you can verify, not for a center-to-center number you hope will work.
Measuring and Marking Your Layout
Set the rails and posts in their finished positions before taking measurements. Measure the clear span between the inside faces of the posts, not from post centers or outside edges. Record the span at both the top and bottom. Older decks and long exterior runs can vary enough to shift the final opening.
If the system requires matching rails, cut the top and bottom rails to the same length. Place them together on a flat surface and mark one centerline across both rails. Keeping that reference shared prevents the upper and lower spindle holes from drifting out of alignment.
Build the pattern from the center
Dry-lay the spindles or connector points before drilling or fastening. Start at the center mark and work outward in both directions with a spacer block representing the intended clear gap. Centering spreads small adjustments across both ends, rather than leaving one oversized opening beside the final post.
Use this sequence:
- Measure the span. Use the actual clear distance between posts.
- Mark the center. Transfer the same centerline to both rails.
- Position the first spindle. Include its actual width when setting the opening.
- Repeat outward. Place the same spacer block between neighboring spindles.
- Check both ends. Confirm each end space stays within the required limit.
- Transfer marks carefully. Keep the rails oriented the same way so the holes align.
A reusable template can speed the layout, but verify each mark against the finished clear opening. Installers often center the pattern while working from the sphere requirement, as described in this baluster spacing and layout guide. Stair rails require separate care because the rail follows a slope and the permitted opening may differ from a level guard.
Post placement also affects the available span. Before marking spindle locations, verify the post layout against this railing post spacing guide. Do not multiply one interval and assume the remainder will fit. Dry-laying exposes cumulative error while the rails can still be moved, avoiding relocated holes and concealed gaps that may fail inspection.
Cutting and Fitting Different Spindle Types
The material changes the technique, but it doesn't change the need to measure the finished clear opening. Wood spindles can usually be cut with a sharp crosscut blade, while aluminum components need a blade and setup suitable for nonferrous metal. Vinyl and composite pieces should be cut according to the manufacturer's instructions because heat, pressure, or an unsuitable blade can deform the end.
Mark each spindle from a reference end. If the system uses preformed connectors, brackets, or drilled rails, don't shorten the component until you've confirmed how much must remain seated inside the fitting. A clean-looking cut is useless if the spindle bottoms out early or fails to engage the rail fully.
Measure the widest profile
Decorative balusters create a common hidden error. The narrow face may appear to leave a safe gap, while a belly, collar, scroll, or other projecting detail reduces the opening farther along the rail. Measure the widest point of the spindle, and check the gap at the same height where that width occurs.
For wood and pressure-treated lumber, mark the center of each hole with a sharp pencil or awl and drill a pilot hole before driving screws. Pilot drilling reduces splitting, especially near the end of a rail or in hardwood. Keep the drill square to the mounting surface so the fastener doesn't pull the spindle sideways.
Aluminum spindles often fit into supplied holes, shoes, or brackets. Remove burrs after cutting and make sure the spindle is fully seated before offering the top rail. Vinyl and composite parts can require clearance for movement, so follow the system instructions instead of clamping them tightly and assuming rigidity is always better.
Use the same reference face for every spindle. A rotated decorative piece can change the clear opening even when its overall length is correct. If a component doesn't sit flat, stop and correct the rail, connector, or cut rather than tightening a fastener to pull it into position.
Fastening Spindles Correctly
A spindle can be perfectly placed on the bench and still move during fastening. The reliable sequence is to secure the lower connection first, check the spindle for plumb, then make the upper connection while keeping the rail aligned. A helper is valuable when the top rail is long, heavy, or carrying several loose spindles.
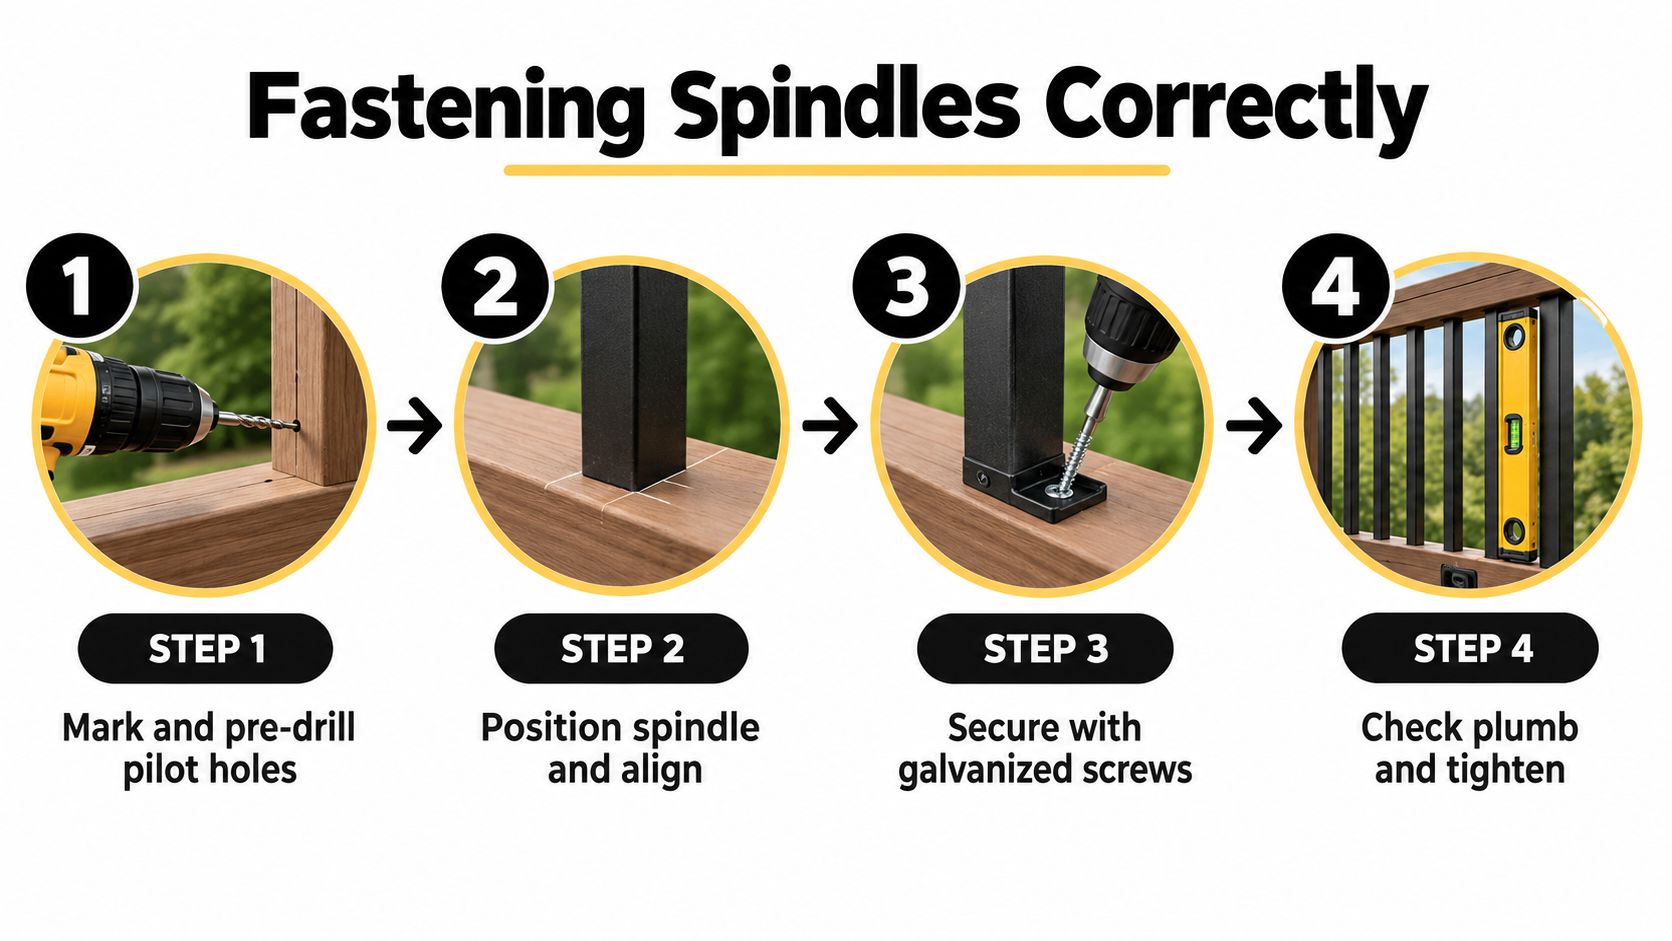
Use exterior-grade screws suited to the spindle and rail material. Fasteners intended for interior work can corrode outdoors, while over-driven screws can crush wood, strip a connector, or distort a metal fitting. Set the driver clutch conservatively and finish tightening only after the spindle has been checked.
Let the whole assembly govern the pattern
Rail height, post position, and spindle spacing work together. Structural guidance commonly places deck guard height at 36 inches, with 42 inches used for commercial and higher-risk applications, while OSHA-oriented guidance commonly limits guardrail posts to 8 feet on center, as summarized in this commercial guardrail engineering guidance. Other installation guidance recommends keeping post spacing around 6 feet on center and never exceeding 8 feet, because long rails deflect more and are harder to keep uniform.
The practical fastening sequence is:
- Pre-drill marked pilot holes where the material and system require them.
- Seat the spindle in the lower rail or connector.
- Align it vertically with a spirit level.
- Drive the first exterior-grade screw without fully crushing the material.
- Recheck plumb and the adjacent opening.
- Secure the upper connection.
- Recheck the rail before moving to the next spindle.
The deck baluster installation sequence follows the same principle: measure the clear span, match the rails, center the layout, dry-lay the components, then fasten and recheck plumb before locking the top rail.
Don't use the spindle fasteners to correct a rail that is bowed or a post that is out of position. Fix the supporting geometry first, then fasten the infill.
Avoiding Cumulative Spacing Errors
The usual failure starts innocently. A builder marks the first spindle correctly, then places each following mark from the previous one without checking the actual gap. A tiny error at every interval eventually leaves a final opening that is visibly wider than the others or too large for the required sphere test.
That last gap is diagnostic. If all the earlier spaces look consistent but the end space doesn't, don't just crowd the final spindle against the post. Remove the layout marks and return to the measured span. Center the pattern again, dry-lay the complete run, and distribute the adjustment across the section.
Measure intervals, not assumptions
A spacer block is useful, but it shouldn't replace visual and physical checks. Place it between each pair of spindles, then check the space at both ends of the run. For decorative profiles, slide the block or test piece along the height of the railing and look for the point where the spindle is widest.
The last opening tells you whether you controlled the layout or merely repeated it.
Use a pencil line on both rails for every spindle location. After two or three placements, pause and compare the upper and lower marks. If one rail is drifting, correct it immediately while the holes are still accessible.
An awkward remaining gap doesn't justify an improvised narrow or wide space. Recalculate the arrangement from the center, or adjust the number of spindles while maintaining the required clear opening. The right pattern looks deliberate at both posts and passes the same inspection standard throughout.
Spindles Versus Modern Railing Systems
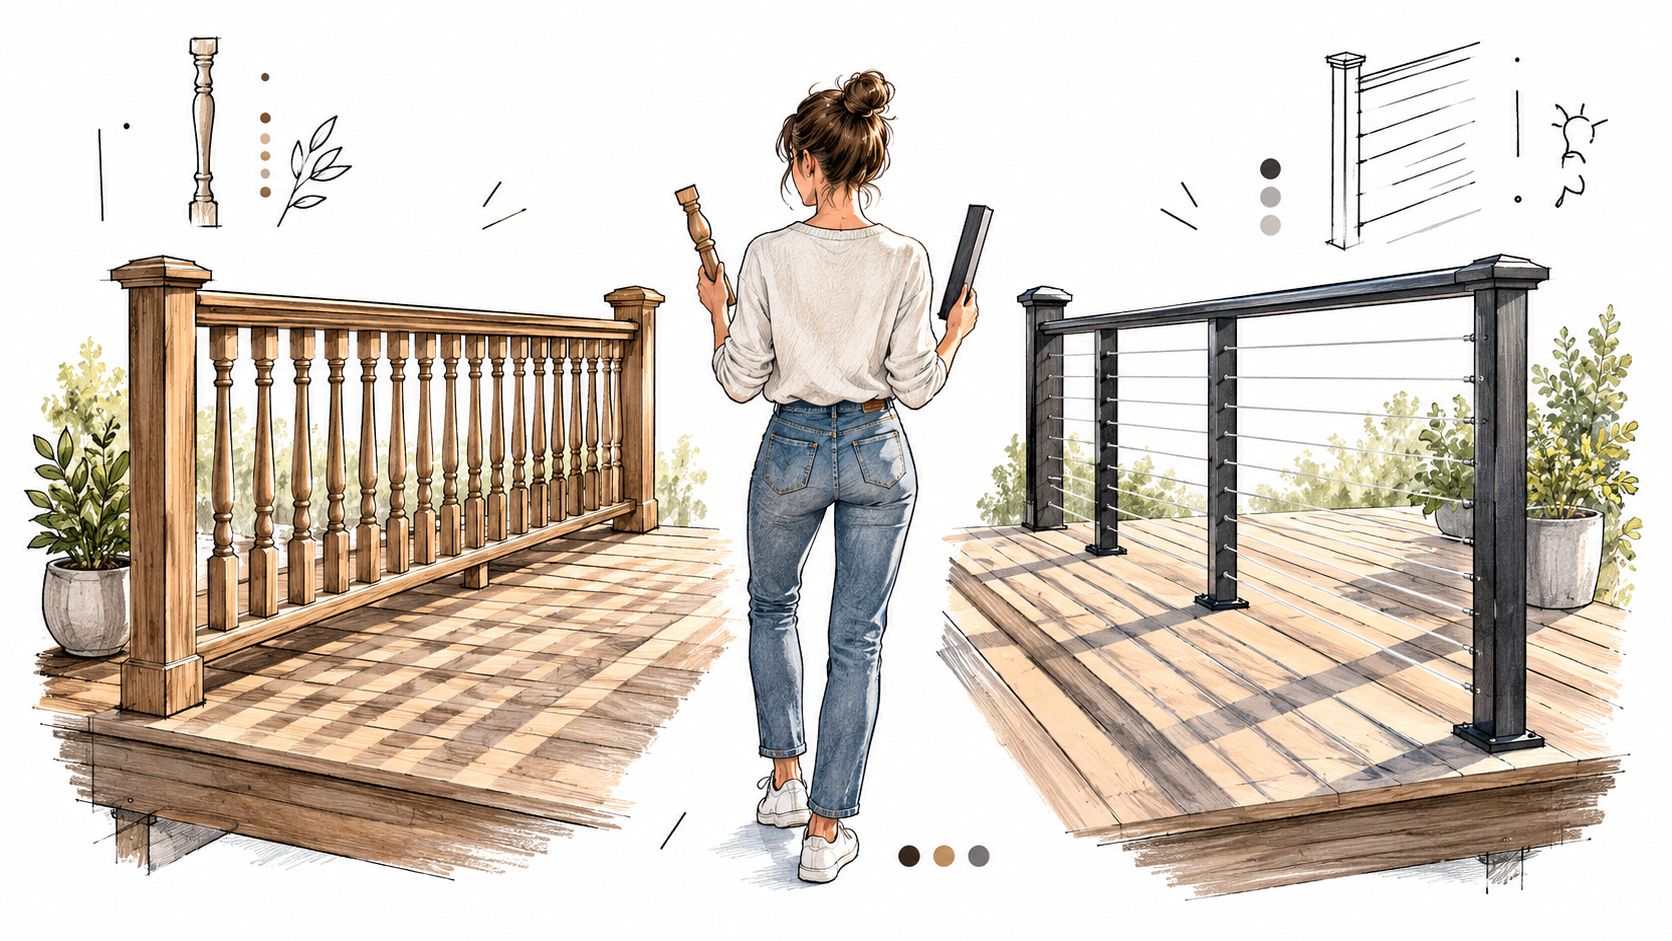
Traditional spindles suit homeowners who want a familiar rhythm, substantial visual infill, or a material that matches the deck structure. Wood can be painted or stained, metal can provide a slimmer profile, and composite or vinyl components can simplify color matching. The trade-off is that every spindle, end gap, bottom opening, and fastener becomes part of the installation and maintenance routine.
Cable and glass systems pursue a different result. They preserve more of the view and can make a compact outdoor area feel less visually divided, but they introduce their own requirements for posts, fittings, tension or panel support, and careful alignment. A modern system isn't a way around code. The openings still need to meet the applicable safety requirements, and the supporting structure still has to carry the railing loads.
Choose based on the site
| Priority | Spindles | Cable or glass |
|---|---|---|
| Visual character | Strong vertical pattern and traditional detail | Open sightlines and a lighter visual boundary |
| Installation | Repetitive cutting, spacing, drilling, and fastening | More system-specific fitting and alignment |
| Maintenance | Individual parts may need coating, cleaning, or replacement | Stainless hardware, cable tension, or panel care still require inspection |
| Layout risk | Cumulative spacing errors and hidden end gaps | Opening, fitting, and structural details must be verified as a complete system |
The 4-inch requirement can apply to more than the obvious spindle-to-spindle gap, including openings at posts and below the bottom rail, as noted in this guide to checking baluster openings. That broader view matters when comparing systems. A cable layout may look open, but its cable spacing and terminal details still need a code review.
For a view-oriented deck or a contemporary renovation, compare the labor and visual result before buying spindles. Ultra Modern Rails supplies custom stainless steel cable railing systems for indoor and outdoor applications, with options for straight and stair configurations.
Final Inspection and Code Verification
The job isn't finished when the last screw is tight. Walk the entire railing as an inspector would, checking the complete guard assembly rather than focusing only on the attractive front face. A clean finish can't compensate for a loose post, an unseated spindle, or a gap that fails the sphere test.
Use a physical verification routine
Run this checklist before the deck goes into service:
- Test every clear opening: Check between spindles, at both posts, below the bottom rail, and around transitions with the applicable test sphere or an approved equivalent.
- Inspect the widest point: Move the test across decorative balusters and connectors, not just through the narrowest visible section.
- Check plumb and level: Confirm the spindles remain vertical and the top rail follows the intended line.
- Check every fastener: Look for missing, loose, stripped, over-driven, or corroded screws.
- Load the assembly carefully: Apply firm hand pressure to identify movement, but remember that a basic movement check doesn't replace required structural verification.
- Inspect the support: Confirm posts, brackets, foot blocks, rail ends, and deck connections are fully seated and secured.
- Review stairs separately: Measure along the stair run and verify the applicable stair opening requirements instead of copying the level-deck layout.
If a gap fails, don't hide it with trim or force a spindle sideways. Remove the affected section, correct the layout or component fit, and repeat the inspection. If the rails move, address the posts and structural connections before adjusting the infill.
A good final railing has more than even-looking lines. Every opening passes, every spindle is seated, every fastener is secure, and the assembly feels solid without relying on a cosmetic fix.
If you're comparing spindles with a lower-maintenance open-view system, Ultra Modern Rails can help you specify a custom cable railing layout for a deck, stair, balcony, or commercial space. Visit Ultra Modern Rails to request a custom quote and drawing for your project.