

You're standing on a new deck, looking across a clean view that took months to plan. The posts are set, the handrail is installed, and now you need cable that stays straight instead of turning the railing into a row of sagging lines. The choice often comes down to 1 x 19 stainless steel cable, but the right result depends on more than choosing a cable labeled “marine grade.”
The construction is stiff, stable, and well suited to straight architectural runs. That same stiffness can make tight corners, retrofit work, and poor terminations difficult. Stainless grade matters too. AISI 316 may be the sensible choice near salt air, while AISI 304 can suit less aggressive environments when the hardware and maintenance plan match the exposure.
Table of Contents
- Why 1 x 19 Stainless Steel Cable Dominates Railing
- Understanding the Construction and Breaking Strength
- Comparing 1 x 19 to 7 x 7 and 7 x 19 Constructions
- The Reality of 304 vs 316 Marine Grade Stainless
- Installation Tradeoffs and Termination Best Practices
- Long-Term Maintenance and Inspection Routines
- Planning Your Cable Railing Project
Why 1 x 19 Stainless Steel Cable Dominates Railing
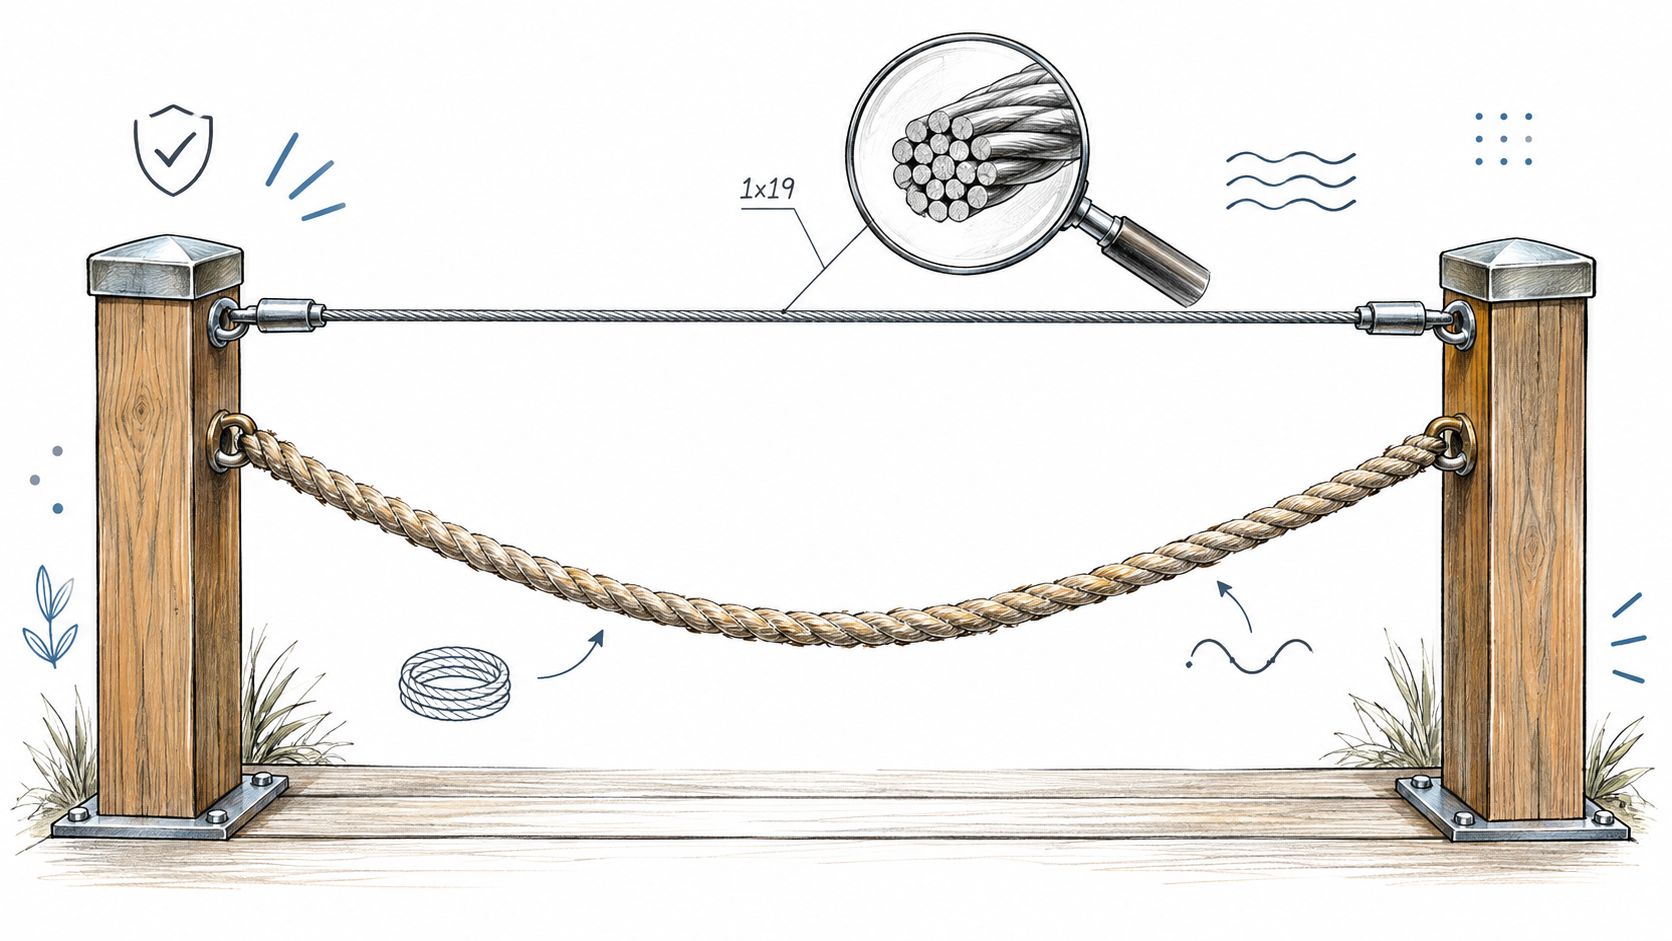
A railing cable has one job that flexible lifting or control ropes often don't: it must hold a clean visual line between fixed posts. A homeowner may first compare cable by diameter or price, but the construction determines how that line behaves after installation. If the cable stretches easily, each long run can develop visible slack. If it resists rotation and holds its shape, the railing looks deliberate rather than improvised.
1 x 19 stainless steel cable consists of one strand containing 19 individual wires. The geometry produces a stiff, low-stretch strand that's commonly specified for marine rigging, lifelines, architectural cable systems, and balustrades. Technical product information describes 1 x 19 as having one of the lowest elongation characteristics among common stainless constructions, which explains its popularity for static, straight-line tension applications (technical information on 1 x 19 stainless cable).
Why straightness matters
On a deck, the cable runs horizontally between posts. On stairs, it follows an angled line through several terminals. In both cases, excessive elongation creates a maintenance problem as well as a visual one. A flexible construction can be easier to route, but it may not preserve the crisp alignment architects and homeowners expect from a modern cable railing.
The construction also resists rotation. That helps the strand maintain a consistent appearance as installers tension it, although it doesn't remove the need for correctly aligned fittings. Cable, terminals, posts, and tensioners still have to work as one system.
Practical rule: Choose 1 x 19 because your railing needs a stable, straight tension line, not simply because the cable appears stronger.
The tradeoff behind the clean look
The industry preference has a limit. The stiffness that helps a long railing run stay visually straight also reduces bendability around tight fittings. A project with frequent direction changes, small radii, or awkward existing posts may be easier to complete with a more flexible construction. The best material choice is therefore tied to the layout, not just the desired finish.
Understanding the Construction and Breaking Strength
The name 1 x 19 describes the cable's anatomy. The first number indicates one strand, while the second indicates 19 wires within that strand. Those wires form a compact, rigid profile rather than a rope made from several flexible strands. That distinction is why the cable behaves differently from 7 x 7 or 7 x 19 constructions, even when the outside diameter looks similar.
Stainless 1 x 19 products are commonly listed in AISI 304 and AISI 316, with published diameter ranges from 0.15 mm to 5.00 mm and minimum breaking force values from 25 N to 20,300 N in one industry reference (stainless steel wire rope specifications). These figures describe a broad product family, not a universal rating for every cable. Diameter, alloy, manufacturing tolerance, and the complete termination system all affect the final design.
Diameter changes the load picture
A useful product comparison shows how sharply minimum breaking strength rises as diameter increases:
| Cable diameter | Minimum breaking strength |
|---|---|
| 1/16 inch | 427 lbs |
| 3/32 inch | 819 lbs |
| 1/8 inch | 1,869 lbs |
These values come from practical product data for the listed sizes, and they demonstrate why a small increase in diameter can materially change the cable's breaking strength (1 x 19 stainless cable product data). They aren't a substitute for local railing codes, engineering calculations, or the manufacturer's allowable working load.
A breaking-strength number also isn't the same as a permitted service load. The cable may be capable of resisting a substantial force, but the railing must be assessed as a system. Posts, end fittings, swages, anchors, intermediate supports, and the structure carrying the posts all matter.
Read the specification as a system
Before ordering, check four details:
- Construction: Confirm that the product is 1 x 19, rather than a flexible alternative with a similar appearance.
- Diameter: Match the diameter to the engineered design and applicable code requirements.
- Material: Verify whether the cable is AISI 304 or AISI 316, rather than relying on a generic “stainless” label.
- Termination compatibility: Make sure the ferrules, studs, tensioners, and tools are rated and sized for that cable.
For a practical overview of how stainless wire rope is used in railing systems, compare the stainless steel wire rope guide. The important point is simple: construction controls behavior, diameter influences capacity, and the termination determines how much of that capacity reaches the finished assembly.
Comparing 1 x 19 to 7 x 7 and 7 x 19 Constructions
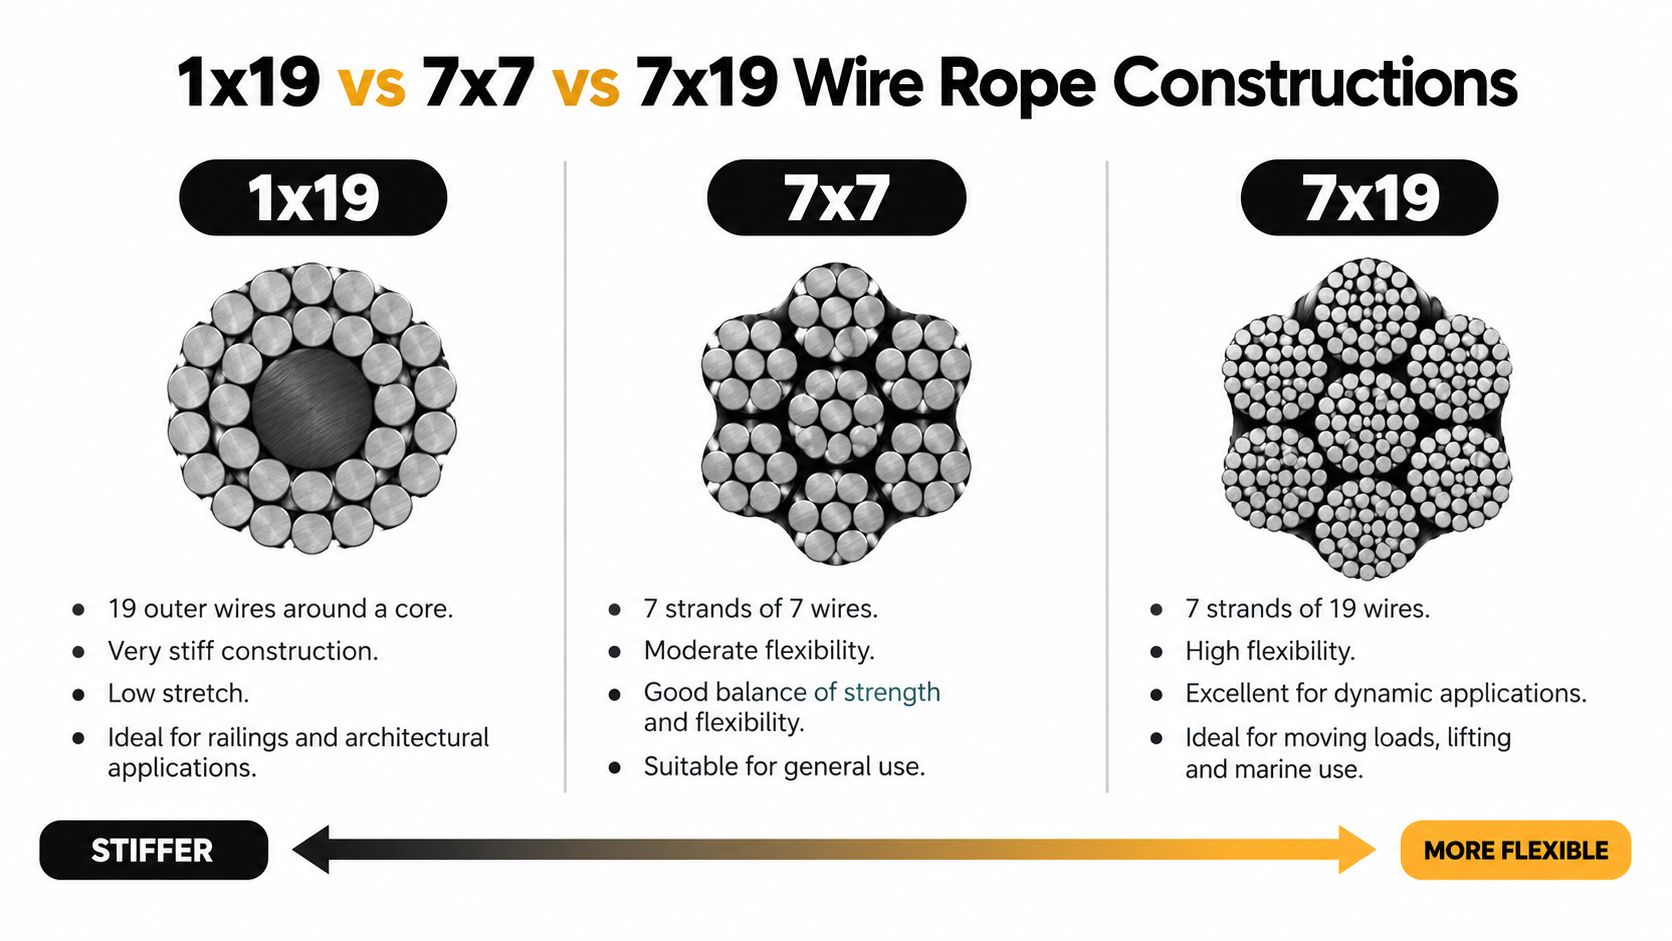
A cable can be strong and still be wrong for the job. The clearest difference between these constructions is how readily they bend and how well they hold a straight, tensioned line.
1 x 19 is the rigid option. It suits static railing runs, standing rigging, stays, and architectural tension systems where dimensional stability matters. 7 x 7 offers more flexibility for general-purpose routing. 7 x 19 is more flexible again, making it useful where the cable travels around sheaves, pulleys, winches, or moving equipment.
Match the construction to the movement
A railing is usually a static application. Once tensioned, the cable should remain visually stable between posts. That makes 1 x 19 a natural fit for straight horizontal runs and stair sections. The cable's resistance to stretch helps reduce the tendency toward a wavy finish, particularly where long sightlines make sag obvious.
A pulley system has the opposite requirement. It needs a rope that can repeatedly bend without fighting the sheave. In that situation, 7 x 19's flexibility is useful, while 1 x 19's stiffness becomes an obstruction. The same mismatch occurs when a railing retrofit forces the cable through tight, irregular routes.
The most rigid cable isn't automatically the best cable. It's the best choice when the route is predominantly straight and the line must stay dimensionally stable.
A field comparison
| Construction | Practical behavior | Typical fit |
|---|---|---|
| 1 x 19 | Stiff, low stretch, rotation resistant | Railings, lifelines, standing rigging |
| 7 x 7 | More flexible, general-purpose handling | Routes requiring moderate bendability |
| 7 x 19 | Highly flexible | Pulleys, winches, dynamic routing |
The comparison reflects the construction tradeoff described in stainless cable railing guidance. A flexible cable may pass through a difficult path more easily, but that convenience can leave a railing with more movement or a less controlled appearance. A stiff cable can produce the cleaner line, but it demands better planning and more careful termination.
This is why installers shouldn't select cable from a photograph alone. Measure the route, identify every change in direction, inspect the available terminal space, and decide whether the system needs rigidity or bendability. For standard architectural balustrades, 1 x 19 usually aligns with the visual objective. For complex rigging, it may not.
The video below provides a visual look at cable construction and installation considerations.
The Reality of 304 vs 316 Marine Grade Stainless
“Marine grade” isn't a complete specification. It usually signals a stainless alloy intended for demanding exposure, but the environment still determines whether the selected grade is appropriate. Product listings continue to show 1 x 19 cable in both AISI 304 and AISI 316, so the buyer needs to understand the difference rather than accept the label without context (304 and 316 stainless cable options).
AISI 316 is generally the more suitable choice for salt air, coastal decks, waterfront properties, and other chloride-heavy environments. Its corrosion resistance makes it a sensible starting point where airborne salt and moisture are persistent. That doesn't make it immune to staining or corrosion. Surface contamination, crevices, poor drainage, harsh cleaning chemicals, and contact with dissimilar metals can still create problems.
When 304 may be reasonable
AISI 304 can be appropriate for dry inland settings or sheltered applications where chloride exposure is limited. It may also make sense when the rest of the system uses compatible 304 hardware and the owner accepts a maintenance routine suited to that environment. Choosing a higher grade than the exposure requires can add cost without solving a problem the site doesn't create.
The reverse decision is more serious. Using 304 on a coastal railing because the cable is cheaper may increase the risk of tea staining and ongoing appearance issues. The cable isn't the only component to assess. Terminals, fasteners, posts, washers, and brackets should be reviewed together so the assembly doesn't introduce galvanic or crevice-corrosion concerns.
Specify the environment, not the slogan
Before approving a material schedule, identify:
- Exposure: Is the railing inland, near the coast, beside a pool, or directly exposed to salt spray?
- Drainage: Can water sit inside fittings, at post penetrations, or around concealed terminals?
- Compatibility: Are the cable and hardware made from compatible stainless grades and finishes?
- Maintenance access: Can the owner clean and inspect the system without dismantling it?
The right answer isn't always “choose 316.” The practical answer is to match the alloy, hardware, finish, drainage, and cleaning routine to the site. That approach prevents both under-specification in harsh conditions and unnecessary upgrades in mild ones.
Installation Tradeoffs and Termination Best Practices
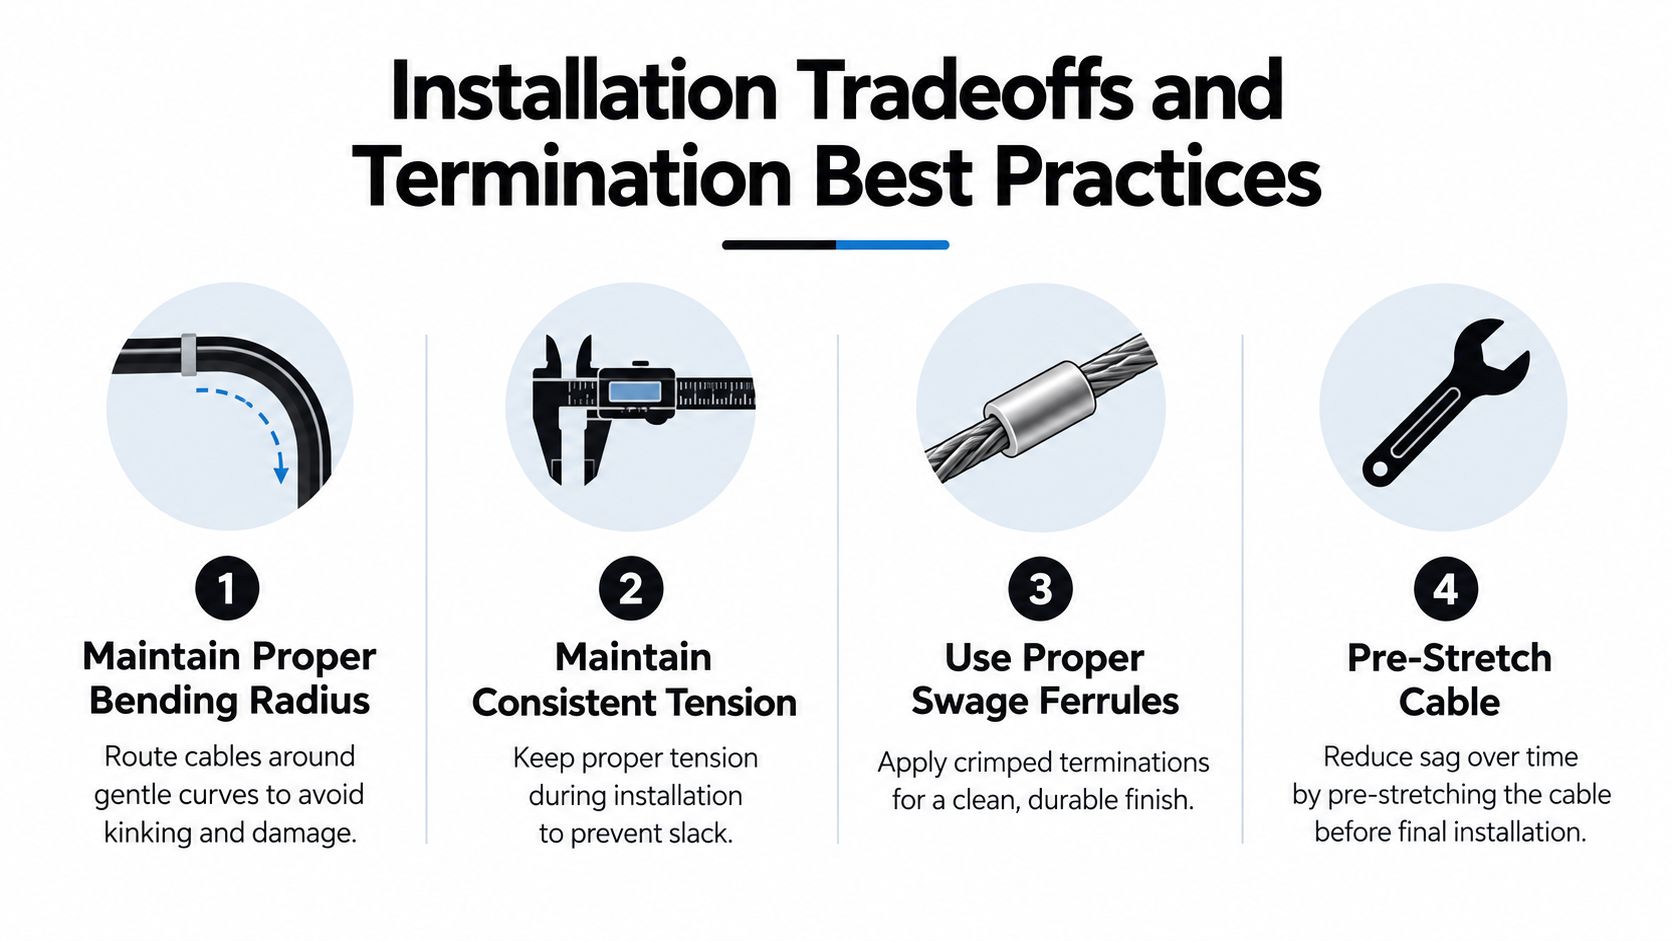
A 1 x 19 cable doesn't forgive improvised routing. Its low flexibility helps it hold a straight line, but installers must plan the path before pulling cable through the posts. Sharp deflections, tight bends, and misaligned fittings can damage individual wires or make the terminal impossible to seat cleanly.
Route the cable before tensioning
Lay out the post line and inspect every entry and exit point. The cable should approach each fitting naturally, without being forced sideways into a terminal. If a stair or corner creates a tight radius, redesign the hardware arrangement or reconsider the construction before cutting cable.
The stiffness tradeoff is documented in technical guidance on stainless steel rope constructions. The source specifically identifies bending, termination, and retrofit work as more difficult with 1 x 19 than with 7 x 7 or 7 x 19.
Terminate with the correct equipment
Use fittings designed for the cable diameter and construction. Swaged terminals need the correct die and a properly calibrated hydraulic or manufacturer-approved tool. A casual crimp with the wrong tool can deform the fitting unevenly, damage the cable, or produce a termination that looks finished but doesn't perform as intended.
For systems that use mechanical fittings instead of a permanent swage, review the swageless wire rope fitting guide. The installation method changes, but the need for correct alignment and full engagement remains.
Tension progressively
Don't pull one cable to its final tension while leaving the rest loose. Install the runs, check alignment, and tension progressively across the system so the posts and fittings aren't loaded unevenly. Use a suitable tensioning tool rather than relying on hand feel, especially when multiple lines share the same posts.
A clean termination starts with a clean route. If the cable is fighting the fitting, stop and correct the geometry instead of forcing the swage.
Pre-stretching may help reduce later adjustment in some systems, but it doesn't correct poor post spacing, weak anchors, or an incorrectly selected cable. The finished railing still needs inspection for wire damage, secure fittings, even tension, and sound attachment to the structure.
Long-Term Maintenance and Inspection Routines
Stainless steel reduces maintenance, but it doesn't eliminate it. Cable railings collect airborne dirt, salt residue, pollen, and cleaning-product deposits, especially around terminals where moisture can remain trapped. A suitable material choice reduces the burden, while regular cleaning prevents contaminants from sitting on the surface.
Start with a visual inspection of the full run. Look for broken outer wires, flattened sections, unusual kinks, loose ferrules, thread movement, and corrosion staining. On 1 x 19, small wire damage matters because the construction is made from a compact set of wires rather than a loose, flexible braid that can tolerate repeated movement in the same way.
Keep the surface clean
Wash the cable and fittings with clean water and a mild, non-abrasive cleaner. Remove salt and grime from crevices, then dry the assembly where practical. Avoid tools or chemicals that can scratch the finish or leave iron contamination on stainless surfaces.
Tea staining doesn't automatically mean the entire cable has failed, but it signals that the environment, cleaning routine, finish, or material selection deserves attention. Near salt air, a 316 system may still require more frequent cleaning than the same system in a dry inland location.
Check tension and fittings
Tension changes can result from structural movement, hardware settling, temperature variation, or installation errors. During an inspection, compare adjacent runs for visible slack and check whether terminals remain fully seated. Don't compensate for a loose line by tightening aggressively, because excessive tension can transfer unwanted forces into posts, anchors, or the supporting deck.
The best maintenance plan begins during specification. Select the stainless grade for the actual exposure, provide drainage around fittings, avoid incompatible metal contact, and make every terminal accessible for inspection. A railing designed for cleaning and adjustment is easier to keep in service than one with concealed, unreachable connections.
Planning Your Cable Railing Project
Begin with the structure, not the cable order. Mark each railing section, stair run, corner, end post, and transition. Measure the actual cable paths after accounting for the terminal depth and any post-mounted hardware. A drawing with section lengths and fitting locations is more useful than one overall deck dimension.
Build the material schedule
For each run, record:
- Section geometry: Note straight runs, stair angles, corners, and changes in direction.
- Cable quantity: Allow enough length for the selected termination method and adjustment range.
- Hardware: Match end fittings, tensioners, washers, ferrules, and posts to the cable diameter and stainless grade.
- Tools: Confirm whether the system requires a cable cutter, swaging tool, tension gauge, or specialized release equipment.
- Environment: Select 304 or 316 based on exposure, then keep the hardware specification consistent.
Round each measured cable requirement up rather than ordering to the exact field measurement. A small allowance helps accommodate cutting, routing, and termination, while cable ordered too short can force an unnecessary joint or replacement. The amount of allowance depends on the fitting system, so follow its installation instructions rather than applying a universal rule.
Choose a coordinated system
Factory-direct kits can reduce guesswork when the posts, cable, fittings, and drawings are designed to work together. Ultra Modern Rails offers custom cable railing systems with stainless cable and hardware, custom sections, handrail options, mounting styles, and drawing support for residential and commercial applications. Treat that option like any other supplier: provide accurate dimensions, confirm the stainless grade, review the hardware schedule, and verify local code requirements before ordering.
A final review should answer three questions. Will the selected construction stay stable on the route? Does the alloy match the environment? Can the installer terminate, tension, clean, and inspect the system without fighting the design? If the answer to all three is yes, 1 x 19 stainless steel cable can deliver the straight, restrained appearance that makes cable railing work.
If you're planning a deck, stair, balcony, or commercial railing, Ultra Modern Rails can prepare a custom system with coordinated stainless cable, hardware, sections, and drawing support. Send your measurements and site details for a practical review of the cable construction, 304 versus 316 specification, and termination approach before you place the order.