

You're standing at the top of a newly renovated staircase. The black rail looks right against the fresh paint, but when you reach for it, your hand can't close around the profile comfortably. It's a small detail with a big consequence: a railing can look finished and still fail to provide useful support.
A wall mounted railing isn't just a style choice. Its purpose, wall attachment, clearances, and local code requirements all affect whether it works safely. Start by identifying whether you need a handrail, a guardrail, or both. Then choose a mounting method and finish that suit the wall and the space.
Table of Contents
- Why Wall Mounted Railing Is a Decision, Not a Decoration
- What a Wall Mounted Railing Actually Does
- Wall Mounted vs Post Mounted Systems
- The Main Wall Mounting Methods Explained
- Substrate, Brackets, and Why the Wall Matters Most
- Code and Accessibility Requirements That Shape Every Choice
- Design Directions, Materials, and Finishes That Match Real Spaces
- How to Specify and Order the Right System
Why Wall Mounted Railing Is a Decision, Not a Decoration
A homeowner can choose a rail from a catalog based on its color and shape. But before ordering, they also need to know what the rail is meant to do and what's behind the wall. A sleek handrail that's difficult to grip, mounted to a weak surface, or positioned without enough clearance won't serve its purpose just because it looks polished.
Think of the rail as part of the route through the home. On stairs, a person may use it to steady themselves while climbing, descending, or recovering balance. On a ramp, a continuous graspable rail can give a user a reliable point of support along the slope. At an open edge, a barrier has a different job: preventing someone from falling.
Those jobs shape the details. A graspable rail needs a comfortable profile and a layout that follows the route. Its brackets must transfer force into a suitable wall structure, not just the decorative finish. The surface finish comes later, once the support function and attachment have been resolved.
Start with the job, not the finish: Decide whether the rail is for grasping, fall protection, or both before selecting its profile or mounting hardware.
That order makes the choices easier. First, name the safety function. Next, check the applicable code and the wall structure. Then settle on a mounting style and appearance that work within those constraints. A modern design can still be a strong design, but the structure must support the look.
What a Wall Mounted Railing Actually Does
People often use “railing” and “handrail” as if they mean the same thing. They don't. A handrail is a graspable support along a stair or ramp. A guardrail is a barrier at a raised edge, designed to help prevent falls. One is held; the other stands between a person and a drop.
A useful analogy is a walking stick beside a fence. The handrail is like the walking stick: someone reaches for it to steady their movement. The guardrail is like the fence: it marks and protects an exposed edge. A single assembly can sometimes perform both roles, but each function still needs to meet its own requirements.
The distinction matters because a substantial-looking guard isn't automatically a suitable handrail. A cable panel may help protect an open stair edge, but it may not provide a continuous, graspable surface for someone using the stairs. Conversely, a slim wall rail can offer a handhold without protecting a person from an adjacent drop.
For accessible stairs, the U.S. Access Board describes requirements for handrails on both sides, continuous along the stair flight, with extensions that return to a wall, guard, or floor. See the Access Board's guide to stairways for the distinction in accessible design.
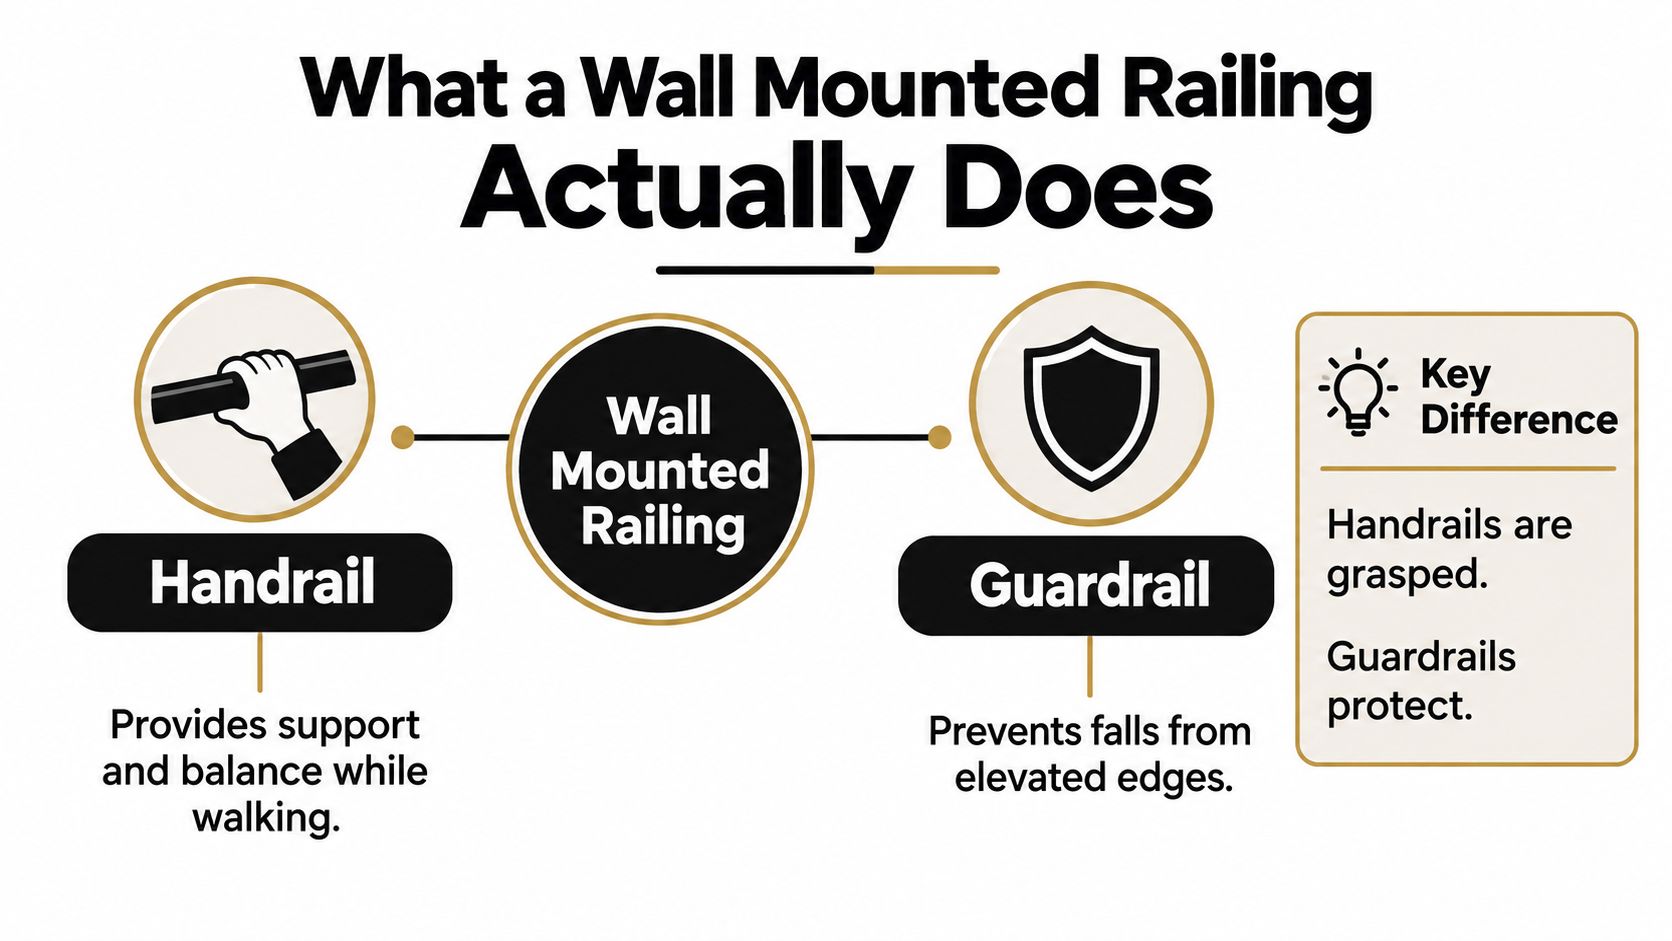
When you look at a stair, identify each part by its job. The wall rail someone grips is the handrail. The barrier along an open side is the guard. If the route has both a wall and an exposed edge, the project may need both elements, even if they share a coordinated design.
Wall Mounted vs Post Mounted Systems
A wall-mounted system and a post-mounted system can both suit a stair or deck, but they transfer loads into different parts of the building. A wall-mounted rail relies on the wall structure and its bracket connections. A post-mounted system typically attaches to the stair, deck, or landing structure through posts and their fixings.
That difference affects the look and the installation plan. A wall rail can keep a narrow stairway less crowded because it doesn't need posts along the wall side. A post-mounted guard can define an open perimeter where there's no wall to attach to, such as a deck edge or the open side of a stair.
| Decision Factor | Wall Mounted | Post Mounted |
|---|---|---|
| Sightlines | Keeps the wall side visually open and can reduce hardware in a narrow passage. | Posts and infill create a more visible boundary, but can suit an open edge. |
| Structural path | Brackets must connect to suitable wall framing, blocking, or masonry. | Posts must transfer forces into the stair, deck, or landing structure. |
| Typical role | Graspable support along stairs, ramps, or circulation routes. | Often used for a guard where a deck or stair has an exposed edge. |
| Good fit | Interior stairs with an adjacent wall, narrow landings, and accessible routes. | Deck perimeters, balconies, and open stair sides that need fall protection. |
Neither mounting style is automatically better. A wall-mounted handrail doesn't replace a guard where an open edge requires fall protection. A post-mounted guard doesn't necessarily provide a separate, usable grasping surface.
For an open stair, examine both sides: Is there a wall suitable for brackets? Is the other side exposed? What support does the stair framing provide? Those answers determine whether the design needs a wall-mounted handrail, a post-mounted guard, or coordinated elements doing both jobs.
The Main Wall Mounting Methods Explained
A wall-mounted railing meets the building in a few common ways. The mounting choice affects the appearance, the hardware projection, and the load path. In each case, the bracket and fastener have to connect the rail to a structurally suitable surface.

Fascia mounting attaches the system to the side face of a deck, stair, or landing structure. It can keep the top surface clear of post bases and suit a view-conscious deck edge. Ultra Modern Rails' side-mounted cable railing example shows this approach in a deck application. The exact attachment still depends on the structure behind the fascia.
Surface mounting fixes brackets to the face of a wall. It's a straightforward choice when there's sound framing or masonry at the intended locations. The visible brackets need enough projection to leave usable hand clearance, without becoming an obstruction.
Recessed mounting places parts of the rail or its supports into a wall detail. It can create a cleaner profile, but it needs coordination during construction because the recess and backing must be planned before finishes close the wall.
Standoff mounting holds the rail away from the wall on projecting brackets. This can help clear trim or other irregular surfaces, but the added projection needs careful review so the rail remains usable and doesn't snag people or objects.
The ADA design standards set a minimum 1.5 inches (38 mm) of clear space between a handrail and the wall. The U.S. benchmark also places the gripping surface 34–38 inches (865–965 mm) above the walking, stair, or ramp surface. See the ADA design standards when checking those dimensions.
The rail itself isn't the entire structure. OSHA requires handrails and stair-rail top rails to resist at least 200 lb (890 N) applied near the top edge in a downward or outward direction. Brackets, fasteners, and the wall must work together to carry that force.
A mounting diagram helps make the attachment plan clear. This overview of railing mounting types can help you identify which configuration fits the site.
Substrate, Brackets, and Why the Wall Matters Most
A strong-looking bracket can still be a weak installation if the fasteners don't reach a sound load-bearing surface. Before selecting hardware, find out what the bracket will attach to. Ask: What's behind the finish, and how will force travel from the rail into the building?
For a wood-framed wall, locate the studs or confirm that structural blocking has been installed where brackets are needed. A bracket fastened only to drywall doesn't have the same support as one connected to framing. If the rail follows a stair angle and a preferred bracket position misses the framing, the installer may need to adjust the layout or provide suitable blocking.
Masonry and concrete need anchors specified for the material and the expected load. Anchor selection and placement matter: drilling too close to an edge or choosing a fastener without regard to the substrate can undermine the connection. Follow the anchor manufacturer's requirements and have the attachment reviewed when the conditions are uncertain.
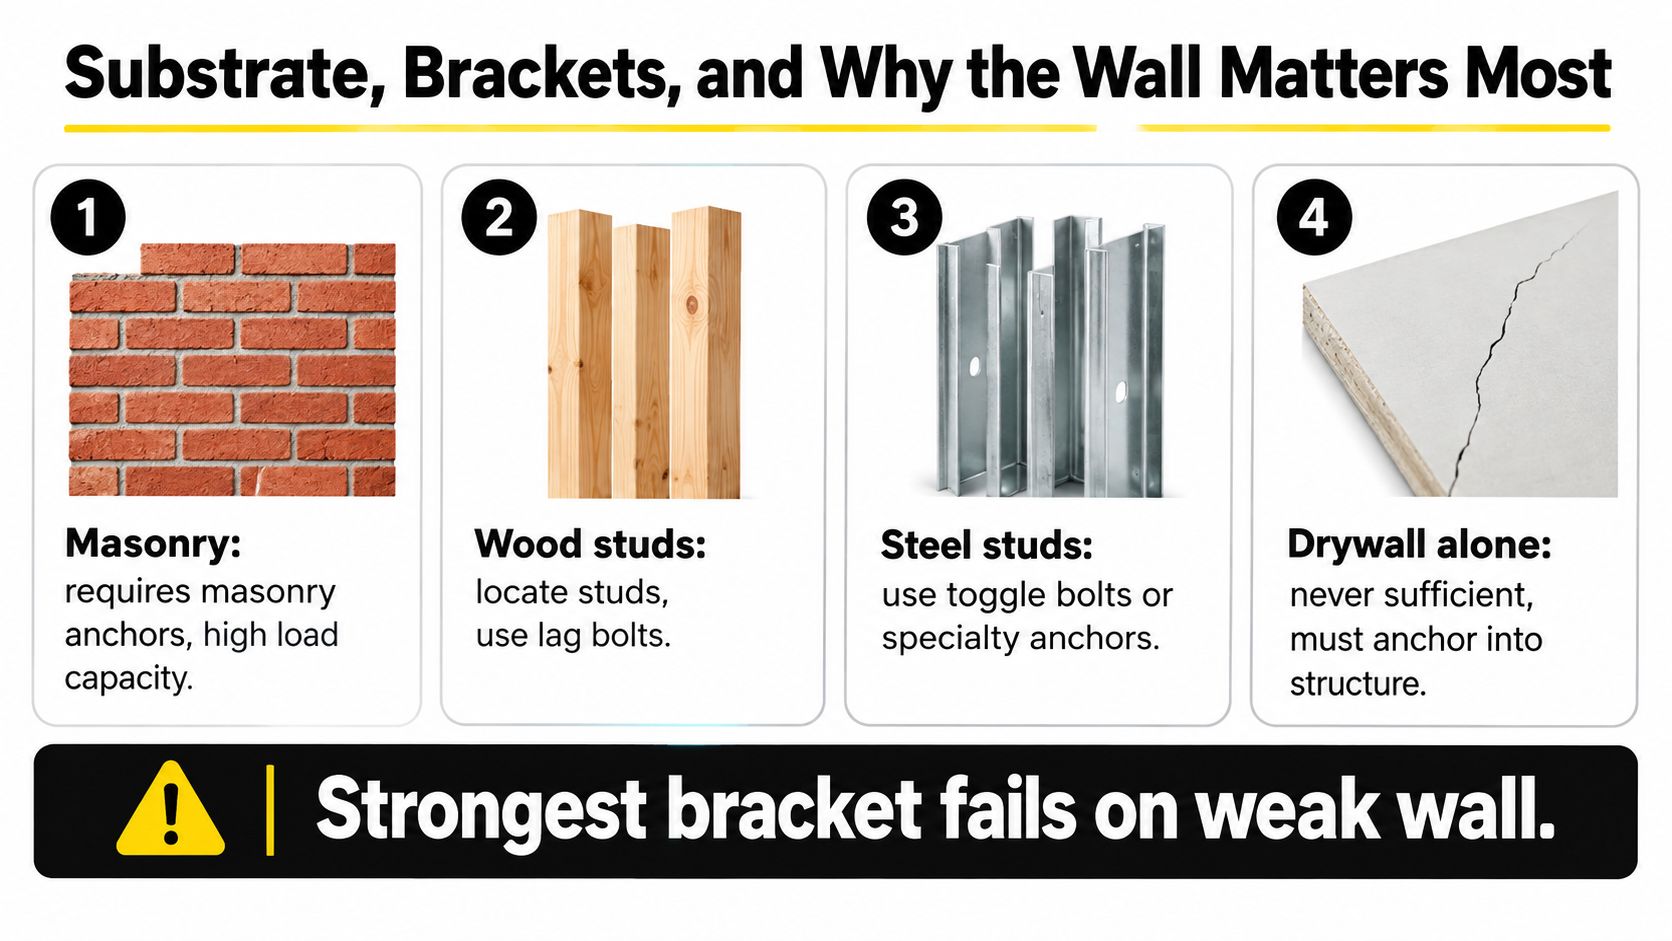
Tile, plaster, wainscoting, and thick trim create another challenge. Those finishes can increase the distance between the bracket and the structure, so the installer must account for the full build-up rather than measuring from the framing alone. A bracket may need a suitable standoff or backing detail that preserves clearance and transfers force safely.
Before accepting a quote or starting installation, check that the plan identifies the wall type, fastener type, bracket locations, finish thickness, and any required blocking. Also ask how the installer will confirm the bracket spacing and the fastener's suitability for the substrate.
A rail is only as dependable as its connection to the wall.
For a closer look at bracket options, compare the details in this guide to wall railing brackets. The right bracket is the one that fits the rail, preserves usable clearance, and has a credible path into the supporting structure.
Code and Accessibility Requirements That Shape Every Choice
Code affects the rail's position and shape from the start. For a U.S. accessibility benchmark, the ADA design standards place a handrail's gripping surface 34–38 inches (865–965 mm) above the stair, ramp, or walking surface and call for at least 1.5 inches (38 mm) of clearance from the wall. Those dimensions help preserve a usable grip rather than leaving the rail too close to the surface behind it.
On ramps, the 2010 ADA Standards require a horizontal handrail extension of at least 12 inches (305 mm) beyond the top and bottom of the ramp run. Ends must return to a wall, guard, or landing surface, or continue to an adjacent handrail. A rail that ends abruptly may create a snag or impact hazard, so end conditions belong on the drawing, not just in the installer's imagination. Review the 2010 ADA Standards for the applicable accessibility provisions.
OSHA's construction requirements use a different height range for handrails, 30–37 inches (76–94 cm) above stair treads, and specify at least 3 inches (8 cm) of clearance from walls and other objects for nonpermanent construction handrails. OSHA also sets the load-resistance requirement described earlier. Requirements depend on the rail's role and the project; where accessibility criteria apply, the applicable accessibility provisions should be checked separately.
California accessibility rules also specify a 34–38-inch (864–965 mm) gripping-surface height and 1.5 inches (38 mm) of clearance. The state's workplace rules address continuous handrails and extensions on nonprivate stairs. These examples show why you shouldn't assume one measurement applies everywhere.
A guard and a handrail have different functions and may have different requirements. A rail can look substantial without offering a compliant grip, and a graspable handrail alone may not protect an open edge. For commercial, multifamily, hospitality, or public projects, have the design checked against the governing local rules. This stair-railing requirements guide can help frame the questions to take to a qualified designer or code professional.
Design Directions, Materials, and Finishes That Match Real Spaces
After the support function, attachment, and code requirements are settled, the finish can shape how the railing feels in the room. A material that looks right indoors may need a different maintenance plan outdoors, where moisture and weather exposure matter.
| Material or Finish | Typical Use | Maintenance Expectation |
|---|---|---|
| Stainless steel cable | View-conscious decks, balconies, and contemporary interiors. | Keep an eye on cable tension and clean surfaces as conditions require. |
| Black metal | Modern interiors and outdoor settings that benefit from a defined frame. | Inspect the finish and fasteners, especially where weather exposure is present. |
| Glass panels | Spaces where preserving sightlines is a priority. | Clean panels regularly and check the supporting hardware. |
| Wood handrail top | Stairs or decks where a warmer touch and visual contrast are desired. | Care for the wood finish according to its exposure and product requirements. |
A black metal frame can give a stair a crisp outline, while a wood top can soften that look and feel comfortable in the hand. Glass offers a different visual effect, but its supports and cleaning needs should be part of the design decision. Cable infill can keep a deck edge visually open, provided the system also meets the project's guard requirements.
Finish choices should follow the environment, not just a sample board. For an outdoor location, check that the materials and coatings suit exposure and maintenance expectations. Indoors, consider how the rail's profile feels in the hand and how its color relates to the wall, floor, and stair finishes.
How to Specify and Order the Right System
A useful quote request gives the supplier enough information to understand the site, the rail's job, and the wall connection. Before requesting pricing, prepare a simple project record:
- Measure each run. Note the length and direction of each stair, ramp, landing, or deck section. Mark where the rail starts, turns, and ends.
- Identify the function. Say whether each section is a handrail, a guard, or a combined assembly. Don't assume one element covers both jobs.
- Describe the substrate. Record whether the attachment is to wood framing, blocking, masonry, concrete, or another structure. Include tile, trim, and other finishes that affect projection.
- Set the design conditions. Note the required height, wall clearance, end returns, and any extension conditions that apply under local rules.
- Choose the mounting approach. State whether you're considering surface, fascia, recessed, or standoff mounting, and ask how the proposed bracket and fastener layout connects to the structure.
Provide photos and a sketch where possible. Include the location of open edges, adjacent walls, and changes in direction. If the project is commercial, public, or otherwise subject to accessibility or workplace requirements, have the layout reviewed by the appropriate professional before fabrication.
Ultra Modern Rails offers made-to-order railing systems in stainless steel and black metal finishes, with custom sections and handrail options. The company says customers can request a free custom quote and drawing within 24 hours. Treat that drawing as a coordination tool: compare it with your measurements, substrate details, and applicable code requirements before approving the order.
If you're planning a wall mounted railing, gather your measurements, site photos, and wall details, then request a project-specific quote and drawing from Ultra Modern Rails. A clear mounting plan helps you compare the proposed system with the conditions on site before you commit to fabrication.